Scrapbooking for Beginners: Turn Photos Into Keepsakes

Scrapbooking for Beginners: Turn Photos Into Keepsakes

DariaCurated by Daria
Jump to the 12 picks

That Shoebox of Photos Is About to Get Interesting

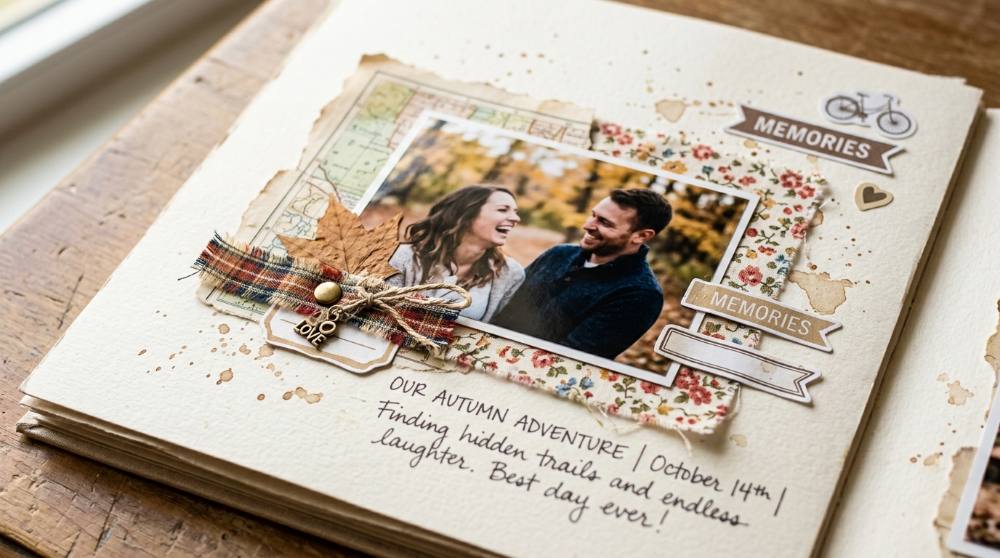
Mark Twain's best-selling product was not a novel. It was a scrapbook, patented in 1873: blank pages coated in dried glue you licked before pressing down your clippings, and it shifted more than 25,000 copies to become the most commercially successful thing he ever invented. That tells you how old this urge is. People have been pasting bits of their lives into books since the commonplace books of the 1400s, and for most of the 1800s a scrapbook was a working tool, somewhere to file recipes, newspaper cuttings and calling cards. It still happens at kitchen tables and on spare-room desks, and it still looks much the same: printed photos, patterned paper, a bit of handwriting, glue.

The thing nobody warns you about is that scrapbooking splits into camps before you have bought anything. Traditional cut-and-paste means building each page from scratch, with a background sheet, photos trimmed to size, adhesive, and whatever you want layered on top. Pocket-page, the Project Life style, means sliding 4x6 photos and matching cards straight into a divided plastic sleeve, and a page is finished in one sitting. Neither is more legitimate. But they want slightly different supplies, and picking your camp first stops you buying the wrong album.

Start with less than you think. An album, something sticky, paper and a trimmer will carry you through an entire first project. Everything else can wait until you know what you actually reach for.

Nothing below costs enough to sting if you decide after two pages that this is not your thing.

Whatever camp you land in, the first page is the hard one. You will fuss over spacing, glue something crooked, and stop caring somewhere around the third photo. Most people find the crooked one is their favourite later. Worth knowing before you start: the photos themselves are the bottleneck, not the craft, so if yours are all still sitting on a phone, a beginner smartphone photography setup is the thing to sort out first.

The Four Things Between You and a Finished Page

Pick your page size first, then buy everything else to fit it. Twelve-inch square is the standard, and it gives you room to layer without every element touching its neighbour. Letter size, 8.5 by 11, is the quiet budget move: binders, cardstock and page protectors in that size cost noticeably less than the 12x12 versions sold as craft supplies. If money is tight, start there. And do not skip the handwriting, because a page with a date and two scrawled sentences beats a gorgeous page that says nothing, which is the same instinct behind a beginner bullet journal setup.

Expandable Fabric Scrapbook AlbumExpandable Fabric Scrapbook Album

Pick 01 of 12

Expandable Fabric Scrapbook Album

A post-bound album holds 12x12 pages between screw posts, so you can add more sheets later instead of running out mid-project. This type comes with clear top-loading protectors and heavy paper inserts, which means a finished layout slides into a sleeve rather than being glued into a fixed book. Check whether page protectors are included before you buy, because adding them separately later costs more than you would expect.

Why we picked this exact one: We picked the MCS Expandable Fabric Scrapbook Album in 12x12 white because it arrives ready to use, with ten page protectors and paper inserts already inside. Its 4.7-star average is unusually high for something as unglamorous as a binder. The fabric cover and its little framed photo window will not suit every taste, but the post-bound spine lets you keep adding pages for years.

See it on Amazon
Double-Sided Patterned Cardstock SheetsDouble-Sided Patterned Cardstock Sheets

Pick 02 of 12

Double-Sided Patterned Cardstock Sheets

Patterned cardstock is the background layer every scrapbook page gets built on, heavy enough to take adhesive and photo weight without buckling. Double-sided sheets effectively double what you get, since each one gives you a bold face and a quieter one for layering underneath. For a first pad choose coordinated colours over a random assortment, because matching papers are what make a homemade page look deliberate.

Why we picked this exact one: We chose the Desecraft 48-sheet Watercolor Flora pad because its sixteen designs coordinate with each other, so almost any two sheets you pull will sit together. It holds a 4.8-star average, and the heavier textured stock takes a tape runner without wrinkling. The floral theme is a commitment though, so if your photos are all skateparks and city breaks, pick a different pad in the same size.

See it on Amazon
Permanent Refillable Tape DispenserPermanent Refillable Tape Dispenser

Pick 03 of 12

Permanent Refillable Tape Dispenser

A tape runner lays down a strip of dry double-sided adhesive as you roll it along an edge, which is how photos and paper get attached on most scrapbook pages. Dry adhesive does not soak into paper, so nothing warps or dries with a gloss the way liquid glue can. Look for a refillable body, because cartridges cost far less than replacing the whole dispenser and a runner is the supply you burn through fastest.

Why we picked this exact one: We picked the Scrapbook Adhesives by 3L E-Z Runner value pack because it ships as a dispenser plus two refill cartridges, which sets the habit of refilling instead of rebuying. It is rated 4.6 stars, and the narrow head gets into curves and tight corners where a wider runner smears. Permanent does mean permanent, so lifting something back off later takes a craft knife and patience.

See it on Amazon
Eco-Friendly Portable Paper CutterEco-Friendly Portable Paper Cutter

Pick 04 of 12

Eco-Friendly Portable Paper Cutter

A paper trimmer cuts a clean straight edge across a full 12-inch sheet in a single pass, which scissors cannot do reliably no matter how steady your hand is. Most have a gridded base and a guide line so you measure and cut in the same motion. Twelve inches of cut length is the number that matters, because anything shorter means repositioning the sheet halfway and leaving a visible step in the edge.

Why we picked this exact one: We chose the Fiskars Recycled SureCut portable trimmer in the 12-inch size because its guide line shows exactly where the blade will land before you commit to the cut. Fiskars is the name that comes up most often when experienced scrapbookers are asked what to buy first. The blade cartridges do dull with heavy use and need replacing, but at this price that is a fair trade.

See it on Amazon

With those four on the table you can finish a page tonight. Press the adhesive down firmly along every edge, because corners are what lift first and you will spot them curling weeks later when the album is already back on the shelf. Whatever goes down under a permanent runner is staying down, so shuffle the layout around loose before you commit to any of it. Everything after this point is decoration.

The Stuff That Makes a Page Look Like Yours

This is the aisle that empties wallets. Craft shops are arranged to convince you that forty embellishment packs are the baseline, and the honest truth is that a first album made from paper, photos and one roll of tape looks completely fine. What these four buy you is not necessity, it is speed: a sticker sheet saves an hour of cutting shapes by hand, a corner punch makes a photo look mounted rather than dropped. Buy one at a time, in whatever order matches the page you are stuck on. If drawing your own page elements appeals, a beginner's guide to sketchbooks is a cheaper place to experiment than expensive cardstock.

Floral Decorative Washi Tape SetFloral Decorative Washi Tape Set

Pick 05 of 12

Floral Decorative Washi Tape Set

Washi tape is a thin, semi-translucent paper tape with a low-tack adhesive, which makes it the one thing on a scrapbook page you can reposition after sticking it down. It tears by hand across the roll, so no scissors are needed for a reasonably straight edge. Assorted widths matter more than assorted patterns, since the narrow rolls work as borders and photo frames while the wide ones cover ground as background strips.

Why we picked this exact one: The Mr. Pen 21-roll floral set covers three widths, from a hairline 3mm up to roughly 15mm, which is the range that actually gets used. It averages 4.7 stars, and the pastel and vintage-floral patterns lean gentle rather than loud. A few designs skew seasonal, so expect to reach for maybe fifteen of the twenty-one rolls.

See it on Amazon
Vintage Scrapbook Sticker CollectionVintage Scrapbook Sticker Collection

Pick 06 of 12

Vintage Scrapbook Sticker Collection

Ephemera stickers are printed paper shapes, things like tickets, labels, frames and botanical cutouts, supplied pre-cut so you peel and place rather than trimming each one by hand. A booklet format keeps them flat and sorted instead of loose in a drawer. Look for sets sold as a book rather than a bag, because loose ephemera migrates and you end up buying the same thing twice.

Why we picked this exact one: The Fayware junk journal set gives you 410-odd pre-cut stickers plus twenty A5 patterned papers in one box, so it doubles as a second paper stash. It sits at 4.7 stars, and the muted browns and creams work against almost any photo. It is firmly one aesthetic though, and nothing in the box will suit a bright modern layout.

See it on Amazon
Precision Corner Cutter ToolPrecision Corner Cutter Tool

Pick 07 of 12

Precision Corner Cutter Tool

A corner rounder is a small hand punch that trims a square corner into a curve, usually in a choice of radii. Rounding all four corners of a photo is the fastest way to make it read as a mounted element rather than a rectangle that happened to land on the page. Three-radius versions earn their keep because a tight curve suits a small journaling card and a wide one suits a full 4x6 print.

Why we picked this exact one: The Sun-Star Kadomaru Pro handles three corner radii in one small body, so you are not buying three separate punches. It is rated 4.7 stars and the cut goes cleanly through cardstock rather than crushing the fibres, which is where cheap rounders fail. It tops out at about three sheets at a time, so it is not a production tool.

See it on Amazon
Precision Fineliner Pens SetPrecision Fineliner Pens Set

Pick 08 of 12

Precision Fineliner Pens Set

Pigment fineliners lay down waterproof, fade-resistant ink that will not bleed through cardstock or feather on textured paper. A set with several nib widths lets you write small captions with the fine tips and add titles or hand-drawn borders with the thicker ones. Check that the ink is pigment-based rather than dye-based, since dye inks are the ones that eventually go brown.

Why we picked this exact one: The Sakura Pigma Micron six-pack covers nib sizes from 005 up to 08, which spans small captions to page titles. Its 4.8-star average makes it about as safe a pen recommendation as exists. The finest tips do flatten if you press hard or drag them over rough paper, so keep the 005 for smooth cardstock.

See it on Amazon

A word on washi: everyone buys twenty rolls and uses three. It tears across cleanly under a thumbnail, no scissors involved, which is why it is what you grab at midnight when a corner looks empty. Three rolls would genuinely do. And if you ever reach the point where nothing on a shop shelf matches your photos, a beginner paper marbling setup turns plain cardstock into a background nobody else has.

For People Who Want the Album Finished This Weekend

Pocket-page scrapbooking exists because traditional layouts are slow, and plenty of people quit before page two. Instead of building a background you drop 4x6 prints and 3x4 cards into a plastic sleeve that is already divided into slots. A page takes one sitting. It still looks composed, because the grid does the composing for you, and since nothing is glued it survives being handled by a four-year-old. One rule: buy the protectors before you print. Get that backwards and you have a stack of photos that fit none of the holes, which is the same trap as a beginner origami setup, where nothing works until the paper is the right shape.

Photo Sleeve Protectors PackPhoto Sleeve Protectors Pack

Pick 09 of 12

Photo Sleeve Protectors Pack

Pocket page protectors are clear 12x12 sleeves pre-divided into slots sized for standard prints, most commonly six 4x6 pockets to a page. Photos and cards slide in from the top with no adhesive involved, and the sleeve protects both at once. Non-glare versions are worth seeking out, because plain clear plastic reflects enough under a lamp to make the photos hard to see.

Why we picked this exact one: The We R Memory Keepers 12x12 photo sleeve protectors use a straightforward six-pocket 4x6 grid, which is the layout you will reuse most often. They are rated 4.7 stars and the non-glare finish genuinely helps under indoor light. Ten sheets only makes five spreads, so budget for a second pack sooner than you think.

See it on Amazon
Premium Blank Kraft Cards PackPremium Blank Kraft Cards Pack

Pick 10 of 12

Premium Blank Kraft Cards Pack

Blank 4x6 cards fill the pockets that do not have a photo in them, carrying a date, a few lines of writing, or a ticket taped down. Kraft stock takes pen and pencil without ghosting through to the back. Heavier weights are worth paying for here, because a flimsy card curls inside the sleeve and slowly slides down out of sight.

Why we picked this exact one: The Goefun brown kraft 4x6 cards come 100 to a pack, enough for a year of pocket pages without paying branded card-kit prices. They hold a 4.7-star average and the stock is heavy enough to feed through a home printer if you would rather type your journaling. Kraft brown is warm but not neutral, so it will tint the look of every page it appears on.

See it on Amazon
Premium Scrapbook Photo AlbumPremium Scrapbook Photo Album

Pick 11 of 12

Premium Scrapbook Photo Album

A ring-bound album takes any standard 12x12 protector, which means pages can be reordered, added to the middle, or pulled out entirely. That flexibility is the practical difference from a post-bound album, where inserting a page means dismantling the spine. Look for D-shaped rings rather than round ones, since pages lie flatter and turn without catching.

Why we picked this exact one: The Lanpn 12x12 linen-cover binder album comes with thirty sleeves already fitted, so it works as a complete starting album rather than an empty shell. It averages 4.6 stars, and the flat-lay design means a spread stays open on a table instead of snapping shut. The sleeves included are plain full-page ones rather than divided pockets, so you will be adding those separately.

See it on Amazon
Photo Corners for Picture MountingPhoto Corners for Picture Mounting

Pick 12 of 12

Photo Corners for Picture Mounting

Photo corners are small adhesive triangles that grip a print by its four corners while touching only the backing sheet. Nothing sticks to the photo itself, so it can be lifted out later undamaged. They are the older mounting method, and they are what you will find holding the photos in most inherited albums.

Why we picked this exact one: The PEASUG 432-piece pack of black self-adhesive corners holds well over a hundred photos for the price of a coffee. It is rated 4.7 stars, and the corners grip cardstock firmly without needing to be pressed hard. Black is a strong visual choice, framing a photo deliberately in a way that suits dark backgrounds and fights with pale ones.

See it on Amazon

Mixing both styles in one album works better than people expect. A pocket page for the ordinary week, a full cut-and-paste spread when something big happened. The sleeves carry a faint plastic smell out of the packet that fades within a day, and a card going into its slot makes a small satisfying slap. If what appeals here is the slow, repetitive, hands-busy part rather than the photographs, a beginner cross stitch setup scratches the same itch with thread instead of paper.

The Questions That Come Up Around Page Three

Do I really need acid-free everything, or is that just marketing?

Mostly marketing, at least at the volume it gets sold to you. Scrappers with albums built in the 1950s through the 1980s out of construction paper, glue sticks and cellophane tape consistently report photos that look the same as the day they went in. What genuinely matters is narrower than the label suggests: the adhesive, because that is the thing physically touching the print, and a page protector so the facing page is not pressed against a photo for thirty years. Buy an acid-free adhesive, use protectors, and stop auditing whether each sticker is certified.

Why do the old sticky-page albums in my parents' cupboard look ruined?

Those are self-adhesive albums, sometimes called magnetic ones, where a tacky page grips the photo under a clear film. Over decades the adhesive migrates onto the film and then onto the front of the print. You see it as a cloudy haze, or the photo bonding to the plastic hard enough to tear when you pull it free. If you have inherited one, get the photos out sooner rather than later, and do not buy the modern equivalent no matter how neat the finish looks.

What is the fastest way to blow the budget without noticing?

Printing. Supplies are a one-off cost, but prints are a subscription you never signed up for, and one parent scrapbooking a baby's first year reported spending sixty to seventy dollars on photos inside five months. Buying a home printer is usually not the fix, since ink plus 4x6 photo paper tends to cost more per print than a lab does on sale. Order in batches when a lab runs a promotion, and print fewer than you think you need, because a good share of any batch never makes it onto a page.

Why do my printed photos come back cropped wrong?

Phone photos are not 4x6 shaped. Most labs default to filling the frame, which quietly trims the top and bottom off a portrait shot, quite often somebody's head. Look for the setting labelled true digital, full image or fit, which prints the entire frame and adds white bands at the edges instead. Then slice the bands off with your paper trimmer, which takes five seconds and beats reordering the whole batch.

Should I resize photos on the computer before sending them off?

No, and this is the step that kills more scrapbook projects than any other. People sit down to prepare a batch, spend an hour cropping everything to odd sizes, and never open the folder again. Print the lot at 4x6, the cheapest size labs offer, then cut down to whatever a layout needs once the prints are physically in your hand. Deciding with real paper in front of you is quicker and produces better pages than guessing at a screen.

Love what you see here? Save individual picks with on any item, or copy everything to a list of your own in one click — great for coming back to later, or dropping as a not-so-subtle hint.

Disclosure: Some product links may be affiliate links. If you make a purchase through one of these links, we may earn a small commission at no extra cost to you.