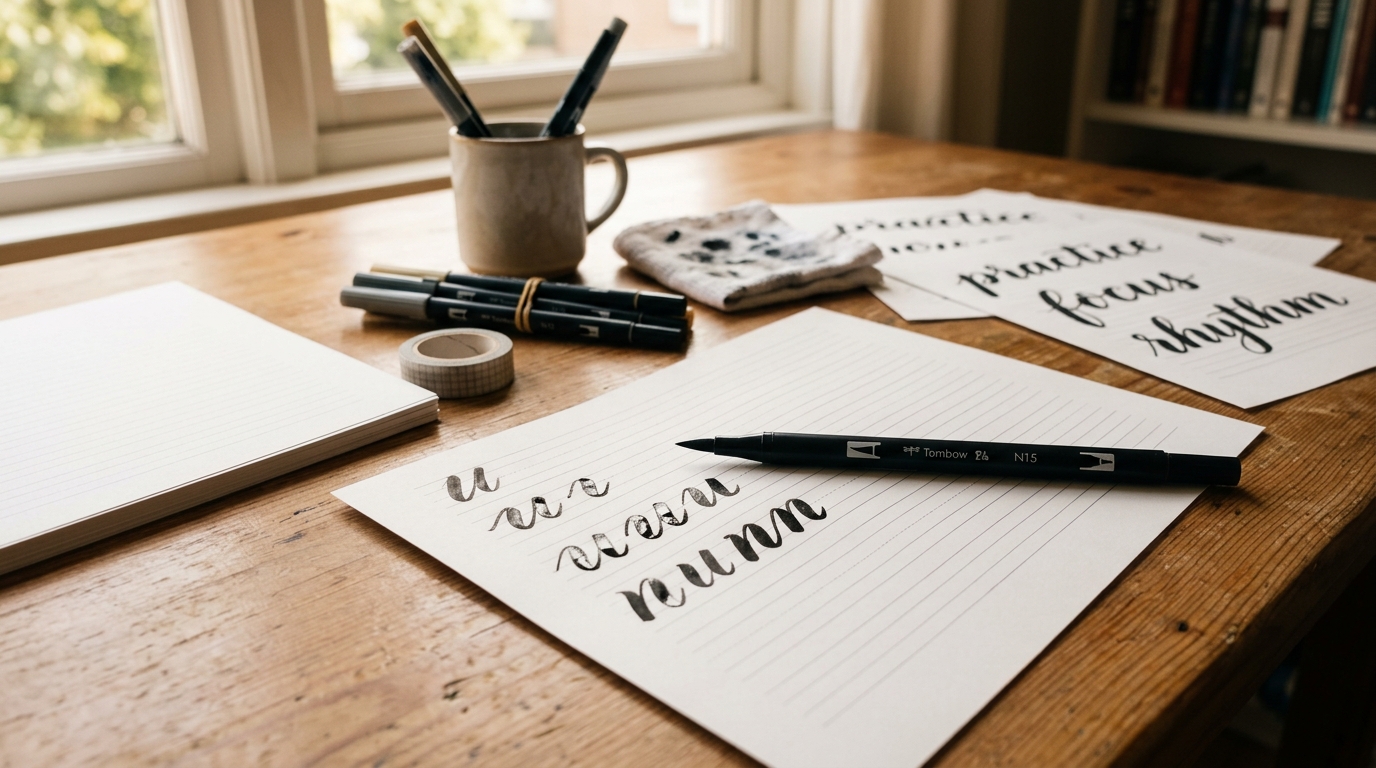
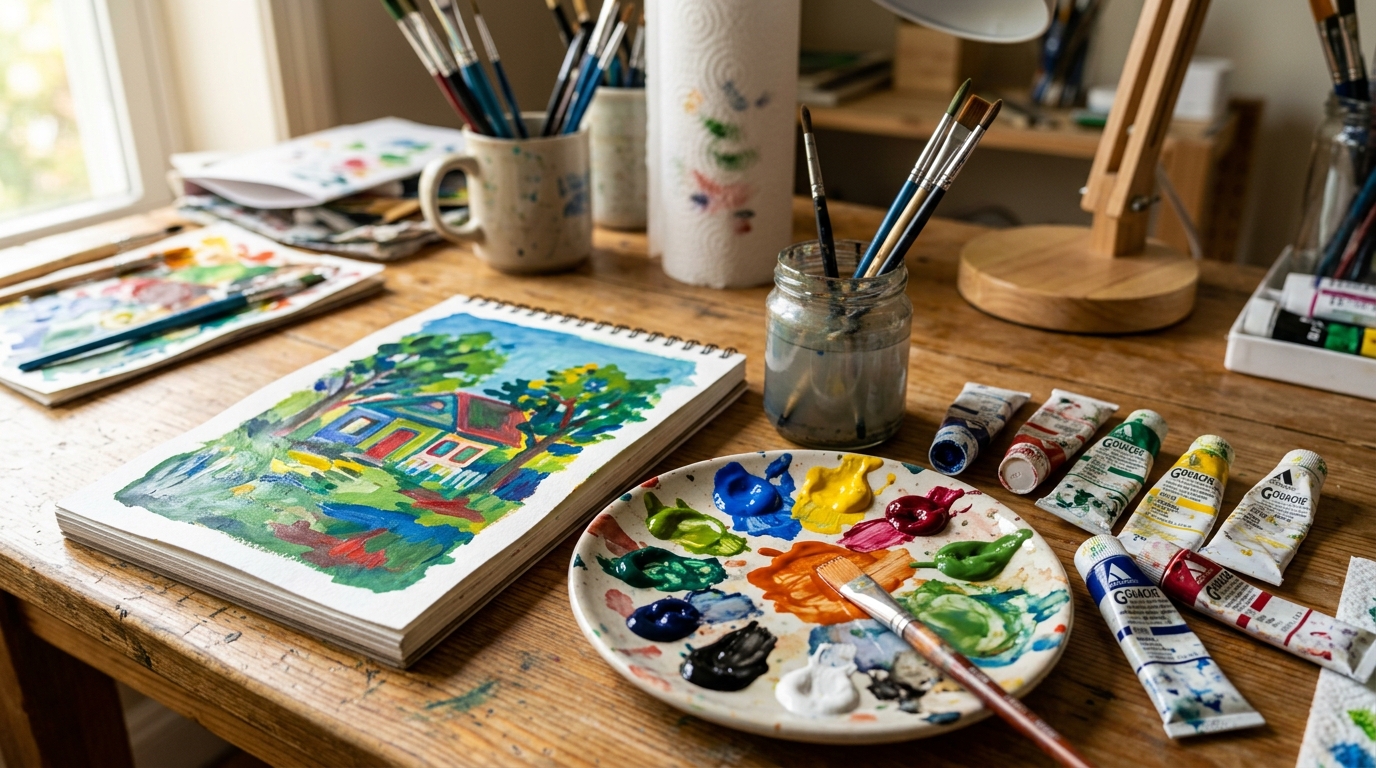
Beginner Paper Marbling Setup: Tray, Paint, and Print Basics
The Bath, the Paint, and the First Lift
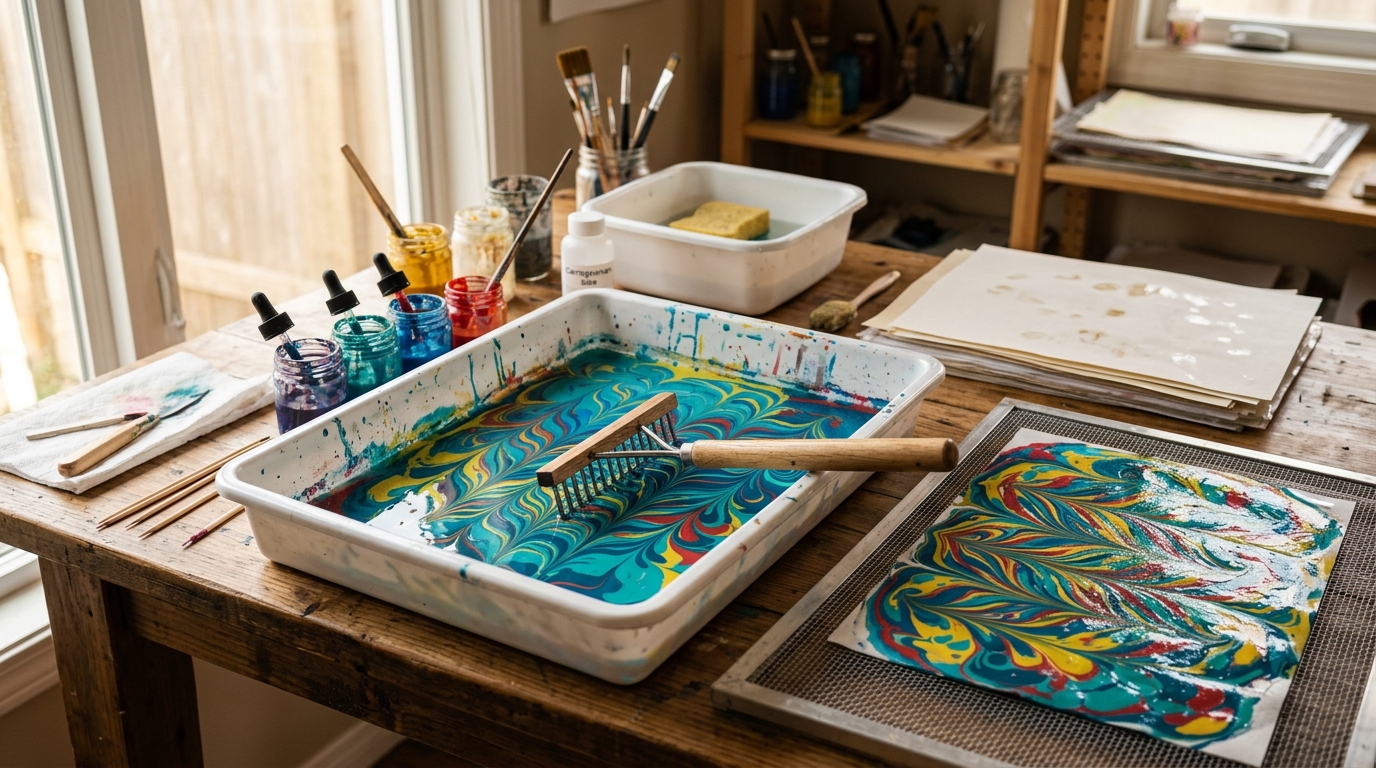
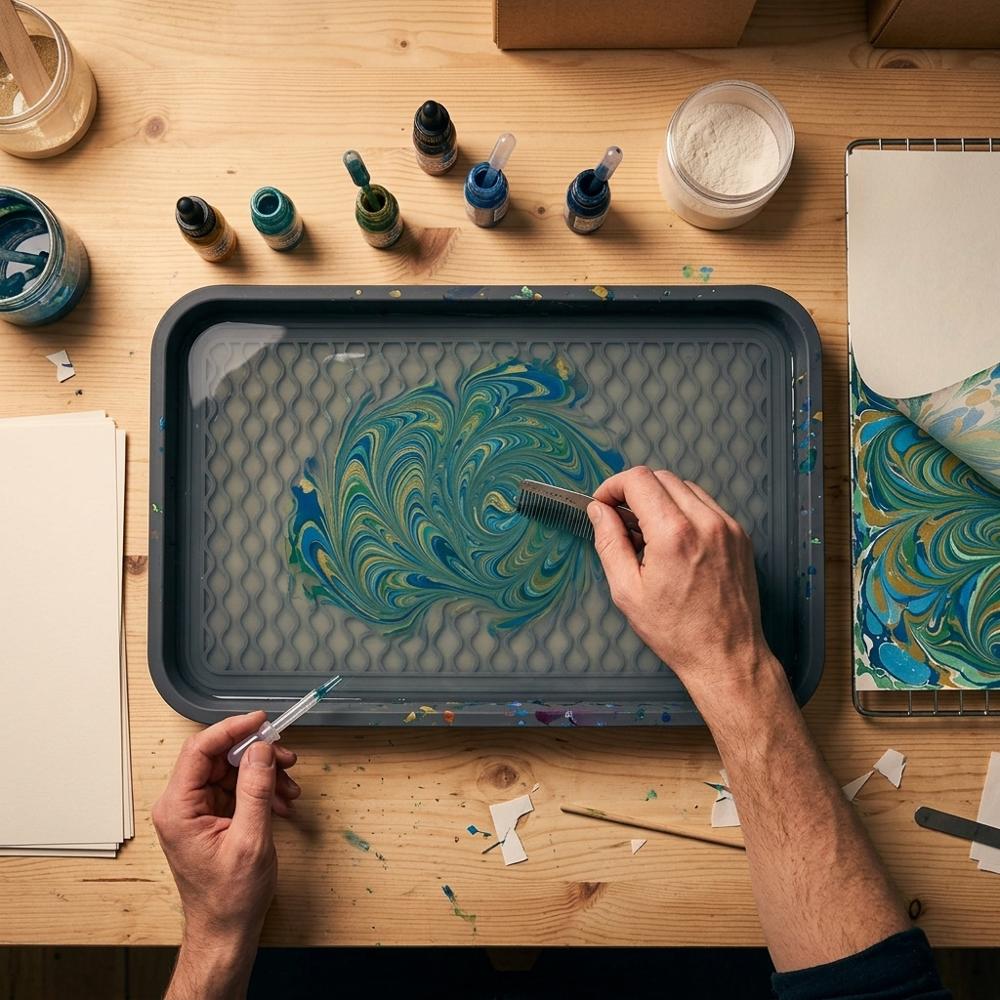
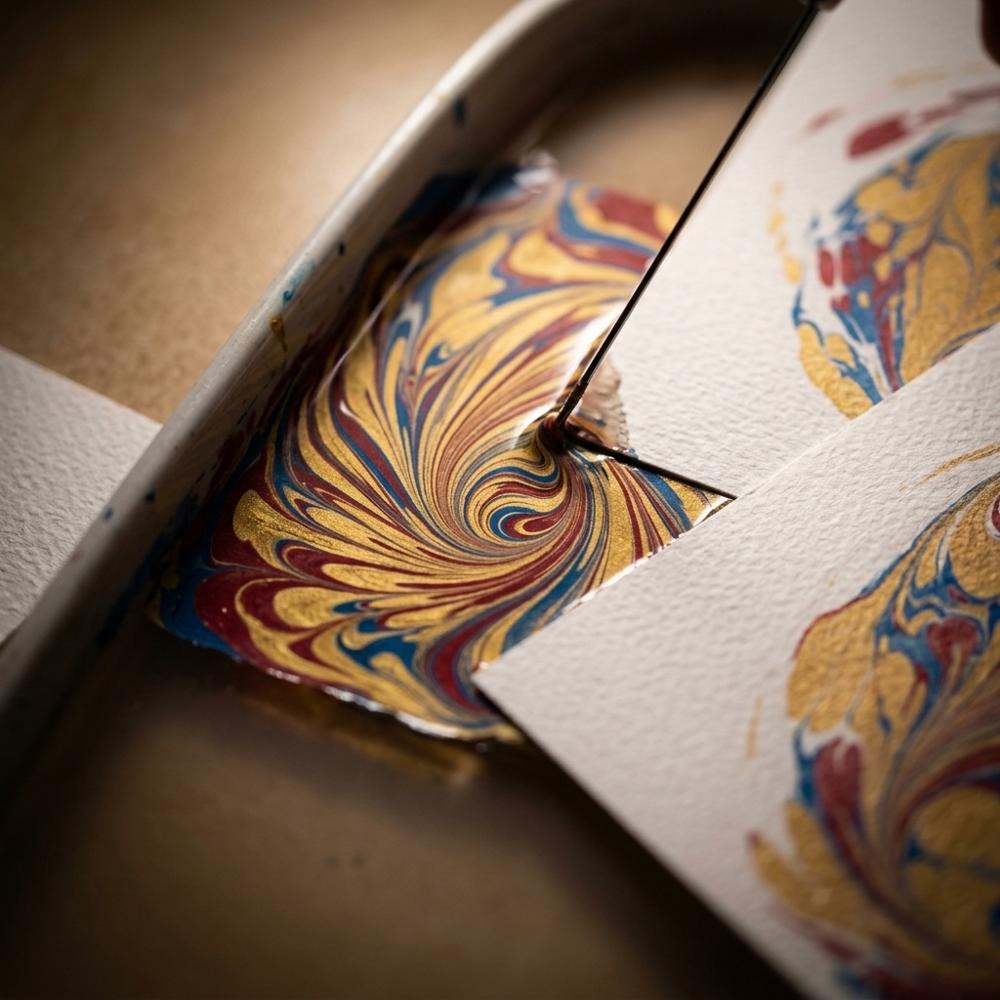
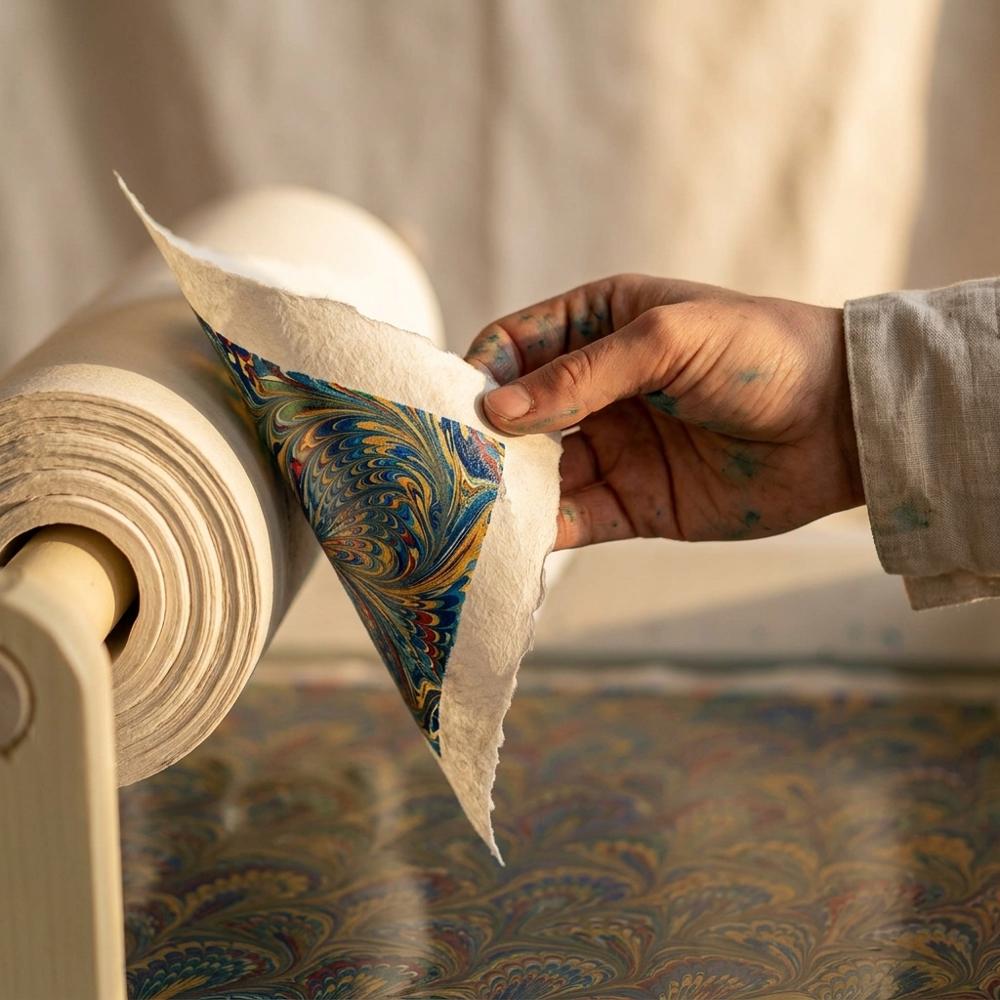
Picture a tray of water turned thick as thin jelly, a few drops of color blooming across its skin, and a comb drawn through to pull those colors into feathers and combed waves — then a sheet of paper laid down for a second and peeled away, carrying the whole pattern with it. That single lift is the entire craft, and no two lifts are ever the same. Marbling traveled two very different roads to reach us: Japanese suminagashi, floating sumi ink in concentric rings, dates to around the twelfth century and was guarded for generations as an art of the imperial court, while Turkish ebru — 'cloud art' — flourished in the fifteenth-century Ottoman world. The Ottomans trusted it so completely that official documents were written on marbled paper, because a pattern that can never be reproduced is a pattern that can never be forged. That history is hiding in every sheet you pull.
The first thing that surprises people is how little of marbling is about painting and how much is about chemistry you cannot see: water that has to be thickened just so, and paper that has to be treated before it will hold a single drop. Get those two invisible steps right and the colorful part almost takes care of itself; skip them and your paint either sinks or slides straight off the page. This is one of the few crafts where the cheapest path — floating ink on plain water, suminagashi-style — is also the most forgiving place to begin, which is part of why it keeps turning up among approachable starter hobbies for adults. The items below cover the full Turkish-style setup, and you can grow into the combed patterns once the basics feel natural.
My honest advice is to resist buying a giant color range on day one. A shallow tray, one small set of floating colors, a box of alum, a thickener for the water, and a pad of absorbent paper will carry you through weeks of experiments, and everything past that is refinement rather than requirement.
I worked through the supplies marblers reach for again and again and kept only the ones that are easy to find, gentle on a first-timer's budget, and genuinely hard to outgrow.
Liquid marbling watercolor set of floating colors for paper marbling
A set of liquid marbling colors comes pre-dispersed so the pigment floats and spreads on the water's surface instead of dissolving into it. For paper marbling you want colors made to sit on top of the bath, not ordinary paint thinned down, and a small multi-color set is plenty to learn how different pigments expand at different rates. Look for ready-to-use liquids with droppers, since mixing your own floating consistency is fiddly for a beginner.
Shallow waterproof tray for holding the marbling size bath
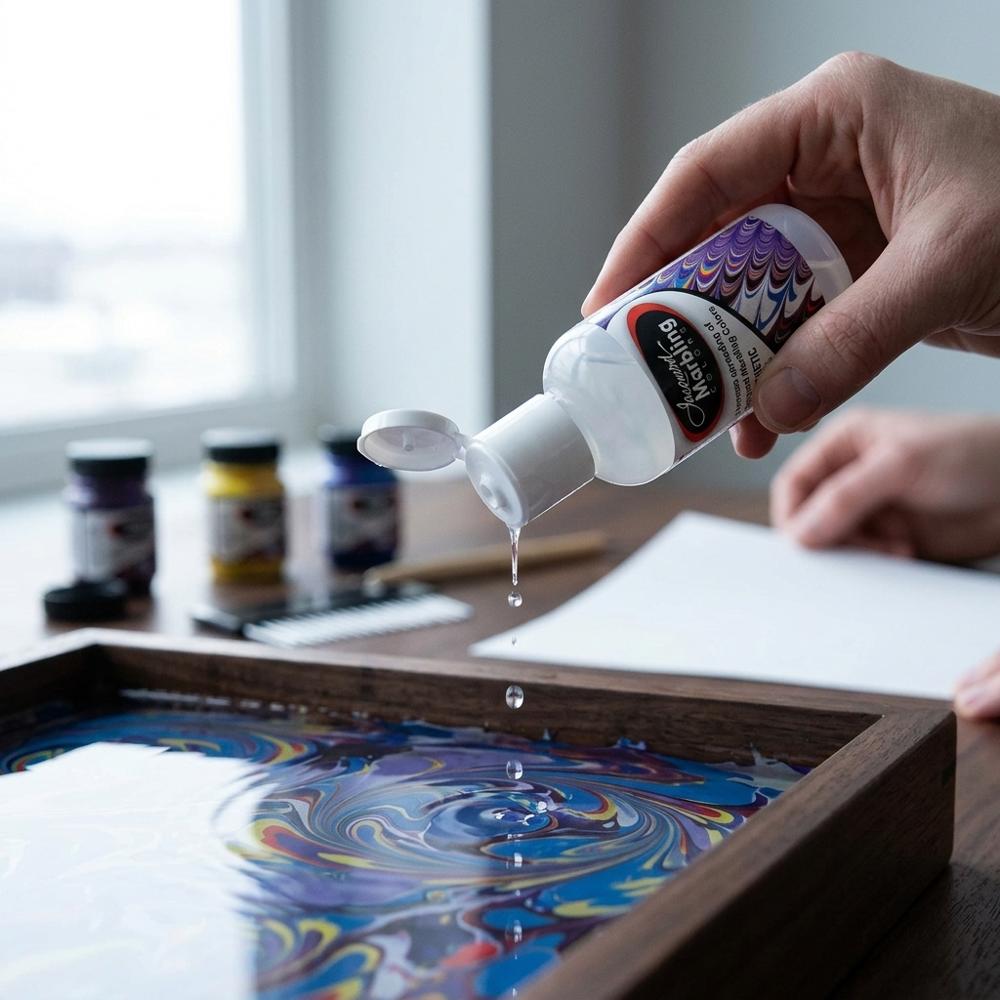
Marbling needs a shallow, watertight tray a little larger than your paper so a sheet can be laid flat onto the bath in one motion. The depth only needs to hold an inch or two of thickened water, but the footprint matters, because too small and the paper will not fit while too flimsy and it bows when full. A smooth, light-colored interior also makes it easier to read your pattern before you print.
Methyl cellulose powder for thickening the marbling size bath
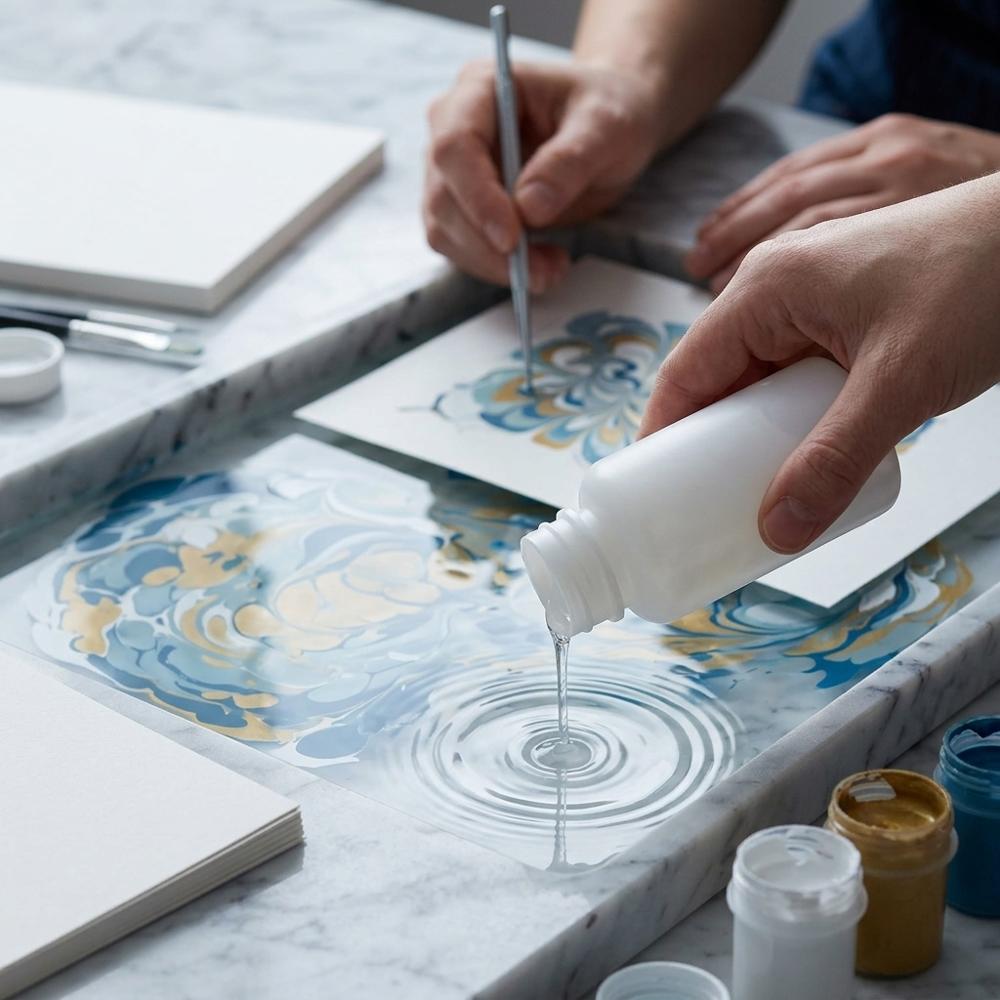
Western and Turkish marbling float color on size, which is water thickened to a slippery, slightly viscous bath so the drops sit and hold their shape. Methyl cellulose is a powder you stir into water to make that size, and unlike seaweed-based carrageenan it does not spoil, so a mixed batch keeps for weeks. Beginners should look for a plain, additive-free cellulose and mix it a day ahead so the bubbles can settle.
Alum mordant for pre-treating paper so floating pigment adheres

Alum is a mordant, a treatment brushed or sponged onto paper before marbling so the floating pigment bonds to the sheet at the moment of contact, and without it the colors simply rinse away. It comes as a fine crystalline powder you dissolve in warm water. A little goes a long way, and one pound treats a large stack of paper.
Absorbent heavyweight watercolor paper for lifting marbled prints
Marbling paper needs to be absorbent enough to grab the pigment yet sturdy enough to survive being wetted and lifted. Heavyweight watercolor paper hits that balance and takes alum well, so a beginner can mordant it, dry it, and print without the sheet falling apart. A cold-press surface with a little tooth holds the pattern crisply.
With these five things you can thicken a bath, treat your paper, drop your colors, and pull a finished sheet — the whole loop, start to finish. Expect the first few pulls to look muddy or to show pale patches where the alum went on unevenly; that is almost always paper prep rather than paint, and it sorts itself out quickly. Because marbled sheets began life as the decorated endpapers inside hand-bound books, a growing stack pairs naturally with a beginner bookbinding setup, but first come the small tools that turn a lucky splash into a pattern you can steer.
Steering the Colors
Once you can pull a clean sheet, the next jump is control — deciding where the color goes instead of hoping. A pipette lets you place a drop exactly where you want it, and from low enough that it does not punch through the surface and sink, which is the single most common reason a beginner's colors vanish. A little gall and a sponge are how marblers tune the way each color spreads and keep the bath clean between pulls. None of this is mandatory to make something lovely — plenty of decorative paper traditions, from marbling to beginner origami paper folding, started with almost nothing — but these three add range without adding much cost.
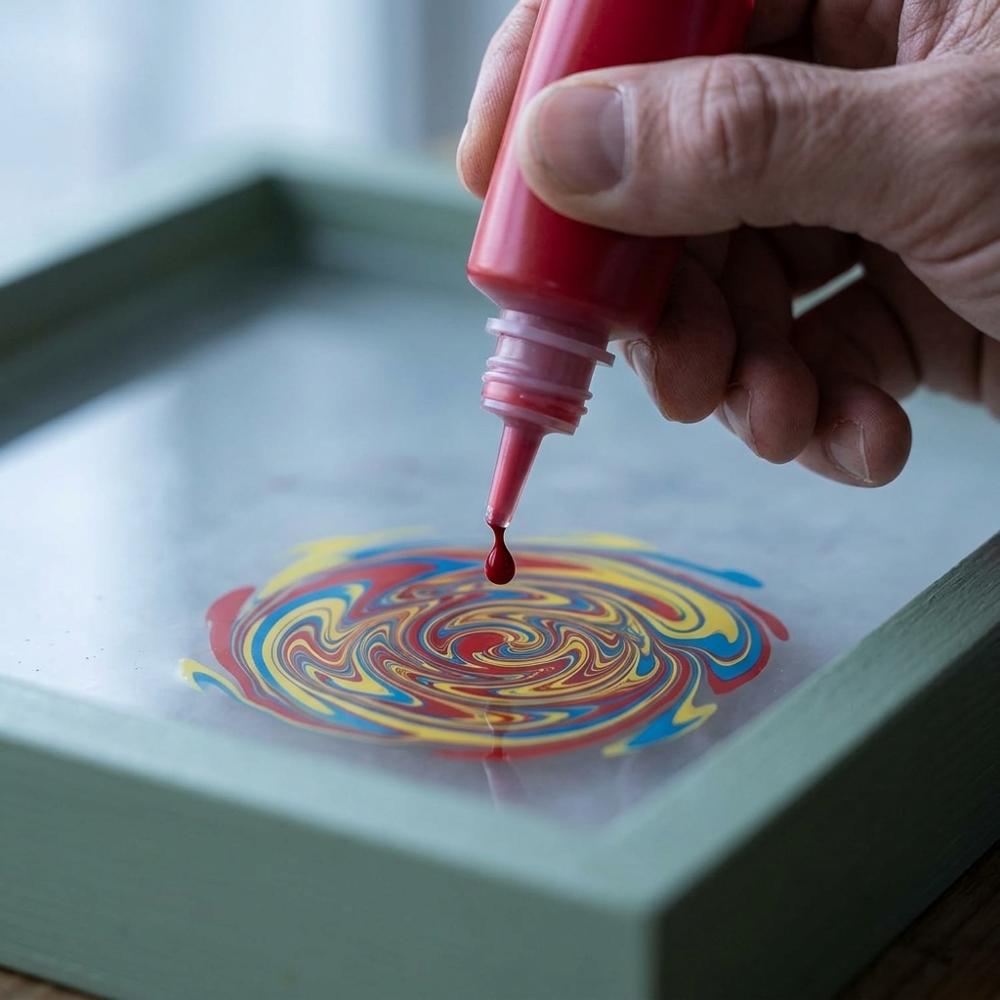
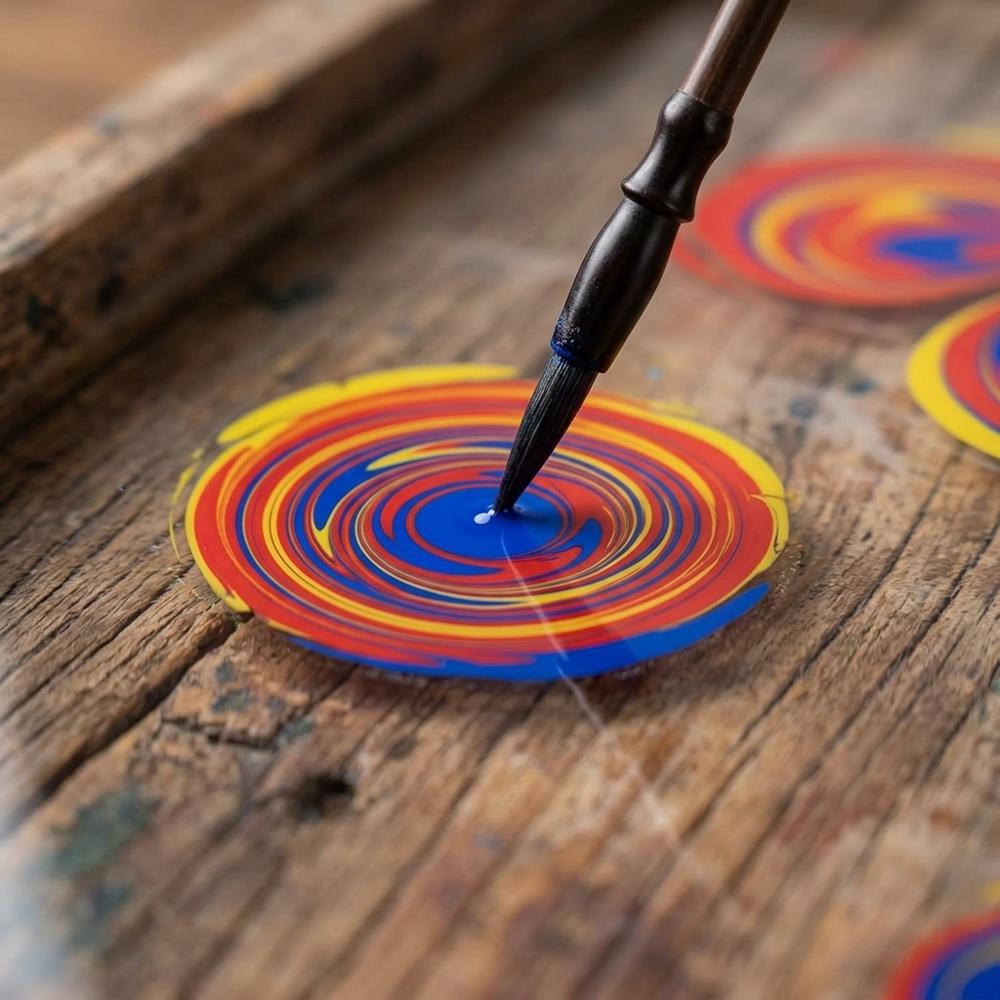
Calibrated plastic pipettes for dropping color onto the bath
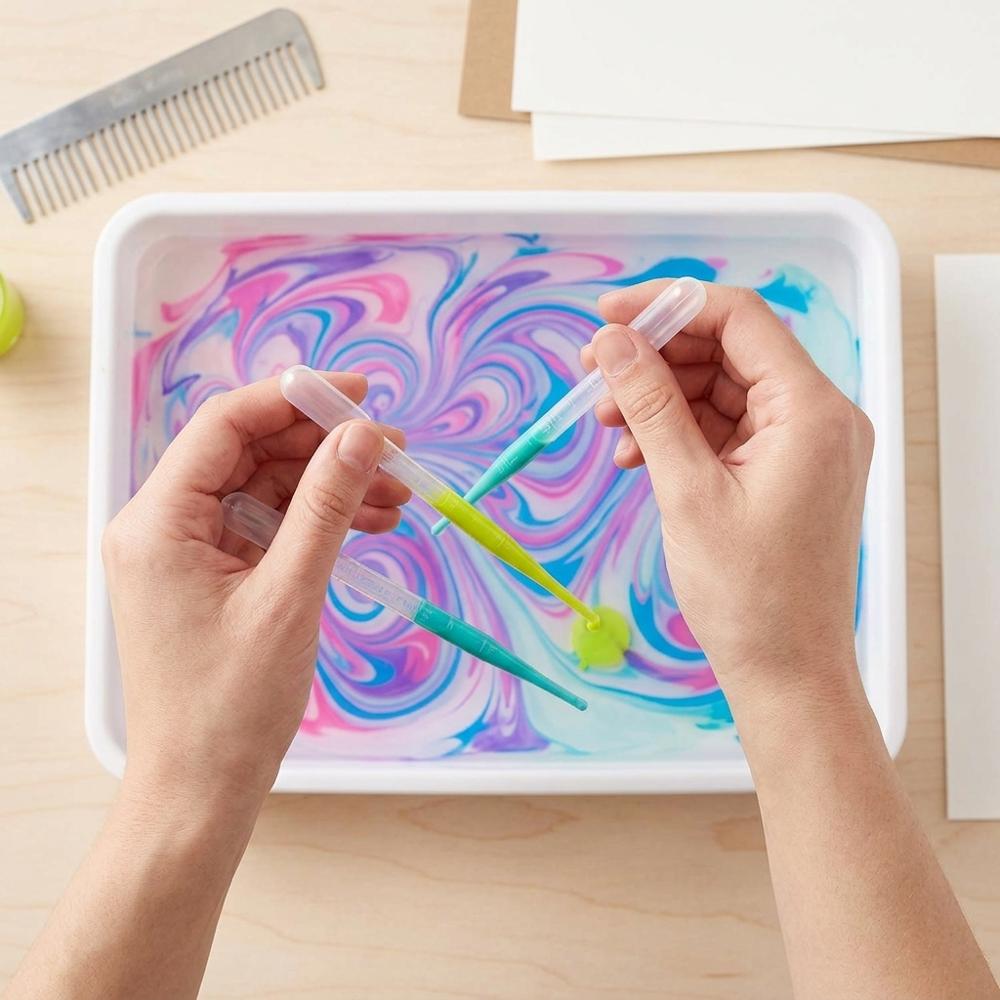
Plastic transfer pipettes let you pick up a small amount of floating color and release it onto the bath drop by drop, with control you cannot get by tipping a bottle. The graduated, fine-tipped kind let you place a drop low to the surface so it spreads instead of sinking. Disposable ones in bulk mean a dedicated dropper per color and no cross-contamination.
Surfactant gall liquid for controlling how each color spreads
Gall is a surfactant added to marbling colors to control how far each drop spreads across the bath, so a color with more gall pushes outward and opens up space while one with less stays compact. It is the dial marblers use to balance several colors against each other on the same surface. A few drops at a time is all it takes.
Natural sea sponges for skimming the bath and laying ground color
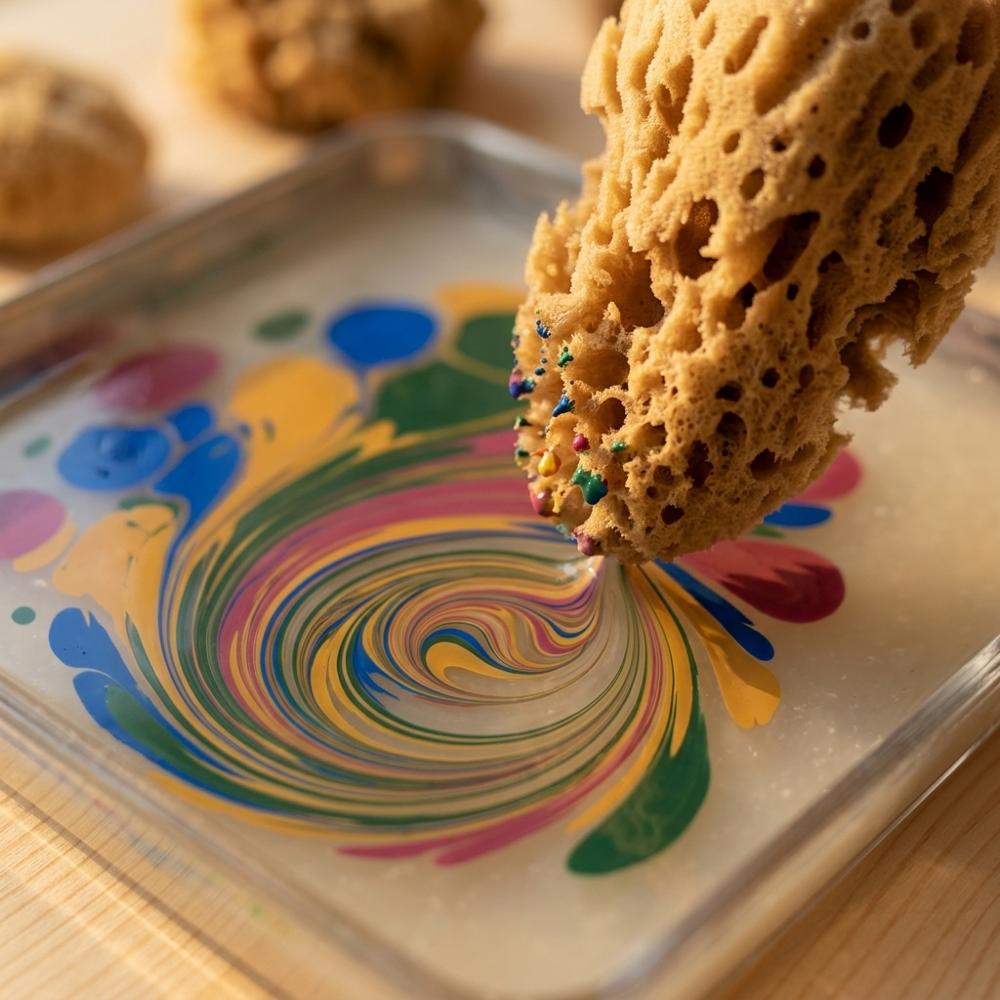
Natural sea sponges have an irregular, open texture useful in marbling for two jobs: skimming the skin of dust and stray pigment off the bath between prints, and laying down a soft background tone. Their uneven surface holds liquid gently without scratching or pushing the size around. A pack of small ones lets you keep separate sponges for skimming and for color.
Add gall one cautious drop at a time in a spare cup, never straight into your paint bottles, because once a color spreads too eagerly there is no taking it back. Skim the surface with a sponge or a strip of newspaper before every single pull and you will be amazed how much dust and stray pigment you had been printing without noticing. If the idea of pressing an image onto paper hooks you, the same pull-and-reveal thrill runs through relief printing too, as in a beginner linocut printmaking setup.
The Quieter Road: Suminagashi
Suminagashi strips marbling back to almost nothing: plain water, a couple of brushes, and ink that spreads itself into trembling concentric rings the moment a loaded tip touches the surface. There is no alum, no thickener, and no comb — you breathe across the water or tilt the tray, and the rings drift into smoke-like patterns. It is the version I would steer a restless beginner toward first, because the feedback is instant and the whole setup fits on a kitchen counter. If you have enjoyed how directly marbling transfers a design, you will recognize the same appeal in carving and stamping crafts such as beginner block printing, where one pressed impression reveals the whole image.
Black sumi ink for Japanese suminagashi ring marbling
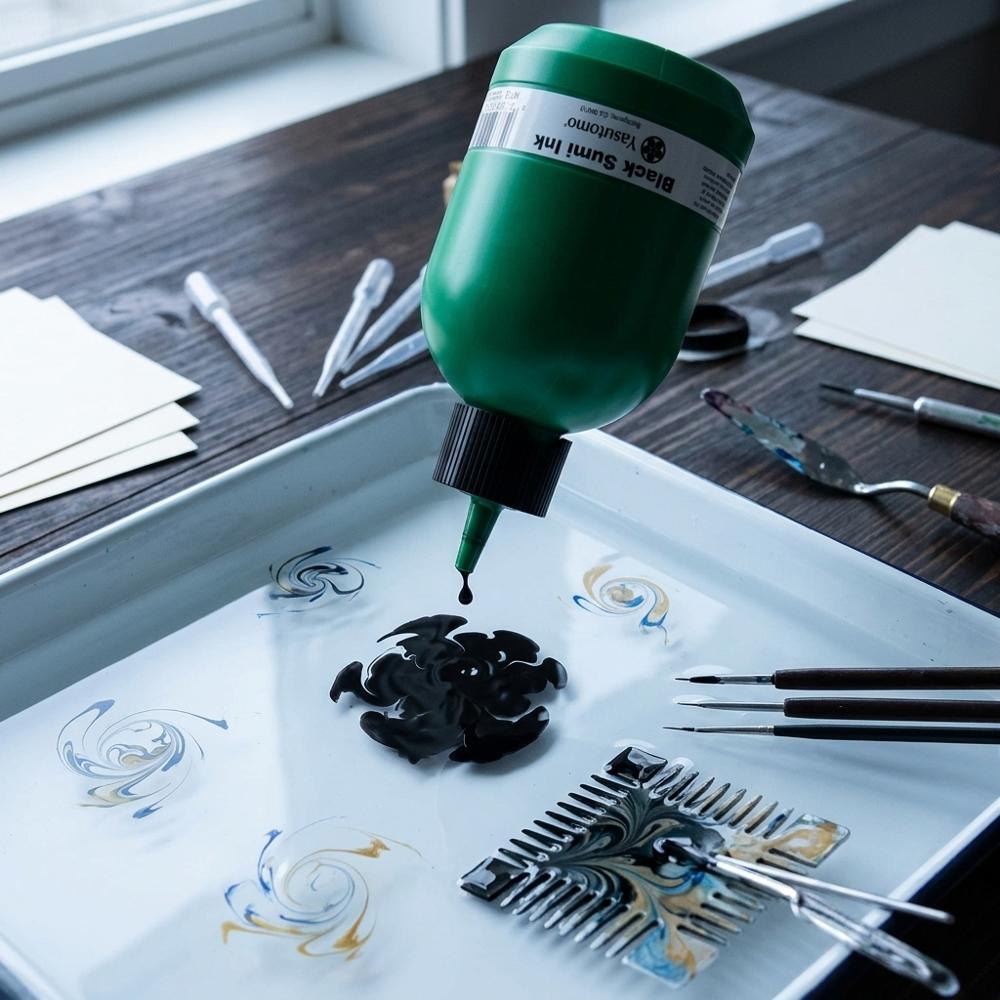
Suminagashi uses sumi, a traditional East Asian black ink, floated on plain water in delicate rings. A bottle of liquid sumi saves grinding an inkstick and gives consistent, deep black tones that spread cleanly on the surface. Look for a genuine sumi rather than a generic India ink, since the way it disperses on water is part of the effect.
Soft calligraphy brushes for floating ink rings in suminagashi
Suminagashi is made with a pair of soft brushes, one carrying ink and the other a surfactant, touched alternately to the water to build expanding rings. Soft, absorbent natural-hair calligraphy brushes hold liquid well and release it gently onto the surface. A small set in a couple of sizes is enough to start.
Absorbent rice paper for lifting suminagashi prints
Suminagashi is lifted onto thin, highly absorbent paper, traditionally a rice or mulberry paper that drinks the floating ink on contact. The sheet is laid on the water for a moment and peeled away with the pattern fixed in place. Thin, soft papers capture the fine ringed lines better than heavy stock.
Two brushes — one for ink, one for the surfactant that pushes the ink outward — plus a stack of absorbent rice paper are genuinely all suminagashi asks of you. Work slowly, keep your movements small, and resist crowding the surface, because the restraint is the whole point and the quietest sheets are usually the most striking.
Why Does the Water Keep Outsmarting Me?
Why do my colors sink to the bottom instead of floating?
Beginners usually release paint from an inch or two up, and the falling drop hits with enough force to break the surface tension and dive straight to the bottom. Certain pigments, deep blues especially, are heavier and sink even when others float fine. Touch the pipette tip almost to the surface so the color rolls out rather than drops, thin a stubborn color with a little water or gall, and make sure the bath has warmed to room temperature, since a cold size holds drops poorly.
Why does the paint slide right off my paper and leave nothing behind?
This is almost always the alum step, either skipped entirely or still damp on the sheet. You cannot marble onto wet mordant; the paint just slides off and rinses away. Sponge the alum solution on evenly, let the paper dry completely before you print, and use it within a day or two, because alum left on paper for too long can start to weaken the sheet.
I added gall straight to the bath and blew a hole in my design — what happened?
Undiluted surfactant dropped onto the size acts like a repellent and clears a crater, shoving every nearby color outward. It is a classic first-session shock. Never drip gall onto the open bath; instead dilute a drop or two into a spoonful of water and add it to your color cups gradually, testing how far each color spreads before you commit it to the tray.
Why do some patterns come out crisp and others blurry and bleeding?
The usual culprit is the thickness of the size rather than your hand. A thinner bath suits combed and raked patterns, while a thicker one holds stone and vein patterns without them softening into each other, and a size that is too warm or too old goes runny and loses definition. Adjust the water in your mix to the pattern you want, and remember that a carrageenan bath spoils within a few days while a methyl cellulose one keeps far longer.
FORK_CTA_HINT
AFFILIATE_DISCLOSURE_TITLE: AFFILIATE_DISCLAIMER