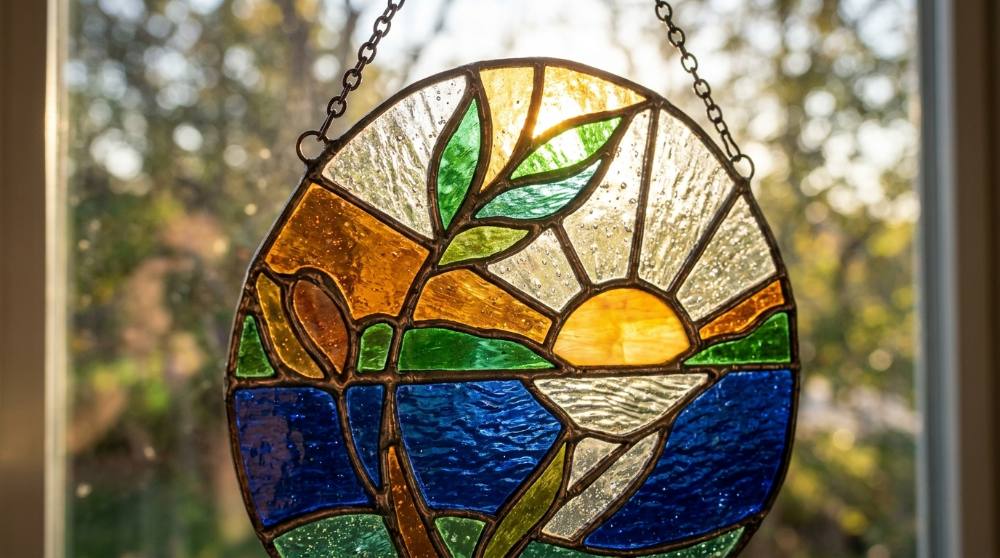
Copper foil stained glass is the method behind every Tiffany lamp you've walked past in a hotel lobby, and it's far less mysterious than it looks. You score a sheet of coloured glass with a small carbide wheel, snap it along the line, wrap the raw edge of each piece in sticky copper tape, then melt solder along the seams until the pieces become one object. No kiln, no furnace, no studio. Tiffany's workshop was using foil by the early 1890s because lead came wouldn't bend around the curves a lampshade needs, and the tape back then was coated with beeswax on one face so it gripped the glass and muriatic acid on the other so the solder would take. Here's the part almost nobody knows: the Dragonfly and Wisteria shades everyone pictures were designed by Clara Driscoll, who ran Tiffany's Women's Glass Cutting Department, and her name only came to light in the mid-2000s when her letters were finally read.
Most people arrive at this craft sideways. They see a suncatcher hanging in someone's kitchen window, assume there's a workshop behind it, and never look further. There isn't one. A first piece is usually five or six shapes, finished across an afternoon, and it hangs in the light looking considerably more expensive than it was, which is why it keeps turning up on lists of Christmas crafts worth taking up. The gap between effort and payoff is wider here than in almost anything else I'd point a beginner at.
Our philosophy: buy the fewest things that get one piece finished. Glass, a cutter with pliers, foil, flux, solder, an iron. Nothing else until the first suncatcher is actually hanging - not the grinder, not the light box, not the patina.
Everything below was chosen assuming you might make two suncatchers and then shove the box in a cupboard for a year. Nothing here is precious.
Where This Little Kit Can Take You
A few real moments and results from this hobby — made with tools no fancier than the ones below.
A robin that catches the lightBlack patina on every seam is what turns bright solder into a drawn line.
Pattern first, glass secondThe drawing gets numbered before a single piece is scored.
One warning before the shopping. Cutting has a genuine learning curve, and your first few scores will break somewhere you didn't intend, usually with a small crunch that sounds much worse than it is. That costs about forty cents in glass and nothing else. If you'd rather have something glossy and finished in a single evening, pouring resin is the shorter road; this one asks for a weekend.
Sharp Edges and Lead Are Two Separate Problems
Freshly cut glass is sharper than anything in your kitchen and it doesn't warn you. The cut you get is thin, clean and deep, and you usually notice it because of the smear on the pattern paper rather than any pain. Safety glasses go on before the first score and stay on through grinding, because the thing that reaches your eye isn't a dramatic shard - it's the chip that flicks off when the running pliers snap a tight curve. Sweep the bench with a damp cloth rather than your hand, and keep plasters nearby.
Lead is the slower risk, and the one most often described wrongly. Traditional 60/40 solder is forty percent lead, but the smoke curling off your iron is almost entirely vaporised flux: a foil seam runs at roughly 360 to 410 degrees Celsius, far below the temperature at which lead actually boils. Flux fumes are still acidic and unpleasant, so work by an open window or put a small fan behind the piece pushing the smoke away from your face. The real lead exposure is hand to mouth. Don't eat or drink at the bench, wash properly afterwards, and keep the whole operation out of the kitchen. If you already burn designs into wood you'll have the ventilation habit already, for completely different reasons.
Lead-free solder exists and is a fair choice if small children share the room, but be warned that it doesn't flow anything like as sweetly as 60/40. It wants more heat and a slower hand, and it won't take ordinary black patina, which is formulated for tin and lead rather than silver. Most beginners start with 60/40, wash their hands, and get on with it.
The Short List You Can't Get Around
Here's the honest shape of it. You need glass, something to score and snap it, tape to wrap the edges, flux, solder, and an iron with enough power to melt that solder without stalling. Six things. Five are below; flux leads the next section purely because it's the one item you might already own, and I'd rather say that plainly than pretend the list is shorter than it is.
The mistake I see most is spending the budget in the wrong order. Beginners agonise over which grinder to buy and then grab the cheapest steel-wheel cutter on the page, which is backwards. The cutter is the tool your hand is on constantly, and it decides whether your shapes fit each other. Oil-fed carbide wheels are what people who cut glass every day reach for, and teachers are consistent that beginners struggle with the cheap steel ones.
Disclosure: This section may contain affiliate links to Amazon. We may earn a small commission from qualifying purchases at no extra cost to you.
01Pick 01 of 12
opalescent and cathedral stained glass sheets in beginner-sized 4 x 6 inch pieces
Art glass comes as flat sheets in two broad families: cathedral glass, which you can see through, and opal or opalescent glass, which is milky and glows rather than reveals. A mixed pack of small sheets lets a beginner try both without committing to a full 12 by 12 inch sheet of a colour that turns out wrong. Look for packs that list the textures as well as the colours, since surface texture changes how the light scatters far more than most people expect.
Why we picked this exact one: The Lanyani 10-sheet variety pack is the one I would hand a beginner, because 4 by 6 inch sheets are exactly the size a first suncatcher eats and a bad cut costs pennies rather than a whole sheet. It carries a 4.6 rating across more than 1,600 reviews, which for art glass sold online is reassuring. The trade-off is that you do not get to pick the exact colours, so expect one or two sheets you will never use.
oil-fed glass cutter with running and grozing pliers for scoring and snapping sheet glass
Cutting glass is really two actions: a single light score with a carbide wheel, then a controlled break along that score. Running pliers have curved jaws and a centre line that you sit over the score so the break travels where you want it, and grozing pliers nibble away the stubborn slivers a break leaves behind. An oil-fed cutter keeps the wheel lubricated as you go, which makes the score cleaner and the wheel last longer.
Why we picked this exact one: The Swpeet 3-piece kit pairs an oil-feed pistol-grip cutter with running and grozing pliers, which is the whole cutting station in one purchase at around $26. It sits at 4.6 stars across more than a thousand reviews, and the oil feed matters: teachers consistently steer beginners away from the cheap steel-wheel cutters because they need more pressure and skip more. The pliers are not heirloom quality, and the rubber tips on the running pliers will need replacing eventually.
7/32-inch black-backed copper foil tape for wrapping the cut edges of glass
Copper foil is thin adhesive copper tape that you wrap around the edge of every cut piece so the solder has something to grip, since solder will not bond to glass itself. Width matters: 7/32 inch is the usual all-round choice for flat work, with narrower tape reserved for tight curves. The backing colour shows through transparent glass, so black backing disappears under a dark patina while silver backing suits seams left bright.
Why we picked this exact one: This is Edco foil, the brand most stained glass shops stock, sold here by Crafter's Best in the 7/32 inch black-backed width. Fresh foil is the point - tape that has sat around oxidises and then fights the solder, and buying from a seller that moves stock is the simplest defence. At 4.6 stars across 124 reviews it is a smaller sample than I would normally want, but the foil itself is a known quantity.
60/40 tin-lead solder wire for running beaded seams along foiled glass
Stained glass solder is solid-core wire about 1/8 inch thick, bought by the pound, and it is not the same as the thin rosin-core wire sold for electronics. The 60/40 ratio means sixty percent tin to forty percent lead, which melts at a usefully low temperature and flows into a smooth raised bead rather than sitting in lumps. Lead-free alternatives exist and are stiffer to work with, needing more heat and a slower hand.
Why we picked this exact one: Canfield is the 60/40 that keeps turning up on working glass artists' own tool lists, and this one-pound spool holds a 4.8 rating across more than 3,400 reviews. A pound sounds like a lot and is roughly a season of suncatchers. Worth knowing before you order: it is leaded, so if a child or a pregnant person shares the workspace you may want the lead-free route instead, with the slower flow that comes with it.
100-watt temperature-controlled soldering iron with a chisel tip for glass seams
A stained glass iron is a different animal from an electronics iron: it needs enough power to keep a chisel tip at temperature while that tip is in constant contact with cold metal. Practitioners look for roughly 80 to 200 watts with some form of temperature control, and a tip around a quarter inch wide for running beads. The common failure is an iron that reaches temperature and then sags, leaving cold spots where the solder goes grainy.
Why we picked this exact one: The Weller W100PG is the 100-watt iron glass teachers hand beginners who do not want to spend on a Hakko, and it holds temperature through a magnet in the tip rather than a dial. It ships with a 700 degree chisel tip, which is the right starting point for foil work. The catch is real: changing temperature means buying and swapping a different tip, so if you think you will want dial control later, budget for the step up instead.
Budget a little over $215 to get all six onto the bench, which is a real number and not a gentle one. This is a buy-to-start craft and there's no honest way around that. The consolation is the ratio: four of the six last for years, and what you'll be rebuying is foil and solder rather than tools. Leather work has the same shape if that trade appeals to you.
The Second Trip to the Basket
Flux leads this section for the reason given above. You can't solder without it, it's cheap, and it's the one item a tinkerer may already have in a drawer. Everything after it is genuinely optional for a first piece.
The grinder is the big-ticket item here, and the advice most often repeated about it is simply wrong. You do not have to grind every edge before foiling. Tape sticks to an unground cut edge perfectly well, and you can prove that to yourself in about ten seconds with an offcut. What a grinder buys you is fit: pieces that meet cleanly instead of leaving gaps you then try to bridge with solder. For a first few projects a sharpening stone and some patience covers it. You'll also want a jump ring soldered into the top seam to hang the thing, and if making your own rings appeals more than buying them, working with wire is a short and useful detour.
06Pick 06 of 12
gel soldering flux for copper-foil seams
Flux is a mild acid that strips oxide off the copper the instant the iron touches it, so the solder can wet the surface instead of beading up and rolling away. Gel flux stays where you brush it and does not spit the way thin liquid flux can when it meets a hot tip. Any flux sold for copper foil work will do the job; what varies is how much it splatters and how hard the residue is to wash off afterwards.
Why we picked this exact one: Classic 100 by Stellar Technical is the gel flux that comes up again and again in glass community tool threads, and an 8 oz jar at 4.7 stars from 587 reviews will outlast several projects. Gel is the forgiving choice for a first attempt because it stays put and spits less than liquid flux. One warning: this listing ships to order rather than off a shelf, so allow a few extra days.
benchtop wet glass grinder for shaping cut pieces until they fit
A glass grinder is a small motor spinning a diamond-coated bit through a water bath, used to take a cut shape down to the pattern line. It does not replace cutting; it corrects the last millimetre, which is where most beginner pieces fail to meet. The things that separate grinders are motor torque, deck size and whether the water delivery keeps the bit wet without flooding the bench.
Why we picked this exact one: The Gryphon Gryphette is the step up worth making once you know you are staying, holding a 4.8 rating across 866 reviews on a brand glass shops have stocked for decades. Buy it when you start designing your own curved patterns, because that is where hand-shaping stops being realistic. Anyone still working through their first suncatchers from a printed pattern should wait and spend the money on glass instead. It is loud, and it sprays a fine slurry if you skip the shield.
black patina that darkens bright solder seams to a dark lead line
Patina is a chemical you wipe over finished solder to change its colour, most commonly to black or to copper. It is cosmetic rather than protective, and it is what makes a hand-made piece read as stained glass rather than as a craft kit. It is formulated for the metal it meets, so a patina made for tin and lead solder will do nothing on a lead-free seam.
Why we picked this exact one: Novacan Black Patina for Solder is the bottle most studios keep on the shelf, and it sits at 4.8 stars across more than 2,100 reviews. Apply it only after the flux has been scrubbed off, or it goes patchy and streaky. It will not work on lead-free solder, which needs a patina made for silver instead, so check what is on your spool before you order.
plastic fids for pressing copper foil tight against the glass
A fid is a small plastic or bone tool used to burnish foil, which means pressing it hard against the glass face so no air sits underneath. The back of a spoon does the same job badly; a fid has a thin edge that reaches into a corner and a broad face for the flat. They cost almost nothing and wear out slowly.
Why we picked this exact one: This four-piece Aswewamt fid set costs under six dollars and holds 4.8 stars from 304 reviews, which is as close to a free decision as this hobby offers. Press from the middle of the edge outwards and do both faces of the glass. The plastic is soft enough that the thin edges round off over time, but at this price that is not a complaint.
slim A4 light pad for tracing patterns and reading colour through glass
A light pad is a flat panel of LEDs under a diffuser, bright enough to shine through paper and through coloured glass. In this craft it does two jobs: tracing a pattern onto card, and letting you see what a sheet of opal glass will actually look like with light coming through rather than bouncing off. Adjustable brightness matters more than size for a tabletop craft.
Why we picked this exact one: The HSK A4 light box is the cheap, boring, extremely well-reviewed option, sitting at 4.7 stars from more than 16,000 ratings at around $21. A4 is enough for suncatcher-sized patterns and it stores flat behind a bookshelf. It is sold for tracing and diamond painting rather than glass, so expect no glass-specific features at all - it is simply a bright flat surface, which is the whole requirement.
Patina is the item people underestimate most. Bare solder is bright silver and reads instantly as a kit, and twenty minutes with a cloth and a bottle of black patina turns the same piece into something that looks like it came out of a studio. Apply it after the flux has been scrubbed off, never before. If slow repetitive metalwork turns out to suit you, chainmaille scratches a very similar itch with no heat involved at all.
Two Books Worth Owning Before You Buy a Grinder
Video is wonderful for watching somebody run a bead and useless for the twenty small decisions around it. How wide should a pattern line be cut? Which way should the grain of a streaky sheet run? What do you do with a piece that came out two millimetres short? Books are better at that, and both of these were written by people who actually make this stuff rather than by somebody assembling a roundup.
11Pick 11 of 12Book worth reading
a project-led beginner book on stained glass craft
A good first stained glass book earns its place by showing the small decisions a video skips: how to break a drawing into cuttable shapes, where a piece wants to be bigger than it looks, what a finished seam should actually look like up close. Project books work backwards from a finished object, which suits people who learn by making something specific. Look for one that covers copper foil rather than architectural leading.
Why we picked this exact one: Kicking Glass is by Neile Cooper, a working glass artist whose own glass cabin is photographed through the book, and it holds 4.8 stars across 463 reviews. It starts with suncatchers, which is exactly where this setup starts, and moves up to three-dimensional pieces. It is a project book rather than a reference manual, so it is light on the fiddly diagnostic material.
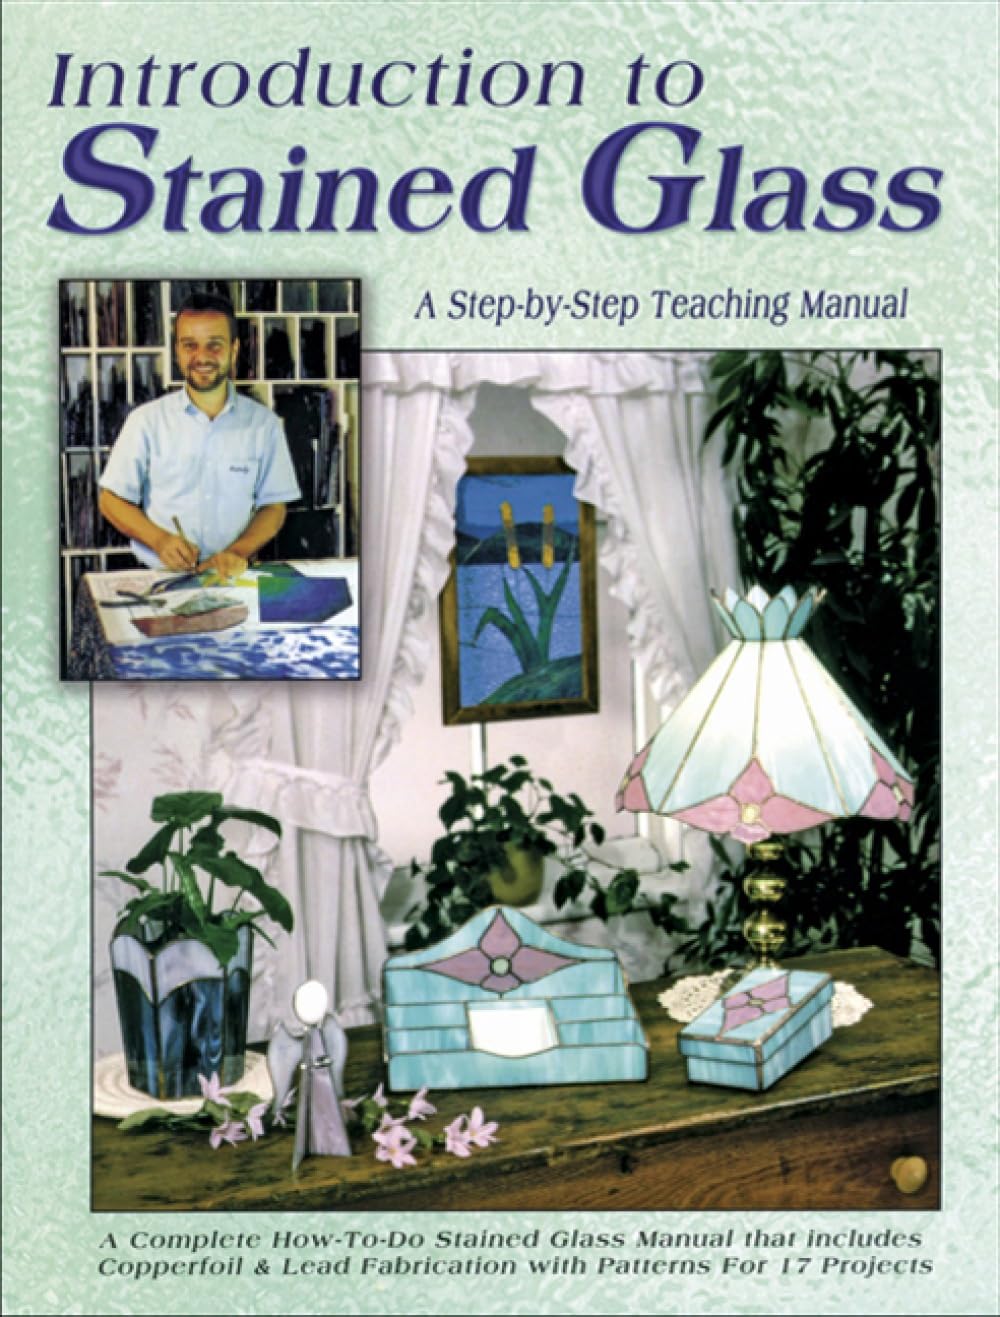
a step-by-step teaching manual covering copper foil and lead came
A teaching manual is organised by process rather than by project: glass types first, then tools, then cutting, foiling, soldering and finishing in the order you meet them. That structure is slower to read and far better to return to when something has gone wrong. The useful ones are honest about failure modes and name the specific fix.
Why we picked this exact one: Randy Wardell's Introduction to Stained Glass has been in print as a teaching manual since 1985 and still sits at 4.7 stars, though only across 59 reviews. It covers both copper foil and lead came, so roughly a third of it will not apply to suncatchers. Buy it as the book you keep next to the bench rather than the one you read through in an evening.
Neither book will teach you to cut glass. That's your hands and roughly ten sheets of practice. What they will save you is the fortnight you'd otherwise spend discovering by accident that pattern shears exist and that they trim a sliver out of every line so the foil has somewhere to live.
The Bits Nobody Mentions Until You're Already Soldering
Why does solder refuse to stick in some spots and run fine in others?
Almost always the foil, not you. Copper oxidises, and tape that's been sitting open in a damp room develops a dull film that solder simply won't wet, however good your iron is. Dip the foiled pieces in a quarter cup of white vinegar with a quarter teaspoon of salt dissolved in it, swirl for about thirty seconds, then rinse and dry - the copper comes back bright and takes solder normally. Keep the roll in a sealed bag between sessions, and try to solder within a day or two of foiling, because humidity softens the adhesive as well.
Do I really have to grind every piece before I foil it?
No, and this is the single most repeated piece of wrong advice in the craft. Copper foil sticks to unground glass perfectly well; cut a shape, tape it, and watch it hold. Grinding does two other jobs: it knocks the jagged nibs off an edge so the foil doesn't tear as it goes over them, and more importantly it brings pieces to a shape that actually meets its neighbour. If your cut shapes already sit together with only hairline gaps, a sharpening stone to deaden the edges is enough for a first suncatcher.
Is that smoke coming off my iron lead?
No. Lead boils far above the temperature you're working at, and a foil seam runs somewhere around 360 to 410 degrees Celsius. What you're watching is vaporised flux. It's still worth clearing, because flux fumes are acidic and will leave your throat scratchy after a long session, so a fan or an open window earns its keep. The lead risk in this craft is swallowing it rather than breathing it, which is why the rule is wash your hands and never eat at the bench.
Why has a white haze appeared on my seams weeks after I finished?
That's flux you didn't wash off, slowly weeping back out through the solder. It's harmless and genuinely infuriating, and it always seems to pick the piece you were proudest of. Scrub the finished panel with ordinary washing-up liquid and a green pan scourer until it foams properly, rinse it, then dry it with paper towel before going anywhere near patina or wax. Skip that step and the patina goes patchy too, for the same reason.
People Worth Following Into This Hobby
Real practitioners we found while researching this setup — people who do the work, show their process, and publish on sites they run themselves. No sponsorships, no affiliations; we just think they're worth your time.
Runs weekly beginner suncatcher and copper-foil workshops at Caveman Glassworks in Centerville, Texas, and writes up the exact errors his students make in class.
His foiling post covers the two failures this setup's FAQ warns about - foil that lifts because it was never burnished, and tape overlapped half an inch at the ends instead of an eighth.
Makes stained glass in central Texas and publishes her own patterns alongside long written tutorials on foiling, wirework and hanging finished panels.
Her copper foiling guide is the next thing to read once the tape is on the bench, and she covers attaching chains and jump rings, which is the step that actually gets a suncatcher into a window.
Has taught stained glass for over twenty years and answers reader questions in public, with hundreds of comments underneath her tutorials on cutting, foiling and soldering.
Her page on oxidised foil is where the vinegar-and-salt rescue in this setup's FAQ comes from, and it is the first place to look when solder stops wetting the copper.
Works stained and fused glass out of a converted Wisconsin garage and writes up the studio decisions behind it, from heating the space to tracking kiln firings.
Her post on the difference between stained and fused glass settles the question most beginners hit when they start browsing glass sheets and wonder why some are sold as fusible.
Love what you see here? Save individual picks with on any item, or copy everything to a list of your own in one click — great for coming back to later, or dropping as a not-so-subtle hint.