Resin Art: Glossy, Impressive Results With No Experience
Pour, Swirl, Wait: The Craft That Finishes Itself
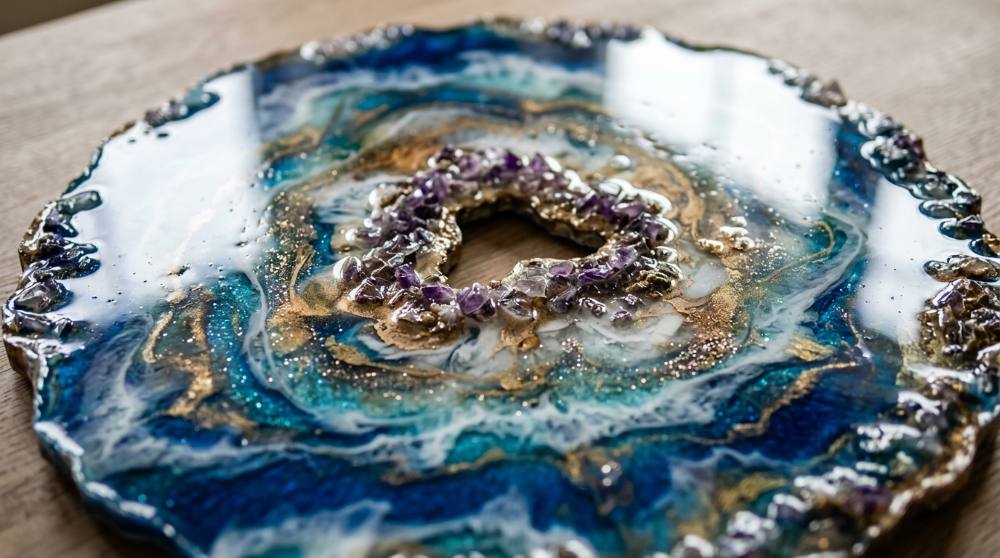
The glassy stuff behind every geode coaster on your feed was invented for false teeth. Chemists in the 1930s developed epoxy resin for dental fixtures, industry adopted it as an adhesive, and by the 1950s painters were pouring pigmented epoxy in layers like liquid stained glass. The craft version — coasters, jewelry, whole tabletops — took off much more recently, once cured pieces started photographing like polished gemstones online. The strangest part of the hobby is its rhythm: you mix two liquids, stir in color, pour, and then you're done touching it. The chemistry finishes your artwork overnight while you sleep.
Here's what nobody tells first-timers: the pour is the easy part. Almost everything that can go wrong happens at the measuring cup, minutes before any art occurs. If you've tried acrylic pouring and fluid art, the swirling will feel familiar, but resin is stricter about ratios and far more generous with shine. Get the two parts equal and stirred properly, and a first-ever coaster can look shop-bought.
Our philosophy stays stubborn: buy little, pour soon. A quart of 1:1 epoxy, one coaster mold, marked mixing cups, nitrile gloves, and something to protect the table — that's a complete first month.
Every pick below sits in pizza-night price territory, deliberately. Resin has a gravitational pull toward overbuying — there's a reason it features among the art supplies beginners waste money on — so this list sticks to things that get used up, not shelved.
Crystal-clear two-part epoxy resin kit with a simple 1:1 mix ratio


A two-part casting kit: one bottle of resin, one of hardener, combined in equal volumes to set into a hard, glass-clear surface within about 24 hours. Look for a 1:1 mix ratio by volume, low odor, and an anti-yellowing formula — those three things decide whether early projects cure properly and stay clear. A quart-sized kit covers several coaster sets without a big upfront spend.
Silicone coaster molds with a matching holder mold for resin casting
Flexible silicone molds shape liquid resin into round, square, and octagonal coasters, plus a holder to store the finished set. Glossy-finish silicone gives cured pieces a shiny face straight out of the mold, no polishing needed. Check that molds are thick enough to hold their shape when full — thin ones bow and produce warped coasters.
Reusable silicone measuring and mixing cups with stir sticks
Graduated silicone cups for measuring the two resin components separately and then mixing them together. Silicone beats disposable plastic for one practical reason: leftover resin cures in the cup and peels out in a single satisfying sheet, so each cup survives dozens of pours. Clear milliliter markings matter more than capacity — accurate measuring is the whole game.
Disposable nitrile gloves for handling liquid resin


Powder-free nitrile gloves protect skin during measuring, mixing, and cleanup. Nitrile specifically — latex degrades on contact with epoxy components, and repeated skin contact with uncured resin can build into a lasting allergy. A 100-count box covers many sessions, and a fresh pair per pour is the habit worth forming from day one.
Large silicone work mat to protect the table under resin pours
A nonstick silicone sheet that covers the work surface and catches drips, overflows, and stray glitter. Cured drips peel off silicone cleanly, so the mat resets itself between sessions instead of ending up in the trash like newspaper or plastic sheeting. Go big: a mat about two feet wide fits a mold, both cups, and the inevitable mid-pour chaos.
These five things take you from sealed bottles to a demolded set of coasters in a weekend, most of it spent waiting. Pick a spot with decent airflow and no foot traffic — a cure takes about 24 hours, and dust or cat hair that lands in wet resin stays there forever. Our guide to carving out a beginner art space at home helps if the kitchen table has to do double duty. Once mixing feels routine, color is the obvious next step.
Where the Color and Sparkle Come In
Clear resin is technically finished art, but nobody stops there. Watching a knife-tip of gold mica bloom through a transparent cup is the moment most people get hooked. A warning about the shopping, though: colorants are where budgets quietly die, because every jar costs little and none of them feel optional. My advice is to skip alcohol inks entirely at first — they're flammable around heat tools and punishingly easy to overdose — and let mica, glitter, and a few pressed flowers carry your first ten pieces. Resin also flatters other handmade work: plenty of makers give air dry clay pieces a glassy top coat that makes matte clay look kiln-glazed.
Mica powder set for coloring epoxy resin


Pearlescent mineral powders that tint clear resin with shimmering, semi-translucent color — the signature look of geode coasters and ocean pours. A knife-tip per cup is usually enough; the pigment is far more concentrated than it looks. Sets of small jars beat one large jar for beginners, since experimenting across colors teaches more than depth in one.
Small craft heat gun for pulling air bubbles out of poured resin


A low-power hot-air tool waved briefly over fresh resin makes trapped bubbles rise and pop before the surface sets. It's gentler and easier to control than a butane torch, and it's the safe choice around flammable colorants. Quick sweeping passes are the technique — parking it in one spot overheats the resin and can leave ripples.
Real pressed dried flowers for embedding in resin


Sheets of naturally pressed, fully dried blooms and leaves sized for coasters, pendants, and bookmarks. Dryness is the critical spec: any remaining moisture reacts with resin and clouds the piece from the inside. Variety packs that include tweezers save real fumbling — petals are nearly weightless and cling to gloved fingers.
Fine and chunky glitter set for geode effects in resin


An assortment of fine and coarse polyester glitter jars for building the crystalline rings of geode-style pieces. Mixing grain sizes within one ring is what creates the faceted, mineral look — fine glitter reads as sparkle, chunky reads as crushed crystal. Heavier flakes sink in deep pours, which actually works in your favor in layered geode designs.
None of this shelf is mandatory, and that's rather the point — add one jar at a time as projects ask for it. If embedding little handmade charms sounds more fun than pure color work, skim the comparison of air dry and polymer clay to pick a clay worth pairing with your resin. Expect your taste to change fast. The colors you buy today are rarely the ones you reach for in month two.
Why Is My Resin Still Sticky? And Other First-Pour Mysteries
Why is my resin still soft or sticky two days after pouring?
This is nearly always a measuring or mixing failure, and it happens because equal-looking amounts in mismatched cups aren't actually equal. Off-ratio resin can't complete its chemical reaction, so the piece stays tacky or bendy forever — there's no waiting it out. Measure both parts separately in marked cups, then stir for a full three minutes while scraping the sides and bottom repeatedly. Unmixed resin hiding on the cup wall is the classic culprit.
Why did my flowers turn brown or grow cloudy halos inside the resin?
Moisture. Anything that isn't bone-dry keeps reacting after the pour, and trapped water shows up as fog, bubbles, or browning around the petals. Fresh or half-dried flowers are the trap — they look fine going in and spoil the piece a day later. Use properly pressed, fully dried botanicals, and seal porous items like paper or photos before embedding them.
My coaster cured with a wavy, lopsided surface. What happened?
Resin self-levels by flowing downhill, so it faithfully records every tilt in your table. A surface that looks flat to the eye can be off by enough to leave one coaster edge visibly thicker than the other. Check the work surface with a spirit level or a phone level app before pouring, not after. Elevating molds on small cups also keeps them clear of drips and makes fine leveling easier.
What do I do with leftover mixed resin — can it go down the sink?
Never. Liquid resin hardens inside pipes and pollutes water before it cures, and this catches beginners because half a cup of leftovers feels like dishwater. Let the excess cure fully in its mixing cup instead, then pop out the hardened puck and bin it as ordinary solid waste. Better yet, keep a couple of tiny spare molds nearby and turn every leftover into a bonus keychain.
Love what you see here? Save individual picks with on any item, or copy the whole list to your own wishlist in one click — great for coming back to later, or dropping as a not-so-subtle hint.