Your Egg Will Look Awful Right Before It Looks Incredible
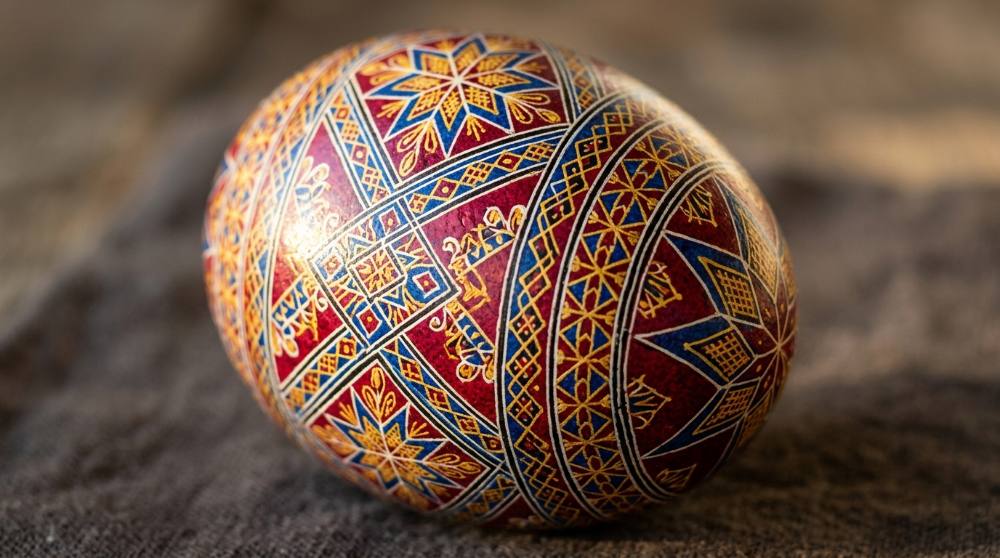
A pysanka is a raw chicken egg written on with hot beeswax and then walked through a run of dyes, one colour at a time, until the shell is nearly black and the design is completely hidden. Ukrainian families have done this for generations at kitchen tables in the weeks before Easter, and the name comes from pysaty, to write: you don't paint a pysanka, you write it. The Hutsuls of the Carpathians tell it like this: a monster sits chained to a cliff, and every year his servants go out to count how many pysanky the world has made. Too few, and the chains go slack. The town of Kolomyia in western Ukraine takes the craft seriously enough to keep its pysanka museum inside a building shaped like a giant egg.
Here's the part nobody warns you about. For most of the evening the egg gets worse, not better, and by the last dye bath it's a sooty dark lump covered in greasy black lines. Then you hold it beside the flame, wipe once, and the wax lifts away in a warm smear to show crimson and gold underneath. I've watched grown adults make an involuntary noise at that moment.
Start small. One kistka, one cake of beeswax, a five-colour dye set and a candle will carry you from a white egg to a finished one, and your kitchen already holds the rest: vinegar, a pencil, a few jars, a big metal spoon, paper towels.
Nothing below costs enough to sting if the hobby doesn't stick, and the whole starting set lands somewhere around the price of a takeout dinner for two.
Where This Little Kit Can Take You
A few real moments and results from this hobby — made with tools no fancier than the ones below.
Two finished eggs, winter lightEvery white line on them sat under beeswax until the very last minute.
Reheating the kistka mid-lineThe lines look black because beeswax darkens the moment it meets the flame.
If you've done folk embroidery with its banded geometric motifs, the visual language here will look familiar: the same rhombs, meanders and eight-pointed stars run around an egg the way they run along a sleeve. The difference is that an egg has no seam to hide a wobble behind. Budget a whole evening for the first one, not twenty minutes.
The Short List You Actually Have to Buy
Four things, and none of them bend. The kistka is the stylus you melt wax into and draw with. The beeswax has to be beeswax, not whatever wax is already in the house. The dyes are proper pysanky dyes rather than the supermarket Easter tablets. And the candle is both your wax heater and, at the very end, the tool that performs the reveal. People who improvise one of the four usually end up writing the egg twice. If you like a process where nothing looks like anything until the last step, cyanotype sun printing has the same delayed payoff.
Disclosure: This section may contain affiliate links to Amazon. We may earn a small commission from qualifying purchases at no extra cost to you.
01Pick 01 of 10
medium-tip wax stylus for writing pysanky designs
A kistka is a small brass funnel on a handle that you heat in a candle flame, load with a shaving of beeswax and then draw with. Tip width decides line width, and a medium tip is the all-purpose size: fine enough for dividing lines and dots, wide enough to fill small shapes without taking all night. Look for a brass funnel that comes with a cleaning wire, because a blocked tip is the frustration every beginner meets first.
Why we picked this exact one: The BestPysanky 0.4 mm medium brass-tip kistka is the one I would hand a first-timer: the standard Ukrainian-made wooden-handle tool at around seven dollars, with the cleaning wire you will want by the second egg already in the packet. Its 4.6-star average is unusually steady for a tool this cheap. The wooden handle does char where it meets the flame, which is normal and a reminder that only the brass cone belongs in the fire.
Small square cakes of filtered beeswax, scraped into the stylus funnel a little at a time. Beeswax is used rather than any other wax because it grips a cool shell properly and, usefully, it darkens as it heats, so your lines stay visible against the dye. Filtering matters more than it sounds: wax straight from a hive carries debris that blocks a fine tip mid-line.
Why we picked this exact one: The Ukrainian Gift Shop three-pack is the wax most North American pysankary learn on: three one-and-a-half-inch cakes that will outlast dozens of eggs. It is pure filtered beeswax rather than a blend, which is what keeps a fine tip clear. Three cakes is more than a first season needs, but it is also the cheapest way to stop thinking about wax.
Pysanky dyes arrive as powder packets you dissolve in boiling water and usually acidify with a tablespoon of white vinegar; each colour then lives in its own jar and keeps for seasons. They are acid dyes meant for eggshell, which is where the deep saturated reds and blues come from. Read each packet before reaching for the vinegar, because one or two colours are ruined by it.
Why we picked this exact one: The Ukrainian Gift Shop five-colour set is the classic starter spread, and five powders is exactly the light-to-dark ladder a first pattern needs. Under seven dollars buys enough powder to mix five full jars, which is less than any ready-made kit and leaves you free to top up single colours later. Five is a real ceiling, though: you will want blue by about the third egg.
short beeswax taper candles for heating the stylus
The candle does two jobs here. It keeps the brass cone of the stylus hot enough to melt wax while you work, and at the end it melts the whole waxed shell off the finished egg. Short tapers around six inches are easier to work beside than tall dinner candles, and beeswax ones smoke noticeably less than paraffin, which matters when the egg is an inch from the flame.
Why we picked this exact one: The DEYBBY six-inch beeswax tapers are the practical choice here, twelve candles for eighteen dollars in the short format pysankary prefer over a tall dinner candle. Beeswax costs more per candle than paraffin, which is the trade-off, but a cleaner flame is the entire point once soot starts landing on your work. They are a standard 0.9-inch diameter, so any ordinary holder takes them.
Lay all four out before you light anything, along with the kitchen bits: pencil, white vinegar, a jar per colour, a big metal spoon, a stack of paper towels. The mistake I see most often is buying two dye colours to save a few dollars, which leaves you with a two-tone egg and nothing to layer. If building a pattern in stages appeals, carving stamps for block printing runs on the same backwards logic: you commit to what stays blank before any colour lands.
What You Add Once the First Egg Survives
None of this is needed for egg number one, and I'd hold off until you know you like the process. These are the four things pysankary reach for next, roughly in the order the frustrations arrive: not enough line widths, a raw egg you'd rather not keep in a drawer for a decade, a shell too small for the pattern you want, and nowhere to put the finished ones.
05Pick 05 of 10
three-width stylus set for fine lines and filled areas
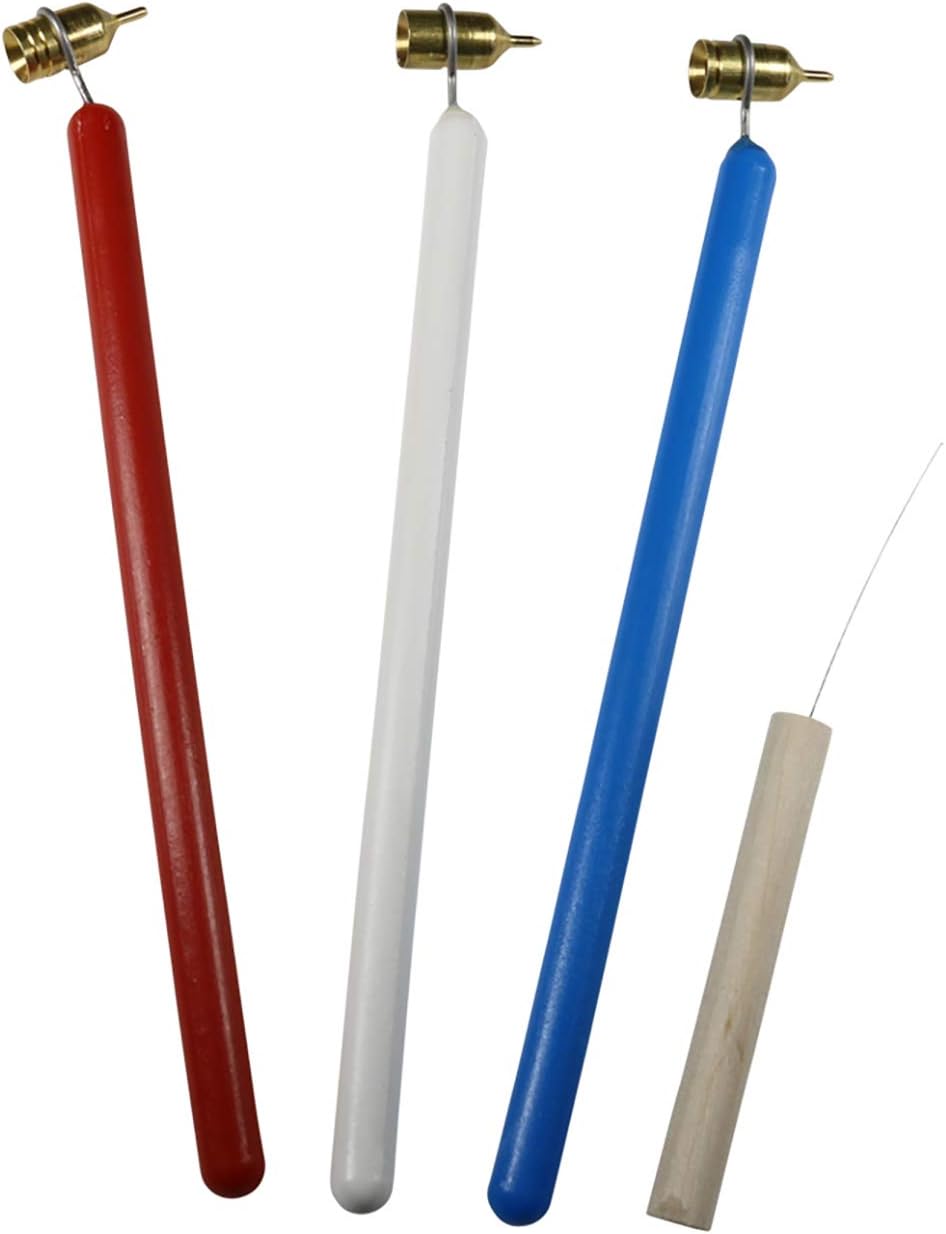
A set gives you a fine tip for outlines, a medium for dividing lines and a heavy one for filling solid areas and laying down round dots. Filling a large shape with a medium tip is slow and tends to leave pinholes that surface as dark specks after the final dye bath. Delrin-handled styluses are the modern alternative to wood: the plastic will not catch light in the flame, though it does carry heat into the wax faster.
Why we picked this exact one: The Ukrainian Gift Shop Delrin kistky set covers fine, medium and heavy in one twenty-five-dollar box and includes the wire-on-a-stick cleaning tool. Its 4.8 average is the strongest of any kistka listing I opened, and the colour-coded handles save you squinting at tips mid-egg. The honest caveat is that delrin heats faster than wood, and some writers find it overcooks the wax and spits, so keep the tip in the flame for a shorter count.
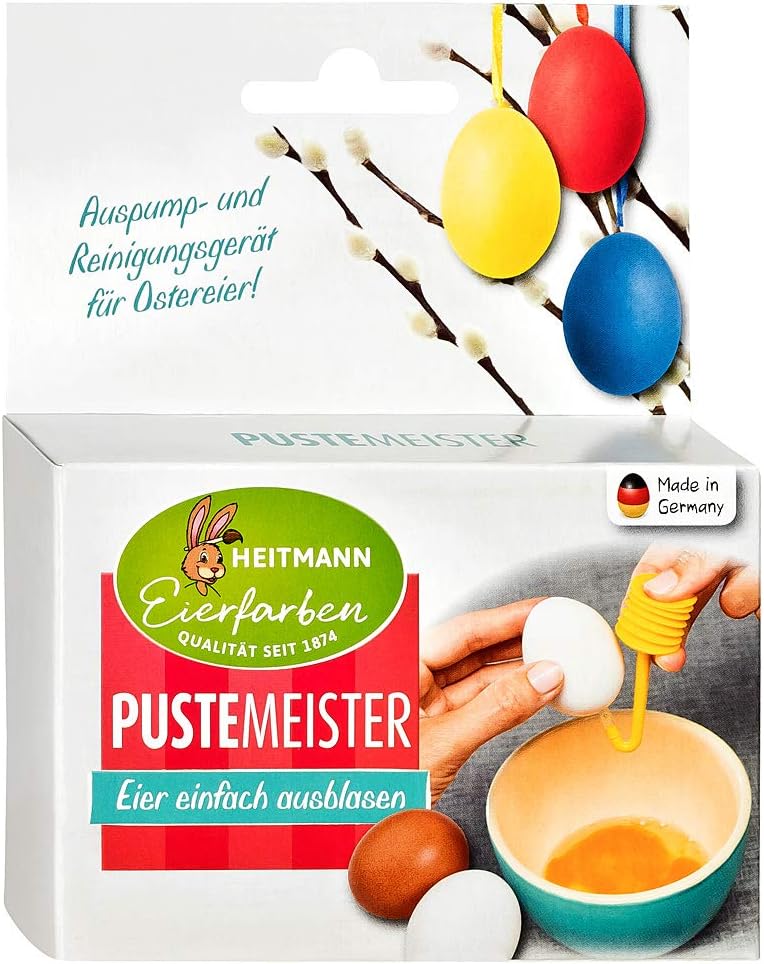
A small hand pump with a needle that forces air into a single drilled hole and pushes the white and yolk back out around it. Emptied shells are what you want if a pysanka is meant to last, because a full egg can leak or burst, and the smell is memorable. The same tool rinses the inside out with water afterwards.
Why we picked this exact one: The Heitmann Eierfarben Puste-Meister is the German bellows-and-needle tool that filled the gap left by the discontinued Blas-Fix in a lot of pysanky workrooms, and at about nineteen dollars with 440 ratings behind it, it is the least fiddly option I found. One hole instead of two means less to disguise on the finished egg. Blow the egg out while it is still white, not after dyeing, because spattered yolk on a finished pysanka is unrecoverable.
A goose shell gives you roughly twice the working surface of a chicken egg and a considerably tougher wall, so it tolerates repeated dye baths and a lot more handling. It arrives already emptied, which skips the pumping and the days of drying. The extra room is the real draw: a sixteen-part division that is cramped on a chicken egg has space to breathe here.
Why we picked this exact one: This BestPysanky blown goose eggshell costs about three dollars, which makes it the cheapest upgrade on the page by a wide margin. Experienced writers describe goose shells as forgiving, taking the repeated dye baths and backwashing that would wreck a thin chicken egg. It does arrive with a drilled hole you need to plug with wax before the first dye bath, or dye gets inside and seeps back out through the shell.
Turned wooden rings that hold an egg upright at a slight tilt, the way a shop would display one. A finished pysanka rolled into a bowl picks up scuffs against its neighbours, and the pattern only reads properly when the egg stands on its axis. Six is about right for a first season.
Why we picked this exact one: The JUXYES six-pack of 32 mm walnut-coloured sphere stands is a plain, cheap way to get finished eggs off the table, nine dollars for six and a 4.7 average. They cost less than most stands sold specifically as pysanky stands. They are generic sphere holders rather than purpose-made egg rings, so a very small chicken egg can sit a touch loose in one.
Two things are genuinely worth skipping at this stage. An electric stylus draws finer, steadier lines than any flame-heated kistka and costs well over a hundred dollars, which makes it a sensible year-two purchase and a waste in week one. An egg lathe is worse: it rules your dividing lines for you, so you never learn to do them, and a slightly uneven division is part of what makes a hand-written egg look hand-written. If you want another craft where tiny, patient work pays off quickly, coiling paper strips into quilled designs scratches a similar itch.
Open Flame, Hot Brass, and Dye That Doesn't Come Off
Pysanky is a candle craft, and candle crafts make people casual. The working position puts your fingers, your sleeve and sometimes your hair a few inches from a live flame for an hour or two at a stretch, and the brass cone you keep dipping into it stays hot long after you put it down.
Keep the table clear of loose paper. Paper towels are part of the kit, but a drifting stack beside a candle is how workshop fires start, so park the drying towels over by the dye jars instead of under your elbow. A long lighter beats matches: nothing hot to throw away, and you don't have to lean across a neighbouring flame to light your own. Wooden handles char where they meet the fire, which is normal, but only the brass should ever be in it.
The dyes are a milder worry with one real exception. In solution the aniline dyes are an irritant rather than a poison, but the dry powder is a toxin you don't want floating around, so cut the packet open at the end away from the powder and mix somewhere ventilated. Wear something you don't mind staining. And these are not food dyes: an egg that has been through a pysanky bath is decoration, never breakfast.
Melting the wax off at the end is where the small burns happen, and emptied shells are the risky ones. With no white and yolk inside to soak up the heat, the shell gets hot in seconds, and you'll want to set it down and let it cool partway through. A child can do the waxing with an adult beside them; the wax removal is not a child's job. Blow the candle out when you walk away, every single time.
Two Books Worth Owning
Pysanky is one of those crafts where the method is simple and the patterns are everything, and patterns are hard to invent cold. A book hands you a tested sequence: which colour order, where the divisions fall, what gets waxed when. That's the same reason people buy stamp sets rather than draw freehand when they make their own Christmas cards - the design problem is the slow part, not the technique.
09Pick 09 of 10Book worth reading
step-by-step beginner guide to writing pysanky
A short, photo-led walk through the whole process: choosing and preparing an egg, mixing dyes, handling the stylus and varnishing at the end. The useful part for a newcomer is seeing the egg at every stage, since the half-waxed middle stages are the ones that look wrong and convince people they have failed.
Why we picked this exact one: Lorrie Popow's Beginner Pysanky is the one to start with: she is a working egg artist who has been publishing tutorials and videos on her own site for years, so it reads as a practitioner's sequence rather than a repackaged roundup. It holds a 4.6 average across 90 ratings. At around thirty-four dollars it costs more than the entire essential kit, which is worth knowing before you order both at once.
Eight complete designs laid out as patterns, with the stages shown rather than only the finished egg. Patterns are the genuinely hard part to improvise: dividing a curved shell into eight or sixteen even sections takes practice before you can invent your own geometry.
Why we picked this exact one: Lorrie Popow's Patterns for Ukrainian-Style Easter Eggs is the companion to her beginner book, covering eight intricate designs and carrying a 4.7 average over 57 ratings. It is the better second purchase than another how-to, since the method is short and the patterns are endless. Free step-by-step patterns do circulate online, so skip it if you would rather hunt for those yourself.
Two is plenty for a first season, and between them you'll have more designs than evenings. Pysanky also sits oddly well beside Christmas crafting: the dye jars keep, the kistka doesn't care what month it is, and a written egg is a stranger and better thing to hand someone in December than in April. If you're still choosing, our round-up of the best Christmas craft to start with lays out the realistic options.
Why Your First Egg Will Probably Lie to You
My lines come out scratchy and wobbly. Is that just my hand?
Usually it's your stroke length rather than your hand. Beginners draw in short nervous dabs because they're watching the tip, and every stop leaves a thickened join that reads as a wobble once dye goes on. Experienced writers use long, broad strokes and turn the egg instead of the wrist. Pencil guidelines underneath are there to be followed loosely, and a rubber band stretched around the shell gives you an even division to pencil against while your eye catches up.
Why did colour creep in under my wax?
The egg sat in the dye too long. Dye will eventually work its way beneath a wax edge, and the usual cause is giving every bath the same length. One to five minutes is the working range: yellow wants about three as a base coat, bright red takes in a minute or two and develops an odd glittery residue if you forget it, and only the last dark bath should sit longer. If a colour hasn't taken within five minutes, the shell is the problem and more time won't fix it.
Do I have to dye light to dark, or is that just tradition?
It's physics, not ceremony. Each bath colours everything the wax isn't covering, so a shell can only get darker or muddier from there, and you can't put yellow back over blue. The odd exception is orange, which is mixed without vinegar and will actually strip green back off a shell, which is why experienced writers keep a spare jar labelled as an orange rinse. Plan the whole colour order on paper before you light the candle, because that's where most failed eggs are really lost.
Tiny beads of moisture keep appearing on my finished egg and ruining it. What is that?
Two causes, and neither is your technique. A cold egg sweats the moment it meets warm room air, so eggs should stand out for hours before any wax touches them - overnight is better. The slower version shows up days later on a full egg that was already old when you started, as the contents keep breathing through the shell and push moisture out through the dye. The fix is to blow the egg empty and plug the hole properly, which is what you'd do anyway to keep it longer than a year.
Can I varnish the egg to make the colours pop?
Yes, but only with an oil-based varnish. Anything water-based will run your dyes, because the colours are water-soluble acid dyes sitting on the surface of the shell rather than paint soaked into it, and one wet coat can smear the lot. Several thin coats beat one thick one, which tends to blob and yellow at the edges. If you're emptying the egg as well, put one coat on and let it dry first, since rinsing the inside out under a tap fades the dye around the hole.
People Worth Following Into This Hobby
Real practitioners we found while researching this setup — people who do the work, show their process, and publish on sites they run themselves. No sponsorships, no affiliations; we just think they're worth your time.
Has written pysanky since the age of seven and documents every part of the craft, from dye chemistry to regional folk patterns, across a 400-page personal site.
Her step-by-step page walks a beginner through one simple egg from pencil division to the final wax removal, which is exactly the sequence this setup asks a reader to attempt with their first kistka.
Publishes step-by-step instructions for more than 35 pysanky designs and answers beginner questions in a long-running FAQ built from her own and other egg artists' experience.
Her FAQ settles the two questions this setup's readers hit first - traditional versus electric stylus, and why only oil-based varnish is safe on dyed shells.
Has written pysanky for about 28 years from Jamestown, North Dakota, teaches local classes and publishes her own process notes, symbol guide and free colouring pages.
Her how-it-is-made page names the exact supplies and the all-in-one delrin kit a beginner can start from, which corroborates the stylus choice in the essentials above.
Writes pysanky and makes ceramics, shows her own collection and explains the wax-resist sequence and the meaning of traditional symbols on her site.
Her technique page describes the light-to-dark dye ladder in one clear paragraph, which is the single idea a first-time reader of this setup most needs to get right.
Love what you see here? Save individual picks with on any item, or copy everything to a list of your own in one click — great for coming back to later, or dropping as a not-so-subtle hint.