Cyanotype Setup for Beginners

Cyanotype Setup for Beginners

DariaCurated by Daria
Jump to the 11 picks

The Sun Does the Developing

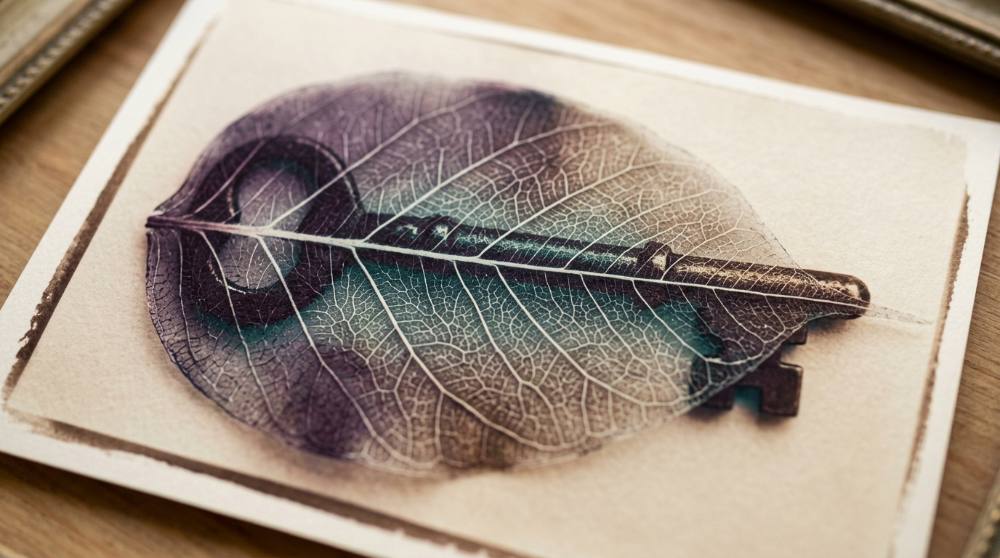
Brush two mixed liquids onto a sheet of paper, lay a fern on it, and leave it in the sun. Ten minutes later you rinse it under the tap and watch a white silhouette surface out of deep Prussian blue. That's cyanotype — the 1842 invention of astronomer Sir John Herschel, and a good place to start if you're still working out what cyanotype actually is. A year on, botanist Anna Atkins used it to make the first book ever illustrated with photographs, pressing seaweed onto coated pages. Engineers then ran the same chemistry for a century to copy their plans — it's why we still call a plan a blueprint.

One decision shapes this whole shopping list: sun or lamp. Start with the sun. It costs nothing, and a weak sky just means a longer exposure, not a failed one — people print through northern winters this way. Buy a UV lamp only once grey weeks actually block you, or when you want exposures you can repeat to the minute; the full sunlight versus UV lamp comparison digs into that call. Everything below assumes daylight and a kitchen table.

Our philosophy here is stubbornly minimal: the chemistry, one pack of the right paper, a foam brush and a pane of glass are a complete working setup. Nothing else on this page is required for a first print.

The picks below were chosen so that finding out this isn't your hobby stays a cheap discovery — the one splurge is the paper, and there's a reason for it.

You don't need a darkroom at any point; a dim room does for the coating and the kitchen sink does for the rest. The precision level is closer to baking than chemistry class. First, the four things that do the actual work.

Two Bottles, a Brush, a Pane of Glass

The chemistry itself is the easy part: fill both bottles with water, wait a day, then mix a few millilitres of A and B right before you coat. Mixed sensitizer dies in hours, but the stock bottles keep for months and outlast most people's first year. The real trap is paper. Most watercolour pads are buffered with chalk to protect drawings from acid, and that same alkaline buffer quietly kills this process — prints come out pale, or wash clean off. What you want is unbuffered paper in the 200–300 gsm watercolour range, sturdy enough to soak. It's the least glamorous line on this list and the one that decides everything.

If the total here stings, a leaner path exists — there's a workable cyanotype setup for under 40 euros — but these four are the version nobody regrets.

Disclosure: This section may contain affiliate links to Amazon. We may earn a small commission from qualifying purchases at no extra cost to you.
two-part cyanotype sensitizer chemistry for coating paper and fabric

Pick 01 of 11

two-part cyanotype sensitizer chemistry for coating paper and fabric

Two bottles of premeasured powder, one for each half of the classic iron formula. You fill both with water, wait a day for everything to dissolve, then mix small equal parts of A and B right before coating. Look for premeasured components in dark bottles: they take the weighing out of the chemistry and keep light off the stock solutions.

Why we picked this exact one: The Jacquard Cyanotype Sensitizer Set is the two-bottle kit textile printers and sun-print hobbyists have standardized on, and it holds a 4.7-star average across roughly 2,900 reviews. The powders come premeasured in their own mixing bottles, so setup is add water, shake, and wait a day. The bottles are dark enough that you can't see how much is left, which is mildly annoying, but the contents outlast the doubt: makers report hundreds of coated sheets per set.

See it on Amazon
unbuffered 100% cotton paper for hand-coated iron printing

Pick 02 of 11

unbuffered 100% cotton paper for hand-coated iron printing

A heavy cotton rag paper made without the alkaline calcium-carbonate buffer found in most watercolour pads. At around 300 gsm it soaks for ten minutes without falling apart or curling into a tube. Buying paper for this process, unbuffered is the one word that matters; surface texture and brightness are taste.

Why we picked this exact one: The Hahnemühle Platinum Rag pack is the exact paper the sensitizer kit's own instruction booklet names as the best surface for cyanotype: 300 gsm, 100% cotton, and made unbuffered specifically for iron-based printing. Buyers rate it 4.8 stars, though the pool of reviews is small. At about $1.50 a sheet it's the one real splurge in this kit, so save it for prints you care about and test exposures on cheap paper.

See it on Amazon
wide foam brushes for spreading sensitizer in thin, even coats

Pick 03 of 11

wide foam brushes for spreading sensitizer in thin, even coats

Simple two-inch foam heads on wooden handles, sold in bulk. The foam lays down a thin, even film of solution without brush marks unless you want them, and the price means you can keep a dedicated set that never touches anything but chemistry. Rinse after each session and a single brush survives many coatings.

Why we picked this exact one: The Bates 2-inch foam brush 16-pack costs about six dollars and carries 4.6 stars across more than 13,000 reviews, which for a foam brush is as close to a settled question as shopping gets. Sixteen heads means a fresh one whenever the last gets stained stiff. The foam does eventually tear at the seam with hard use, but at under forty cents a brush that's a shrug, not a flaw.

See it on Amazon
glass and backing boards for pressing prints flat during exposure

Pick 04 of 11

glass and backing boards for pressing prints flat during exposure

Frameless clip-style picture frames are the cheapest way to buy what this process actually needs: a clean pane of real glass with a stiff backing board. Paper goes on the board, objects go on the paper, glass goes on top, clips hold the sandwich shut. Several in a pack means several prints can expose at once.

Why we picked this exact one: The Ambiance Gallery clip frames put six 8×10 panes of real glass with backing boards at under six dollars a set, rated 4.4 stars by roughly 900 buyers, and the display clips double as printing clamps. Skip anything sold as UV-protective or archival glass here: that coating blocks the very light the print needs. The glass edges arrive unpolished, so handle them by the faces and tape an edge if it bothers you.

See it on Amazon

Coat in a dim room — an ordinary lamp across the room is fine, a sunny window is not — and let the sheets dry in the dark until the coating is a matte green-yellow. Outside, the exposed border slowly shifts from green to blue to a dull bronze-grey; that bronze is your cue to stop. Then rinse for a good five minutes, changing the water until it runs clear, and don't panic at the pale first look: the blue keeps deepening for a day or two. Some printers add a splash of citric acid to the first wash to brighten the whites — useful, but go easy, since an over-acid bath can fade the print you just made.

When the Weather Stops Cooperating

Nothing in this section is needed for a first print — which is exactly why it's the section beginners overspend on first. The honest order is: make prints in the sun for a few weekends, notice what actually annoys you, then fix that one thing. For most people the annoyance is weather, and the fix is a UV panel that turns exposure into a number you can repeat in January. For others it's the ceiling on subject matter, and the fix is transparency film: once a phone photo can become a negative, portraits and street shots join the ferns. The gloves you'll simply be glad of the first time you see what the solution does to fingertips.

395 nm UV exposure lamp for printing indoors in any weather

Pick 05 of 11

395 nm UV exposure lamp for printing indoors in any weather

A flat LED panel that emits at 395 nanometres, the near-UV band this chemistry answers to. Panels like this are built for exposing screen-printing emulsions, which is the same job: even UV over a flat area at a fixed distance. Hang it above the printing sandwich, run a timed exposure, and December behaves like July.

Why we picked this exact one: The Caydo 96-LED panel is a screen-printing exposure unit whose own listing names cyanotype as a use, and its 395 nm output sits right where the sensitizer is most responsive. It holds 4.3 stars across a few hundred reviews at a price well under the dedicated photo-supply units. It is not a calibrated instrument, so plan on one session of test strips to find your minutes, and don't stare at the lit panel.

See it on Amazon
inkjet transparency film for printing digital negatives

Pick 06 of 11

inkjet transparency film for printing digital negatives

Clear film that runs through an ordinary inkjet printer. You invert a photo to a negative on your phone or computer, print it on the film, and contact-print it exactly like a pressed leaf. Only one side takes ink; pinch a corner with damp fingers and print on the side that feels tacky.

Why we picked this exact one: The Uinkit 30-sheet inkjet film pack is the budget standby for homemade negatives, rated 4.6 stars by nearly a thousand buyers at about eight dollars. The quick-dry coating takes dense black ink without pooling, which is what a contact negative needs. One hard limit: it's for inkjet printers only, and a laser printer will melt it.

See it on Amazon
disposable nitrile gloves for mixing and coating sessions

Pick 07 of 11

disposable nitrile gloves for mixing and coating sessions

Powder-free nitrile exam gloves in a pull-out box of one hundred. Nitrile shrugs off the iron salts, fits close enough for brush work, and a pair costs pennies, so there's no reason to reuse a stained one. Latex-free matters if anyone in the house has the allergy.

Why we picked this exact one: The Supmedic Soft Max 100-count box carries 4.7 stars across nearly 30,000 reviews at around nine dollars, which settles the commodity question. These are thin exam-weight gloves, right for brushing and rinsing rather than scrubbing trays; double up or slow down if you're wrestling wet fabric. The soft stretch fit keeps brush control close to bare-handed.

See it on Amazon
pre-coated sun print paper for a first print with zero preparation

Pick 08 of 11

pre-coated sun print paper for a first print with zero preparation

Paper that arrives already sensitized, with a clear panel to press your arrangement flat. You skip mixing, coating and drying entirely: arrange, expose, rinse. Sheets are smaller and thinner than self-coated rag paper, which makes them practice material rather than the final destination.

Why we picked this exact one: The LIGHOON 24-sheet sun print kit runs about ten dollars, includes the pressing panel, and holds 4.4 stars across 550-plus reviews with over a thousand sold monthly. It's the lowest-stakes way to watch the process work the same afternoon the box arrives. The stock is noticeably thinner than artist paper and wants a gentle rinse, so treat these as sketches, not keepers.

See it on Amazon

One more trick worth knowing: a drop of hydrogen peroxide in the final rinse snaps the blue to full depth on the spot. It changes nothing about the finished print — waiting a day gets you to the same place — but as theatre for guests it's unbeatable. And if the negative-making side is what hooks you, that instinct has somewhere to go: a beginner film photography setup runs on the same contact-printing logic with silver instead of iron.

Printing the Sun onto Fabric

Sooner or later everyone wants the blue on something wearable, and fabric is genuinely a second skill rather than a bigger sheet of paper. Cloth needs longer exposures than paper and drinks more chemistry, and only natural fibres hold the image — on a polyester blend the print rinses away with the wash water. The painless entry is pre-sensitized cotton sheets: exposure and rinsing work exactly as they did on paper, with the coating already done for you. When those feel easy, the bottle chemistry plus cheap all-cotton cloth opens up totes, tea towels and quilt squares for pennies per attempt.

pre-sensitized cotton fabric sheets for sun printing on textiles

Pick 09 of 11

pre-sensitized cotton fabric sheets for sun printing on textiles

Cotton sateen already treated with the sensitizer, cut to letter size and backed so it stays flat. Expose it like paper, rinse, and the print is part of the cloth. Sheets sew into quilt squares, patches, or framed textile prints without any coating work.

Why we picked this exact one: Jacquard's Cyanotype Fabric Sheets are the quilting world's standard entry into printed cloth, rated 4.7 stars by around 500 buyers. The sateen has a tight, smooth face that holds fine detail better than loose weaves. At roughly $2.35 a sheet they're too dear for endless experiments, which is exactly when the bottle chemistry and your own cotton take over.

See it on Amazon
unbleached 100% cotton yardage for coating your own textile prints

Pick 10 of 11

unbleached 100% cotton yardage for coating your own textile prints

Plain unbleached muslin, sixty-three inches wide and sold by the yard. Natural cotton takes the chemistry well once it's been washed to strip the factory sizing. Two yards cuts into dozens of test squares, so experiments stop feeling expensive.

Why we picked this exact one: The PEASUG 63-inch unbleached muslin gives two full yards of all-cotton cloth for about ten dollars, rated 4.5 stars across 700-plus reviews. Per test square it's the cheapest natural-fibre surface you can buy. It's utility cloth with the occasional slub and a prewash requirement, which honestly suits the handmade look of a brushed-on print.

See it on Amazon
blank cotton tote bags for prints that leave the house

Pick 11 of 11

blank cotton tote bags for prints that leave the house

Plain natural-cotton totes with a flat front panel, sold in bulk for craft printing. The panel is the easiest fabric surface to coat and expose: no seams, no curves, and the finished bag actually gets used. A dozen blanks covers a summer of gifts.

Why we picked this exact one: The NPBAG 12-pack of 15×16 natural cotton totes runs about seventeen dollars and holds 4.5 stars across more than 3,300 reviews. The bags are lightweight craft-weight cotton rather than heavy canvas, which coats and rinses more easily even if it won't haul bricks. Slide cardboard inside before coating so the chemistry doesn't bleed through to the back panel.

See it on Amazon

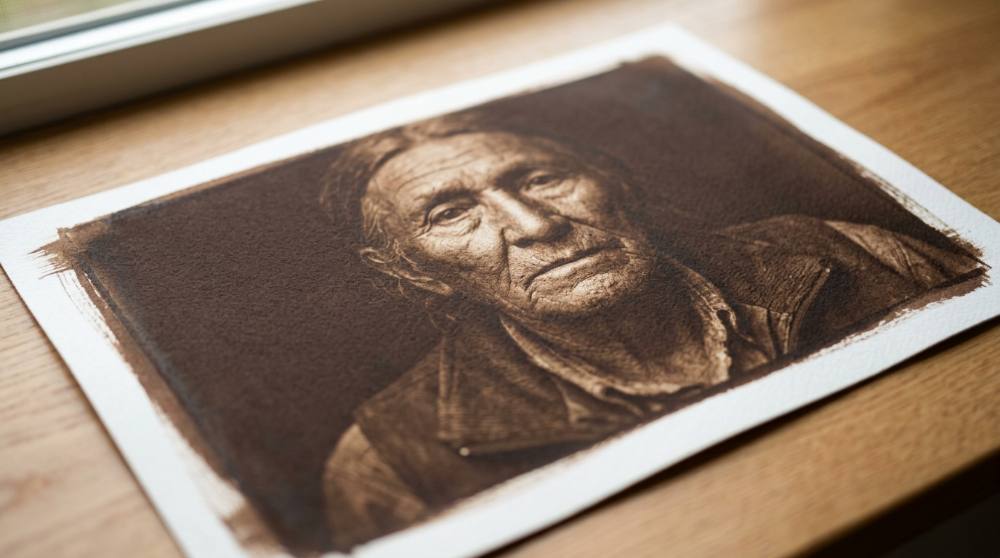
Treat finished fabric prints like the old textiles they chemically are: wash cold and seldom, with a gentle pH-neutral soap — strong alkaline detergents bleach Prussian blue toward yellow. A tote that's coated on a flat panel, exposed a little longer than you think, and washed like a vintage quilt will keep its blue for years. And once fabric feels routine, the sibling processes start calling — it's worth seeing how cyanotype compares with Van Dyke brown and salt printing before you buy another bottle of anything.

Low-Drama Chemistry, Two Real Rules

You'll read everywhere that cyanotype is non-toxic. That's folklore, and it's worth replacing with the two facts that matter. Potassium ferricyanide, despite the alarming name, is genuinely low-hazard on its own — safety sheets rate it a 1 out of 4, in the same lethal-dose neighbourhood as table salt — because its cyanide groups are locked to iron. The lock opens two ways: strong acid, or high heat. Meet either and it can release hydrogen cyanide gas. So rule one: concentrated chemistry never meets strong acids or a stove. The dilute citric rinse on a washed print is normal practice; pouring acid into your stock bottles, or warming solution to dissolve it faster, is how the one real hazard in this hobby gets invited in.

Rule two is the drain. Leftover sensitizer and the first strong rinse aren't drain-safe — collect them in a jug and hand it to household hazardous-waste collection instead of the sink. Beyond that, the habits are ordinary: nitrile gloves on for mixing and coating, no kitchen utensils on chemistry duty ever again once borrowed, bottles labelled and shelved away from kids.

Two smaller notes. The solution stains skin and clothes a yellow-brown that outlasts several washes, which is a nuisance rather than a hazard — but it argues for an apron. And if you do add a UV lamp, treat it like the sun it's imitating: don't work with your face over the lit panel, and keep eyes off the LEDs.

Why First Prints Die (and How Yours Won't)

Why did my image wash straight off in the rinse?

Nine times out of ten this is underexposure: the iron never fully converted, so the water carried it away. Beginners pull prints early because the exposed coating looks oddly grey and 'wrong' — but that dull bronze-grey is precisely what done looks like. Wait for it. The other classic causes are printing on the wrong side of pre-coated paper and printing on synthetic fabric, so mark the coated face while it's still in dim light.

Why is my print pale sky-blue instead of deep navy?

Suspect the paper first. Buffered watercolour paper — which is most watercolour paper — carries an alkaline chalk reserve that attacks the chemistry before light ever gets a vote. Switch to an unbuffered sheet, or soak the buffered one in a dilute citric-acid bath and dry it before coating. If the paper is right, mix fresh sensitizer: the combined solution is only good for a few hours, and a batch mixed yesterday prints weak.

Why does the print look blotchy where nothing was even sitting?

Blotches are almost always laid down at the coating stage and only revealed by the exposure. Coating in a bright room part-exposes the sheet before you ever reach the sun; puddles and dry gaps print as clouds. Coat in dim light with an almost-dry brush, working slow passes vertically and then horizontally, and let the sheet dry flat in the dark rather than propped by a window.

My whites were white, then turned yellowish overnight — what happened?

Unreacted chemistry stayed in the fibres and kept working after you stopped. A rinse that looks sufficient often isn't: five minutes minimum, changing the water until it runs truly clear, and hold the wet print up to the light — any lemon tint still in the paper is tomorrow's stain. Prints also mustn't dry face-down on paper towels, which wick the blue out along with the water.

Every one of these failures costs a sheet of paper and teaches more than a success does. The longer catalogue of cyanotype beginner mistakes is worth a skim before your first weekend — mostly so that when a print dies, you can name the killer.

Love what you see here? Save individual picks with on any item, or copy everything to a list of your own in one click — great for coming back to later, or dropping as a not-so-subtle hint.

Disclosure: This section may contain affiliate links to Amazon. We may earn a small commission from qualifying purchases at no extra cost to you.