Bake Your First Polymer Clay Earrings and Pendants

Bake Your First Polymer Clay Earrings and Pendants

DariaCurated by Daria
Jump to the 10 picks

From a Squishy Bar to Something You'll Actually Wear

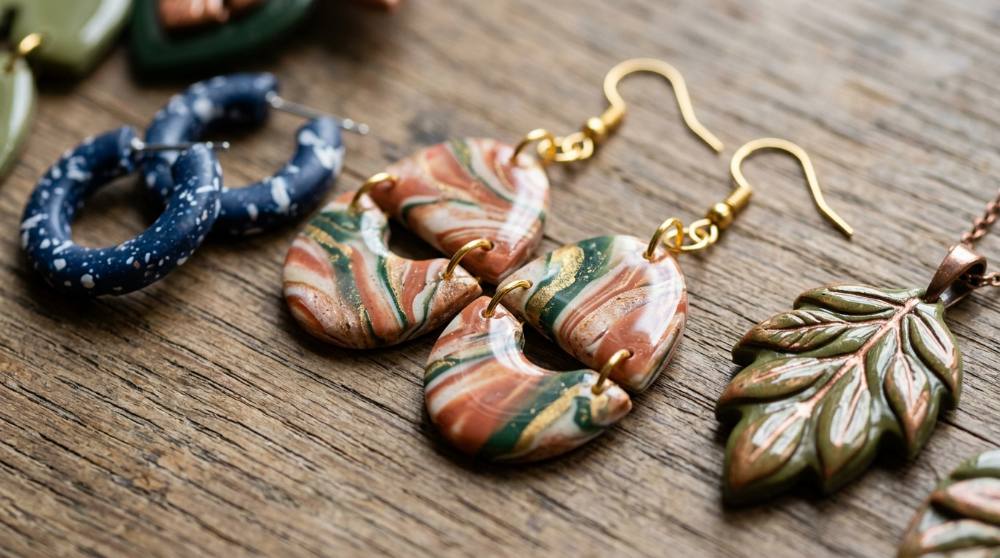
Polymer clay isn't clay at all. It's soft PVC plastic with a plasticiser mixed in, which is why a bar of it never dries out on the shelf and only hardens once it hits a warm home oven. The stuff was cooked up as a Bakelite substitute, and the German doll-maker Käthe Kruse was handed a batch in 1939. Her factory couldn't use it, so her daughter Fifi played with it instead — which is where the name FIMO comes from: Fifi's Modelling compound. Today the same material sits in museum collections, gets fed through pasta machines in spare bedrooms all over the world, and turns up as the arches, marbles and terrazzo drops you see hanging off ears at every craft market.

Here's the honest shape of a first session: you knead a bar until it stops crumbling, roll a slab about as thick as a stack of two coins, press out a couple of shapes, poke a hole near the edge, and slide the tile into the oven. Twenty-odd minutes later they're hard, and the fiddly bit begins — twisting open a jump ring without launching it across the kitchen. If you've never so much as conditioned a bar, our general beginner polymer clay setup covers the tile, the roller and the oven basics; this list is the jewelry layer that sits on top of it.

Start small. A jewelry-grade clay, one roller, one long blade, a bag of hooks and jump rings, two pairs of pliers and a tube of strong glue will get you through your first ten pairs. Cutters, glaze, thermometers and drills can all wait until you know you like this.

Nothing on this page costs more than a takeaway for two, on purpose — if you make three pairs and drift away, you're out less than a pair of shop-bought earrings.

Classic Multipack Modeling Clay Bars

Pick 01 of 10

Classic Multipack Modeling Clay Bars

A set of small one-ounce bars of firm, jewelry-grade oven-bake clay in a mix of classic colours you can blend into anything else. This kind of clay holds a crisp cut edge, stays a little flexible after baking so thin earring shapes don't snap, and cures in an ordinary home oven. For jewelry, look for a professional-grade line rather than the soft craft-store or kids' clays, which bake brittle.

Why we picked this exact one: The Sculpey Premo 12-colour Classic multipack is the clay you'll see named again and again by people who make earrings for a living. It bakes tough and a little flexible, and the ounce-sized bars mean you can try a dozen colours without committing to big blocks. The bars are small, so heavy users burn through white and black quickly, but for a first batch of earrings it's the right amount.

See it on Amazon
Complete Polymer Clay Sculpting Kit

Pick 02 of 10

Complete Polymer Clay Sculpting Kit

A small starter tool set with a clear acrylic roller, a couple of long flexible tissue blades, short knives, a needle tool and clear acrylic sheets to press slabs flat. The roller gives you an even slab without a pasta machine, and the long blade lifts cut shapes off the tile without stretching them. Look for a roller that's actually acrylic rather than wood, and blades that are thin enough to flex.

Why we picked this exact one: The DIYOOHOMY 12-piece clay tool kit covers the two tools practitioners call the bare minimum, a weighted acrylic roller and tissue blades, for the price of a coffee and a bun. It also throws in acrylic sheets, which turn out to be handy for pressing a slab dead flat. The blades are sharp on one edge only and easy to grab the wrong way round at first, so mark the blunt side with a bit of tape.

See it on Amazon
Bulk Hypoallergenic Earring Hooks

Pick 03 of 10

Bulk Hypoallergenic Earring Hooks

A bag of the metal bits that turn a baked clay shape into an earring: fish-hook ear wires, small open jump rings, and rubber backs to stop hooks slipping out. The jump ring links the clay to the hook; the hook goes through the ear. Look for nickel-free wires, and a jump ring that's small enough to sit neatly but wide enough to pass through your hole plus the wire.

Why we picked this exact one: The Aiythouy 600-piece hooks-and-rings kit is deliberately unfussy: 200 hooks, 200 jump rings, 200 backs, in silver and gold tones. That's enough for a hundred pairs, which is plenty to find out what you like. The rings are on the thin side and will spring open if you're rough with them, but for polymer earrings that's fine, and thin rings are easier to close cleanly.

See it on Amazon
jewelry pliers set for opening and closing jump rings

Pick 04 of 10

jewelry pliers set for opening and closing jump rings

A three-piece set of small pliers made for jewelry work: needle-nose, round-nose and a wire cutter. You use two of them at once to twist a jump ring open sideways and closed again, and the cutter trims a headpin or wire. Look for smooth jaws so they don't chew the plating off findings, and comfortable grips.

Why we picked this exact one: The Shynek 3-piece jewelry plier set is the one everyone seems to start with, and its rating has held up over ten thousand reviews. It gives you the two gripping pliers you actually need for jump rings plus a cutter for later wire experiments. They're light and not built for heavy gauge wire, but polymer earrings never ask that of them.

See it on Amazon
flexible industrial-strength craft glue for attaching metal findings to baked clay

Pick 05 of 10

flexible industrial-strength craft glue for attaching metal findings to baked clay

A clear, gap-filling adhesive that stays slightly flexible once cured, used to bond metal posts, bails and pin backs to baked polymer clay. It needs a roughened metal surface and a day to cure fully. Look for a small tube with a fine tip; the big tubes skin over long before you use them up.

Why we picked this exact one: The E6000 mini four-pack is the glue polymer clay makers reach for by name for studs and pin backs. Four small tubes are smarter than one big one because it thickens once opened. It's smelly and needs a window open, and you'll want to scratch the metal pad with a needle first, but once cured it doesn't let go.

See it on Amazon

With these five things you can make a slab, cut it, bake it and turn it into dangles the same afternoon. My one warning: don't buy the giant 50-colour brick of unbranded clay because it looks like better value. It's mushy, it grabs every bit of lint in the room, and the finished pieces snap. Two or three good bars beat fifty bad ones. And if you're still deciding whether this is the right clay for you at all, our air-dry vs polymer clay comparison spells out why the oven-bake kind is the one that survives being worn.

The Second Order, Once You Know You're Hooked

After a few pairs you'll notice the same small annoyances: hand-cut edges that wobble, an oven that seems to run hot, holes you forgot to poke before baking. Every item here fixes one of those. None of them is needed on day one, and honestly the cutters are the only one most people end up wanting badly. The pliers you already own carry straight over into wire art for beginners if the metal side turns out to be the part you enjoy.

A word on the thermometer, though. It's the least glamorous thing on the page and it's the one that saves whole batches. Ovens lie, and underbaked clay crumbles while overbaked clay browns.

stainless steel earring shape cutters for clean, repeatable clay pieces

Pick 06 of 10

stainless steel earring shape cutters for clean, repeatable clay pieces

A set of small metal cutters in earring-friendly shapes such as arches, teardrops, ovals and half circles, with a run of plain circles for studs. You press them through a rolled slab to get two identical halves of a pair without tracing. Look for stainless steel with a sharp edge; plastic printed cutters can leave a ragged bottom edge you have to tidy up.

Why we picked this exact one: The PTFJZ 76-piece stainless cutter set has the shapes people actually make earrings from, arches and drops and semicircles, rather than only cookie shapes. Metal edges cut cleaner than the plastic sets at the same price. There are more shapes than any one person will use, so treat the box as a menu rather than a to-do list.

See it on Amazon
water-based gloss glaze for sealing and shining baked clay jewelry

Pick 07 of 10

water-based gloss glaze for sealing and shining baked clay jewelry

A brush-on water-based varnish that dries clear and shiny over baked polymer clay. It's used to seal powders, chalk pastel or paint that would otherwise rub off, and to give matte clay a glossy look. Baked clay doesn't need sealing to be durable, so treat this as a finish, not a protection layer. Look for a glaze made for polymer clay; some general varnishes stay tacky on it.

Why we picked this exact one: The Sculpey Gloss Glaze is the same brand's own finish for the clay in the essentials, so there's no compatibility guesswork, and the twist-cap bottle drips less than a jar. It goes on milky and dries clear. It does show brush strokes if you flood it on, so thin coats, and it isn't a substitute for the thick domed look you'd get from resin.

See it on Amazon
leave-in oven thermometer for baking clay at the right temperature

Pick 08 of 10

leave-in oven thermometer for baking clay at the right temperature

A stainless steel dial thermometer that hangs from an oven rack or stands on the tray and reads the actual air temperature inside. Home ovens are often off by a fair margin, and polymer clay cares. Look for a clear dial you can read through the oven door and a range that covers 250 to 300°F comfortably.

Why we picked this exact one: The Rubbermaid Commercial oven thermometer is a plain steel dial with a hook and a stand and tens of thousands of ratings behind it. It's the same one people use for bread and smoking meat, which is exactly the point: it doesn't need to be clay-specific. The face is small, so you'll be squinting through the door, but it's accurate.

See it on Amazon
stainless steel flat-pad earring posts and backs for clay studs

Pick 09 of 10

stainless steel flat-pad earring posts and backs for clay studs

Blank stud posts with a small flat disc on the end, plus matching butterfly or rubber backs. The disc is the part you glue, or bake, onto the back of a small clay shape to make a stud earring. Stainless steel is the usual choice for sensitive ears. Look for a pad size that suits your shapes; a bigger pad on a tiny stud will show around the edge.

Why we picked this exact one: The VERACT 500-piece stainless post-and-back set gives you 4mm and 6mm pads, which covers small studs and the top piece of a two-part dangle. Stainless is the safe default when you don't know whose ears these will end up in. Five hundred is a lot for a beginner, but the price is the same as a bag of fifty elsewhere.

See it on Amazon
pin vise hand drill with micro bits for adding holes to baked clay

Pick 10 of 10

pin vise hand drill with micro bits for adding holes to baked clay

A small hand-twisted drill that holds tiny bits, from well under a millimetre up to a few millimetres. You spin it between your fingers to bore a neat hole through baked clay for a jump ring. It's slower than a power tool but far less likely to crack a thin piece. Look for a set with a range of bits and a chuck that grips them without wobbling.

Why we picked this exact one: The AUTOTOOLHOME pin vise set with 0.5 to 3mm bits is a plain, well-liked hand drill that costs less than a pair of earrings. It comes with more bits than you'll need for jump-ring holes, which is useful because the smallest ones do snap. The chuck can loosen mid-drill until you learn to tighten it firmly.

See it on Amazon

With cutters, glaze and a way to check your oven, you've got everything most makers use for years; a pasta machine is the one big upgrade after this and it can wait. If you crave a thick, glassy dome on top of your pieces instead of a brushed-on glaze, that's a job for UV resin, and our resin art for beginners setup covers what that involves before you add another hobby to the pile.

Why Did My Earrings Snap, Brown, or Hang Sideways?

My pieces baked hard but broke when I tried to bend them. Did I do something wrong?

Almost always this is underbaking, and it catches beginners because underbaked clay feels perfectly hard once it cools. Ovens routinely run cooler than the dial says, so a batch that should have had a full half hour at temperature never actually got there. Put a standalone thermometer in the oven, wait until it reads the packet temperature, then time from that point rather than from when you switched it on. Thin earring pieces can go a little longer than the packet says without harm.

Why did my nice white clay come out yellowish?

Light colours scorch before darks, especially in ovens with a hot spot near the element. Beginners crank the temperature or leave the tray uncovered. Tent a sheet of foil loosely over the pieces while they bake and keep the tile in the middle of the oven, and the whites stay white.

I forgot to poke holes and now the pieces are baked. Are they ruined?

No, but this is where a lot of first batches stall. Baked polymer clay drills cleanly with a small hand-held pin vise, so you can add a hole afterwards; plenty of makers actually prefer drilling after baking because the hole ends up neater. Just keep it near the edge and go slowly so the bit doesn't wander.

Why do my dangles hang facing the wrong way?

A hook and a single jump ring together turn the piece a quarter turn, so a shape that looked right on the table faces sideways on the ear. Beginners fight this by bending the hook. The fix is to add a second jump ring, or twist the ring so it sits perpendicular to the piece before you close it.

The stud post fell off after two days. Isn't glue supposed to hold?

Glue alone on a smooth flat pad on smooth baked clay is a weak bond, however strong the tube claims to be. Scratch the metal pad with a needle first so the glue has something to grip. Better still, press the post into the raw clay, lay a thin slice of clay over the pad and bake it in, so the metal is held mechanically and the glue is just a backup.

Love what you see here? Save individual picks with on any item, or copy everything to a list of your own in one click — great for coming back to later, or dropping as a not-so-subtle hint.

Disclosure: Some product links may be affiliate links. If you make a purchase through one of these links, we may earn a small commission at no extra cost to you.