Beginner Bookbinding Setup: Tools for Your First Handmade Book
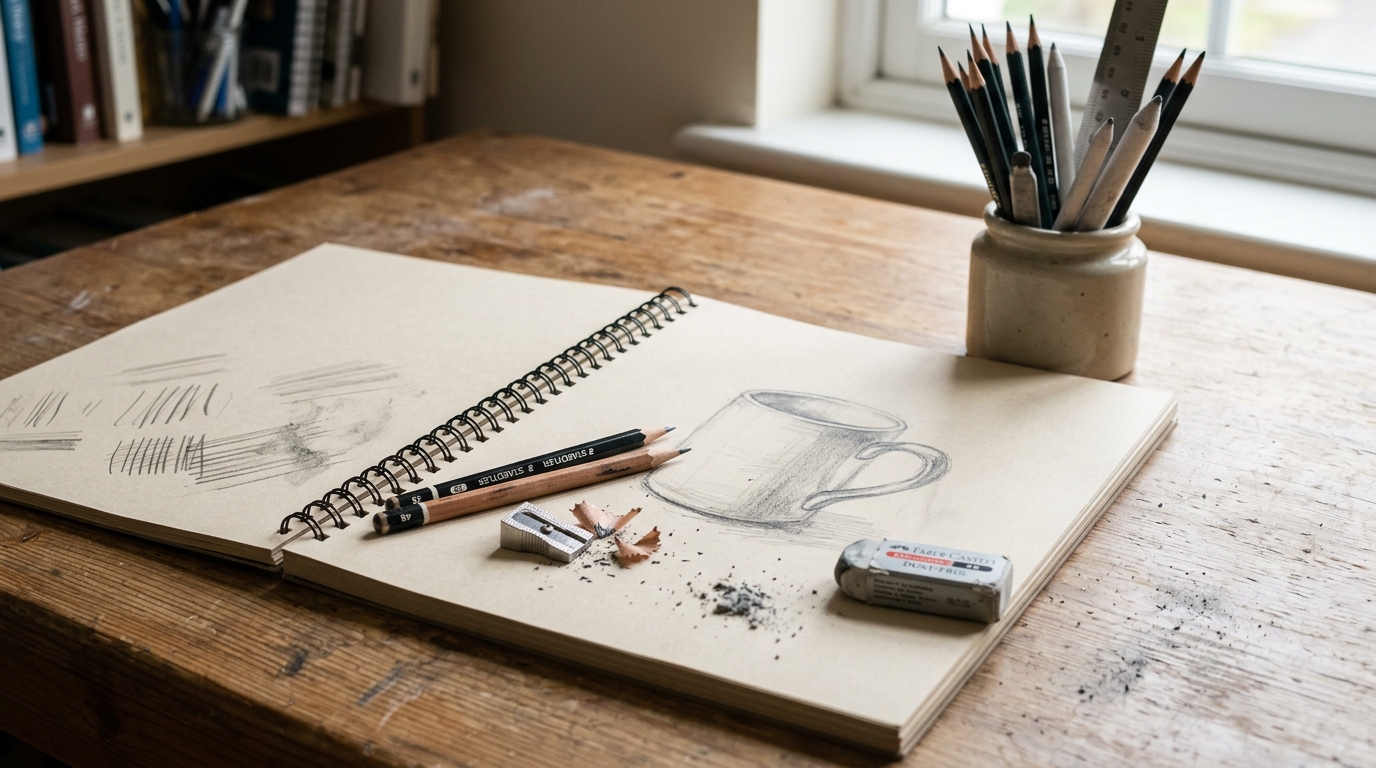
The Core Folding and Sewing Kit
The first handmade book almost always wobbles a little, and that is fine — what surprises most beginners is how few tools stand between a stack of folded paper and a sewn book that actually holds together. A folder to sharpen the creases, an awl to punch the sewing stations, a needle, some thread, and a little glue will carry you through your first dozen pamphlets and notebooks. If you are still weighing this craft against others, it sits comfortably among the quieter, low-mess options worth considering when you are deciding which first hobby to commit to.
My advice is to skip the boxed sets and build the kit one honest tool at a time: a bone folder, an awl, a single spool of waxed linen thread, a few blunt needles, and a small pot of PVA are all you genuinely need to sew your first book. Everything fancier can wait until you know which kind of binding you actually enjoy.
I worked through the supplies beginners are pointed toward most often and kept only the ones that are easy to find, forgiving to learn on, and priced so a first attempt never feels like a gamble.
Bone folder for creasing and burnishing paper folds
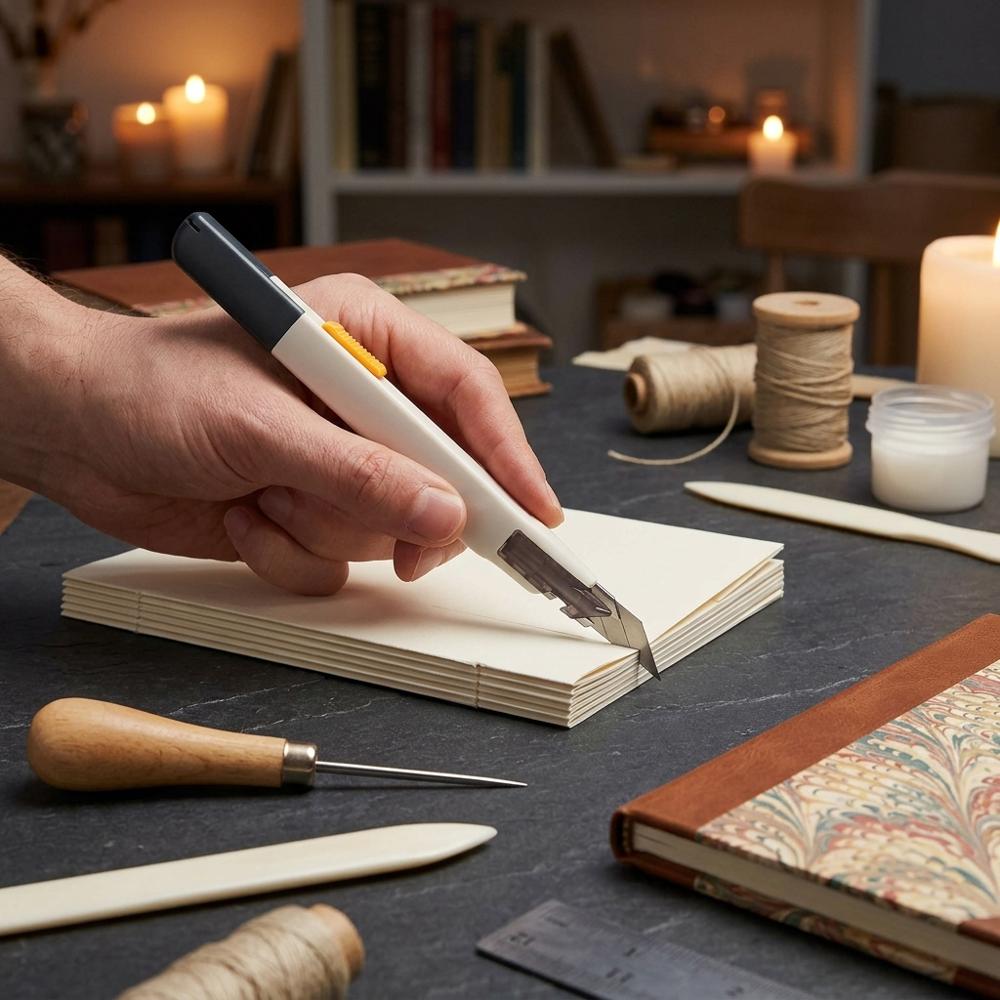
A bone folder is a smooth, tapered hand tool used to press sharp, clean creases into folded paper and to flatten glued surfaces without leaving shiny marks. Made from polished bone or hard plastic, it gives folds a crisp edge that fingertips cannot match. For bookbinding a pointed end also helps score fold lines and tuck thread into tight corners, so a beginner should look for one with a rounded end and a pointed end.
Bookbinding awl for punching sewing stations
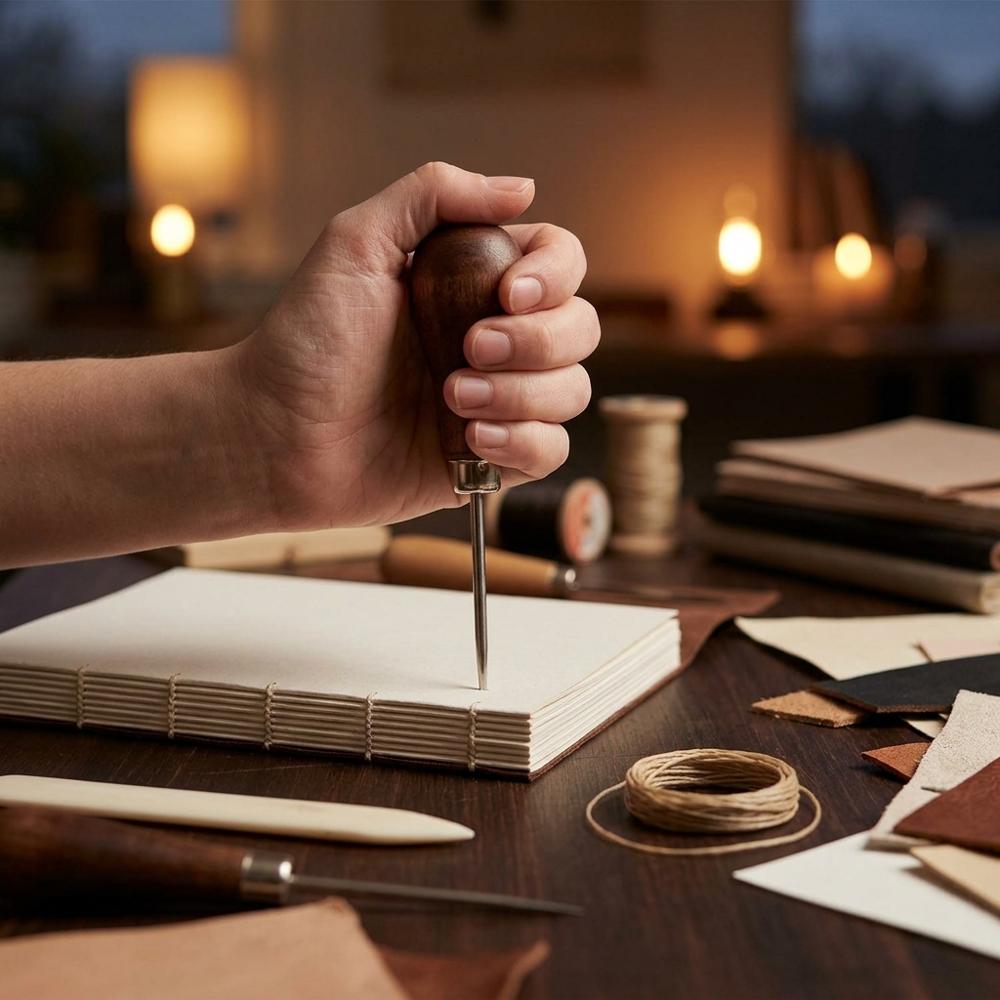
A bookbinding awl is a sharp, fine-pointed spike set in a handle, used to pierce the holes (called sewing stations) through folded signatures before stitching. A slim round point makes a clean hole that closes back around the thread instead of tearing the paper. Beginners should pick an awl with a comfortable handle and a point fine enough for paper rather than the thick blades sold for leatherwork.
Waxed linen thread for sewing book signatures
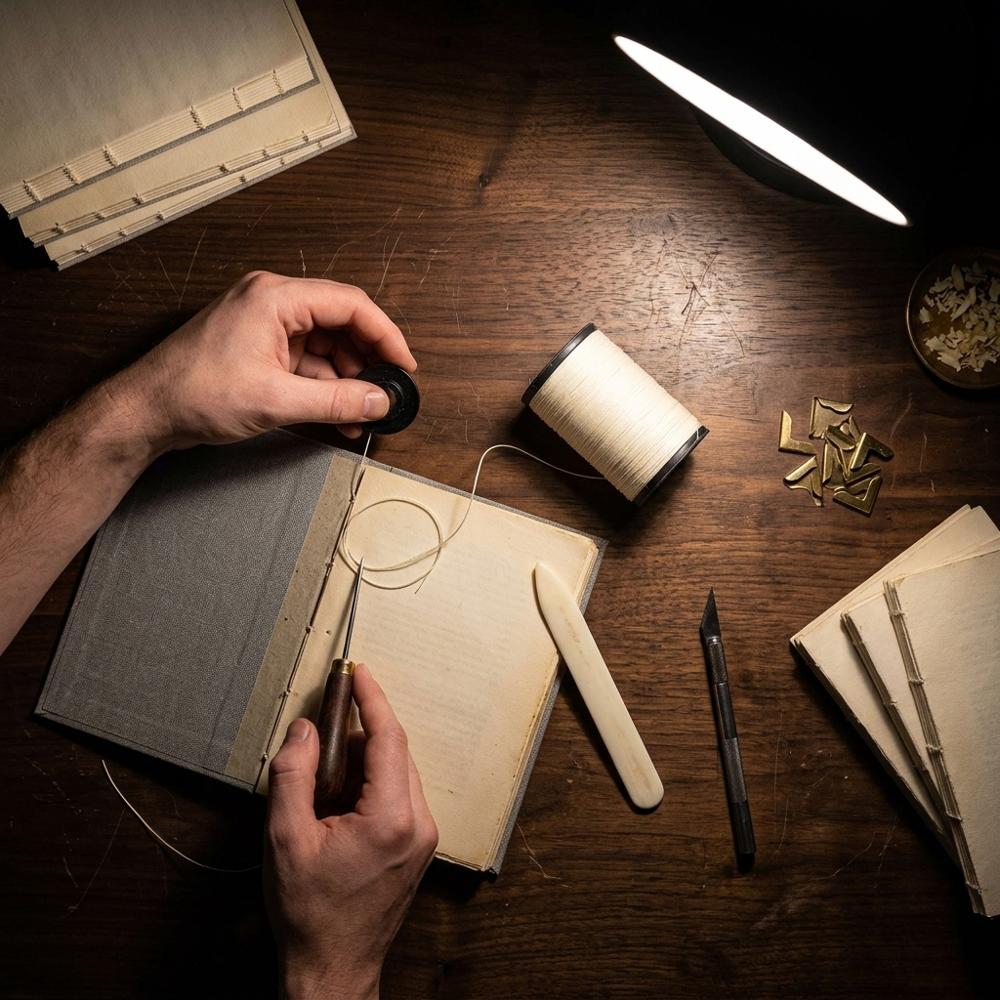
Waxed linen thread is a strong, lightly coated cord used to stitch the folded signatures of a book together along the spine. The wax reduces friction so the thread glides through punched holes without snagging or fraying, and it helps each knot grip so the binding stays tight for years. Look for genuine linen in a medium weight, strong enough for a text block but thin enough not to bulk up the spine.
Blunt-tip bookbinding needles with large eyes
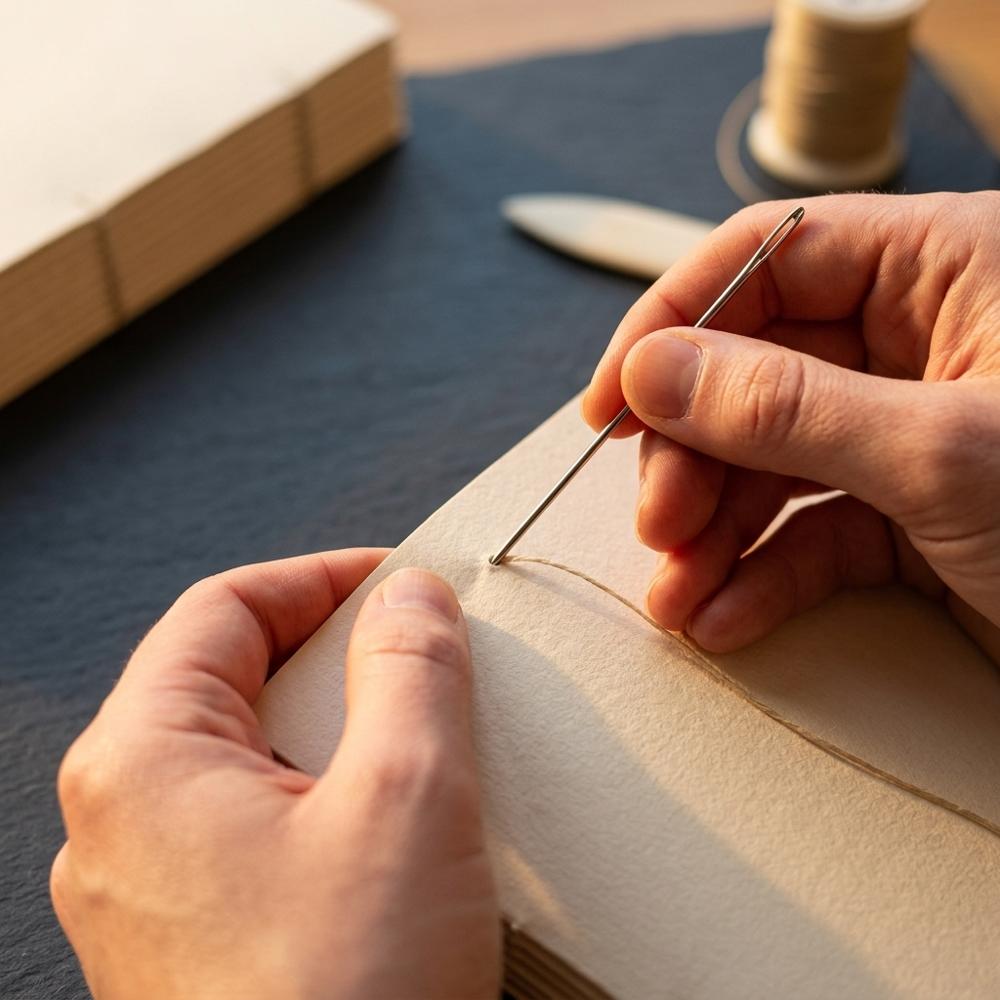
Bookbinding needles are sturdy steel needles with a large eye to take thicker linen thread and a slightly blunt tip that slips through pre-punched holes without catching the paper or your fingertips. The blunt point matters because a sharp sewing needle tends to pierce new, off-line holes and split the fold. A beginner only needs a few, and a small pack lasts a long time.
Acid-free PVA adhesive for spines and covers
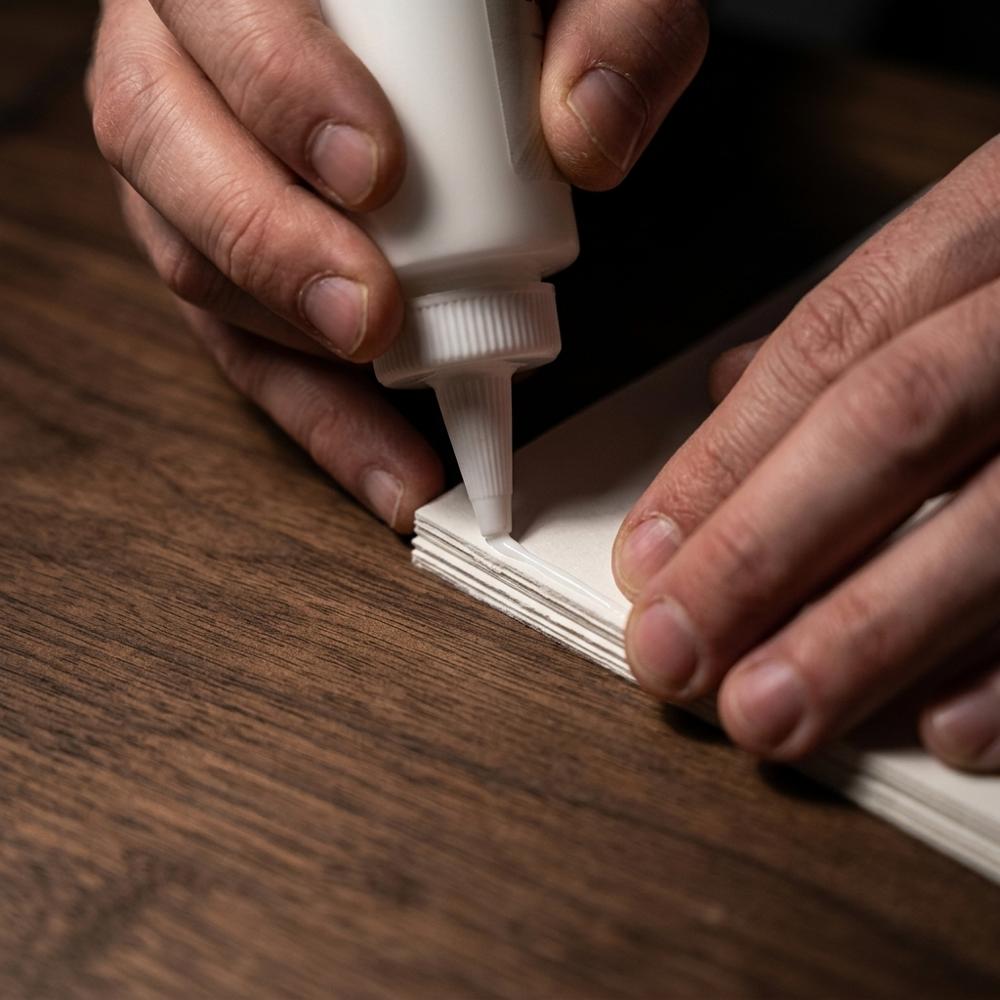
PVA (polyvinyl acetate) is a water-based white glue that dries clear and stays slightly flexible, which is exactly what a book spine needs so it can bend without cracking. An acid-free, neutral-pH formula keeps the glue from yellowing pages or covers over time. Beginners should choose a PVA that remains flexible when dry rather than a stiff craft glue, and brush it on in thin coats.
With these five tools you can fold paper into signatures, punch even sewing stations, and stitch a text block that opens flat. One detail nobody mentions early enough: cut your thread roughly four to five times the height of the book, because running out halfway through a stitch is far more irritating than a little waste. Many binders find the pleasure of a finished notebook quickly pulls them toward putting together a fountain pen for everyday writing, and the next tools worth owning are the ones that keep your cuts clean and your covers square.
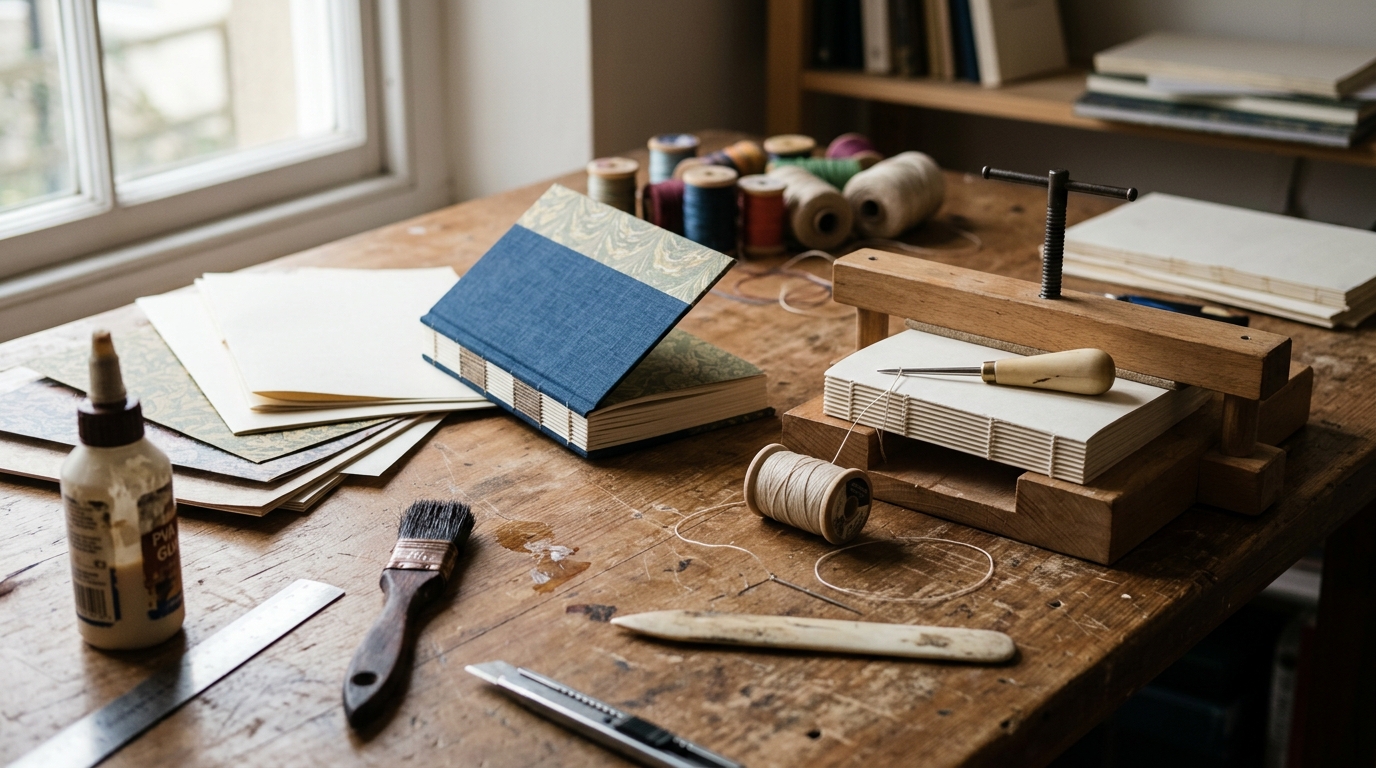
Cutting Clean Edges and Staying Square
The difference between a book that looks homemade and one that looks handmade lives almost entirely in the edges. Tearing paper to size or hacking at it with kitchen scissors leaves ragged, slightly angled covers that quietly announce a first try, while a sharp blade drawn along a metal straightedge gives the crisp trim that makes everything else look deliberate. None of these tools are strictly required to sew a book, but they are the ones I reached for constantly once I stopped making tiny pamphlets and started building proper notebooks. The same precision pays off if you ever branch into a custom bullet journal setup, where consistent page size and squared corners really show.
Self-healing cutting mat for trimming paper and board
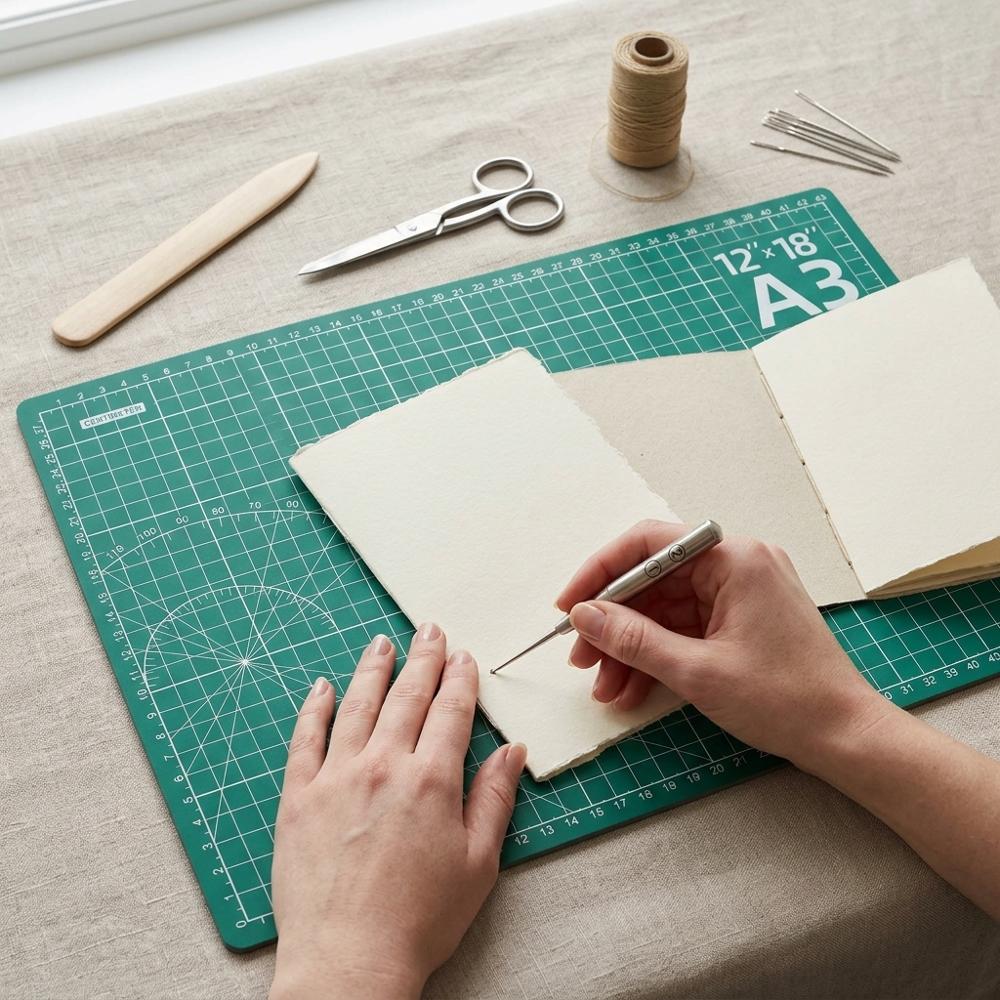
A self-healing cutting mat is a layered plastic surface that closes back up after a blade passes through it, protecting both your knife edge and your table. Printed grid lines help you square up paper and measure cuts at a glance. For bookbinding an A3 (roughly 12 by 18 inch) mat fits most notebook-sized sheets, and a beginner should pick one thick enough to lie flat without curling.
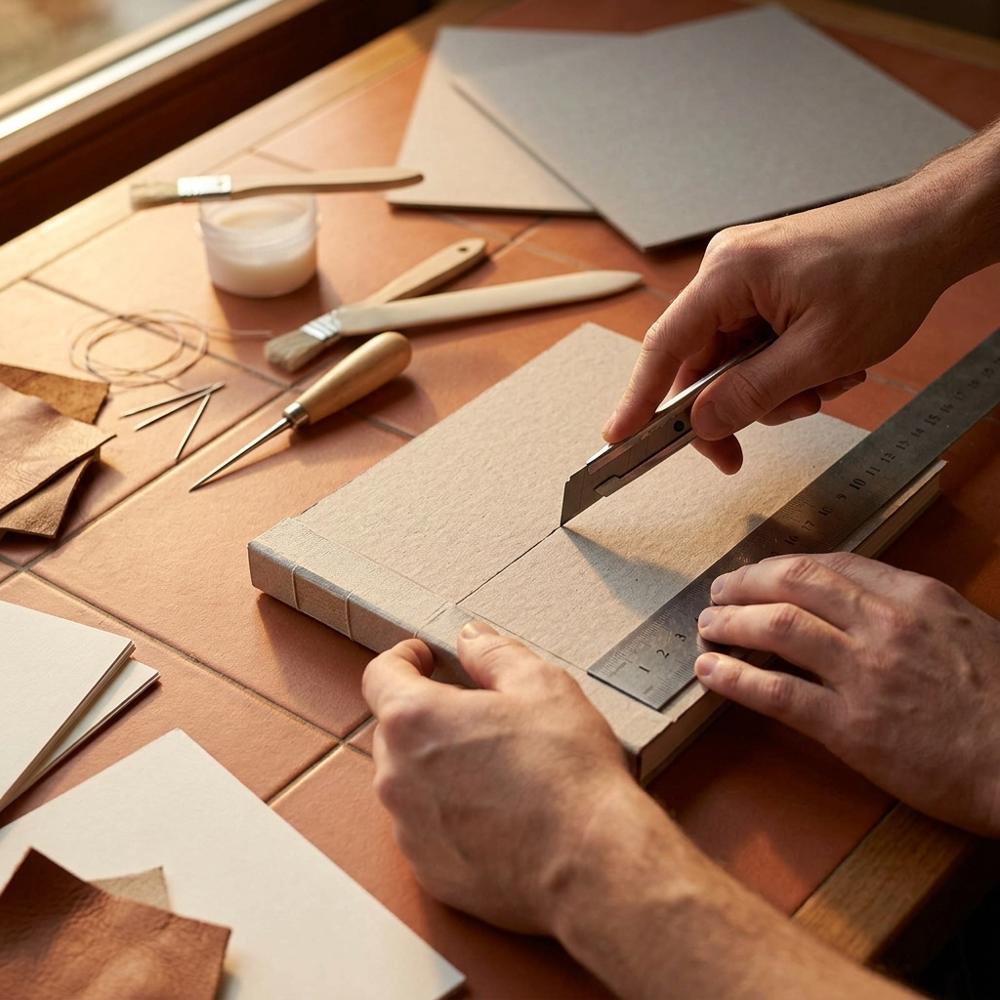
Precision craft knife for cutting paper and board
A precision craft knife is a slim, pen-style handle holding a small pointed blade, used to slice paper and thin board cleanly along a straightedge. A sharp, fine blade cuts in a single confident pass, which leaves a cleaner edge than sawing back and forth. Beginners should keep spare blades on hand and swap them often, since a dull blade tears paper and slips more easily.
Cork-backed stainless steel ruler for guiding cuts
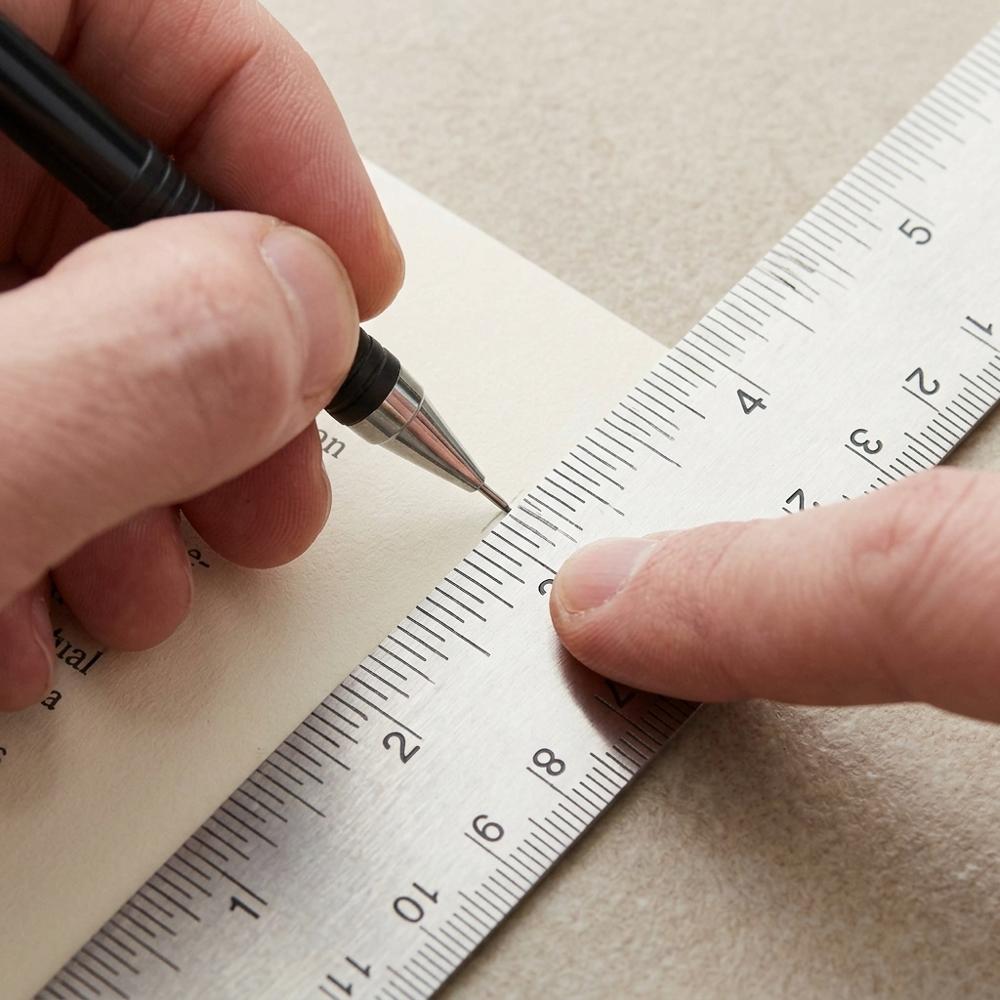
A cork-backed metal ruler is a stainless steel straightedge with a cork underside that grips the paper so it does not slide while you cut. The metal edge stands up to the repeated blade passes that would shave or nick a plastic ruler. Twelve inches suits most notebook work, and a beginner should make sure the ruler carries both imperial and metric markings.
Assorted binder clips for holding the text block
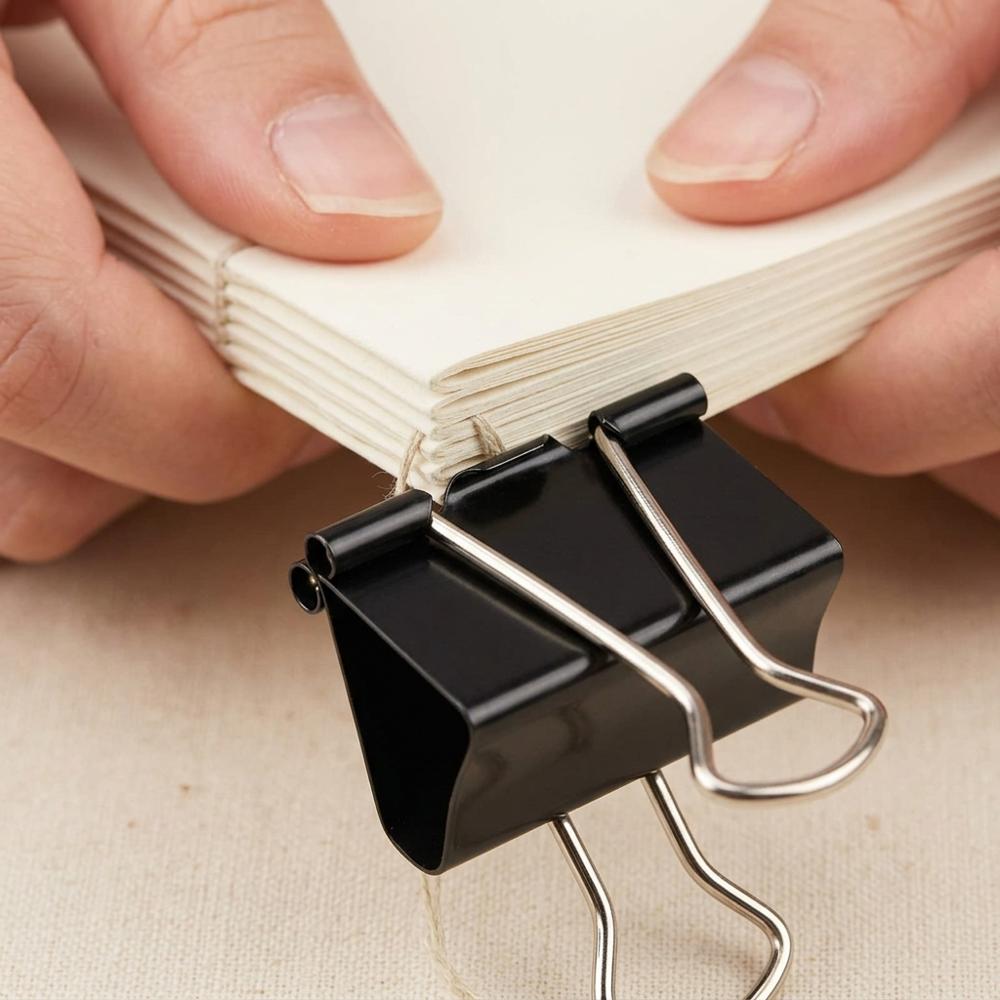
Binder clips are spring-loaded metal clamps that hold a stack of signatures firmly together while glue dries or while you punch sewing stations. A range of sizes lets you clamp anything from a thin pamphlet to a full text block without crushing the paper. Beginners benefit from an assortment, and the larger clips do the real work of holding a book square under pressure.
Flat craft brushes for spreading bookbinding glue
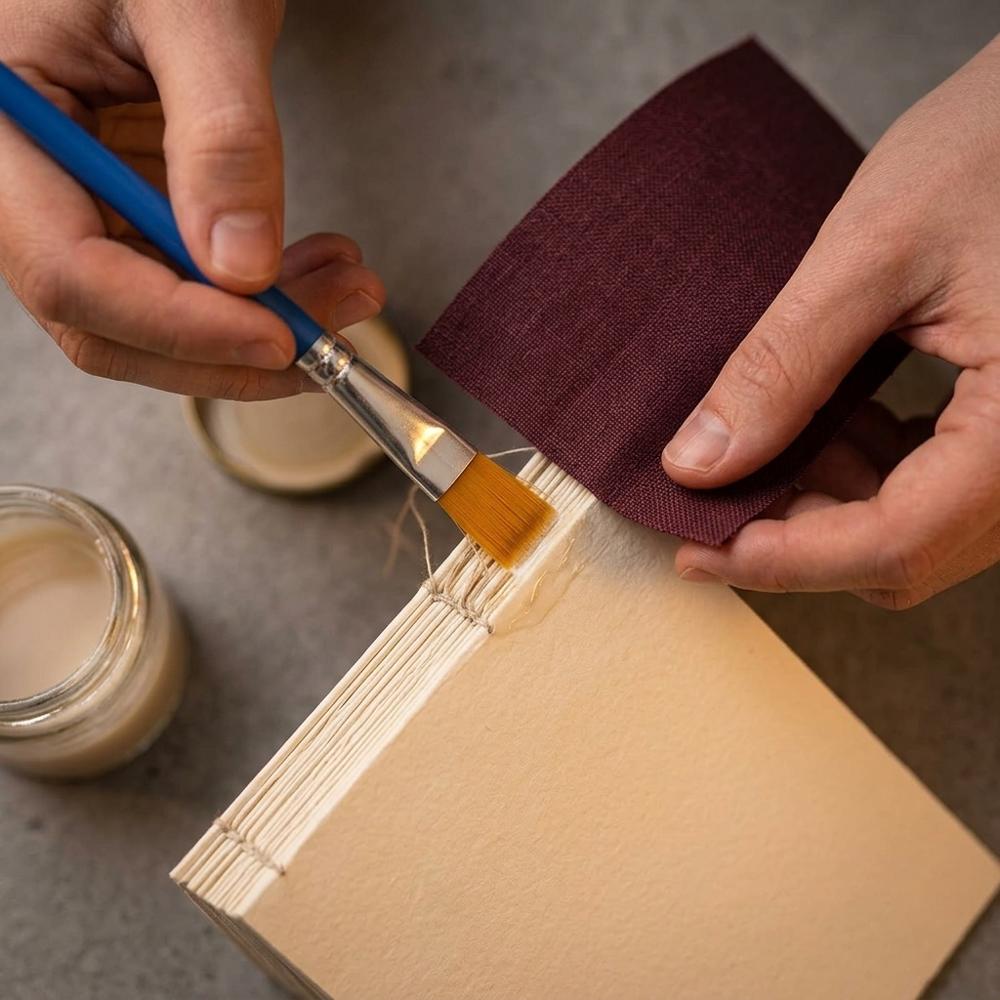
A flat, soft-bristled brush spreads PVA in a thin, even film across spines and covers, which dries faster and flatter than glue squeezed straight from the bottle. Small, inexpensive brushes work best because dried PVA is hard to wash out, so they are treated as semi-consumable. Beginners should keep several on hand so a stiffened brush never holds up a project.
Together these turn a cluttered desk into something closer to a small bindery: a protected surface, a blade that tracks straight, a ruler that will not slip, clips to hold the text block while glue sets, and a brush for thin, even coats. A common early mistake is flooding the spine with glue, when a thin layer brushed out from the centre dries faster and flexes better than a thick one. Bookbinding rewards patience the way a lot of good starter hobbies for adults do, and the payoff arrives the first time a cover closes with a clean, square snap.
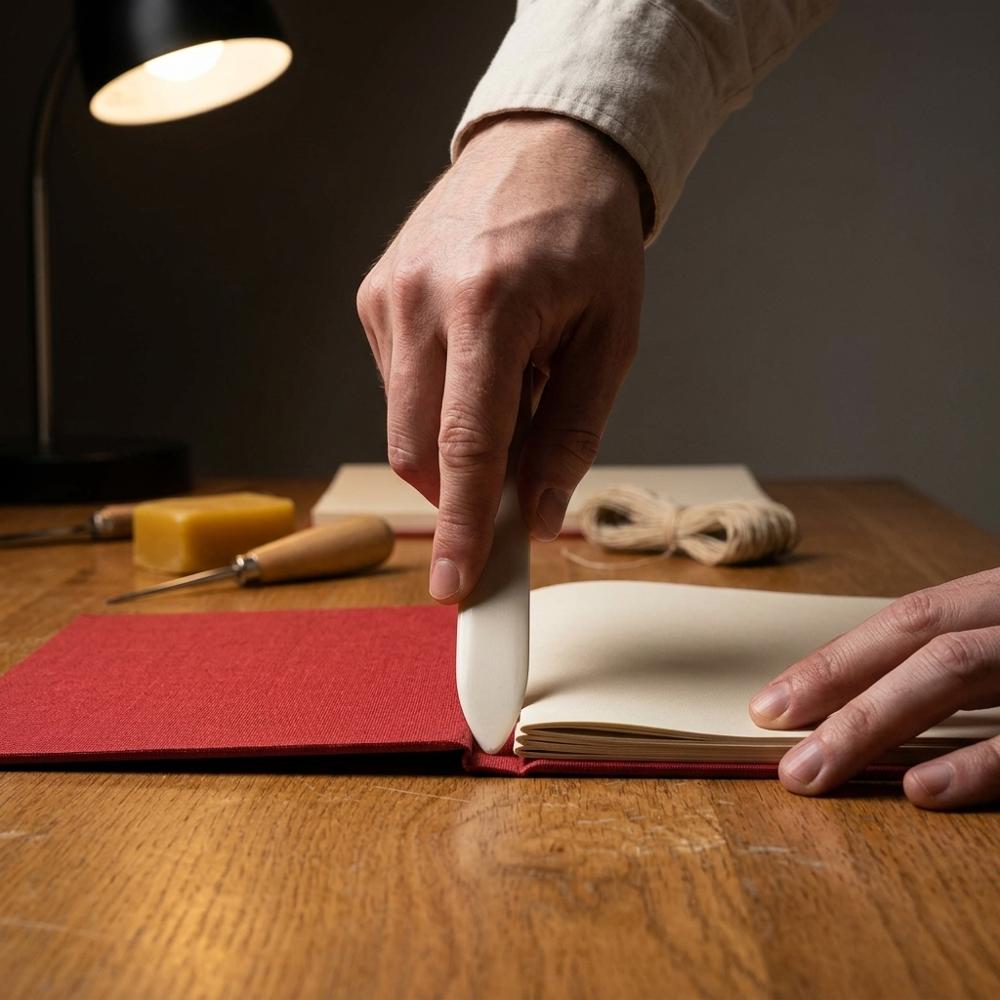
Stepping Up to a Sturdy Hardcover
There is a real jump between a sewn pamphlet and a hardcover book, and it comes down to three materials: stiff board for the covers, cloth or paper to wrap them, and decorative sheets for the endpapers that hide the raw edges inside. This is where bookbinding starts to feel like a craft with depth rather than a single trick. The board is heavier and the gluing is fussier, so I would not rush into it — but the first time you case in a text block and the cover sits flush, it is hard not to grin. Plenty of binders begin making their own patterned sheets around this point, which is a short hop to trying paper marbling for your own covers.
Paper-backed bookcloth for covering hardcovers
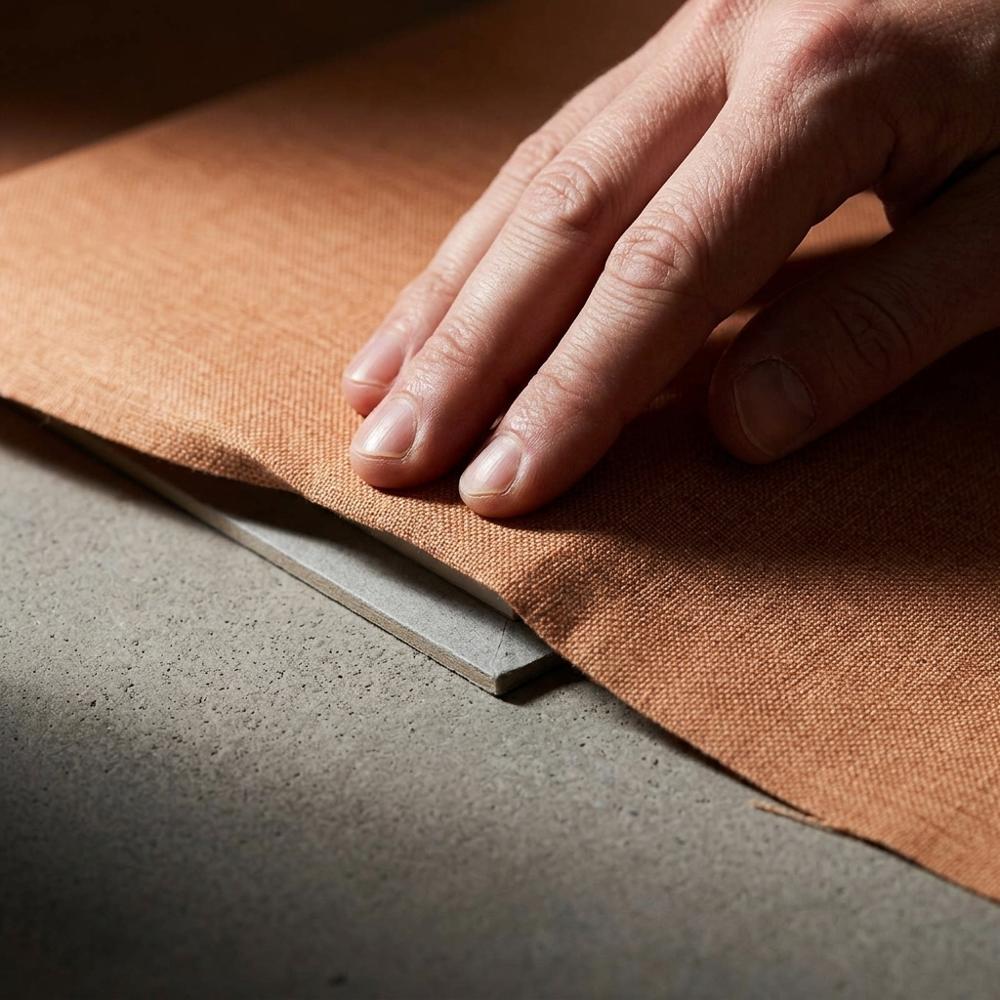
Bookcloth is fabric bonded to a paper backing so it can be glued over board without adhesive bleeding through to the surface. It wraps the spine and covers in a durable, flexible skin that resists fraying at the corners. For a first hardcover, pre-backed cloth in a small assortment of colours lets you experiment without committing to a full bolt of fabric.
Rigid binder's board for hardcover construction
Binder's board is a dense, heavy chipboard cut into sheets that form the stiff front and back covers of a hardcover book. Its rigidity is what gives a finished book its solid feel and protects the pages inside. Beginners should look for board around two millimetres thick and cut it with several light blade passes rather than forcing one deep cut.
Decorative patterned paper for endpapers and covers
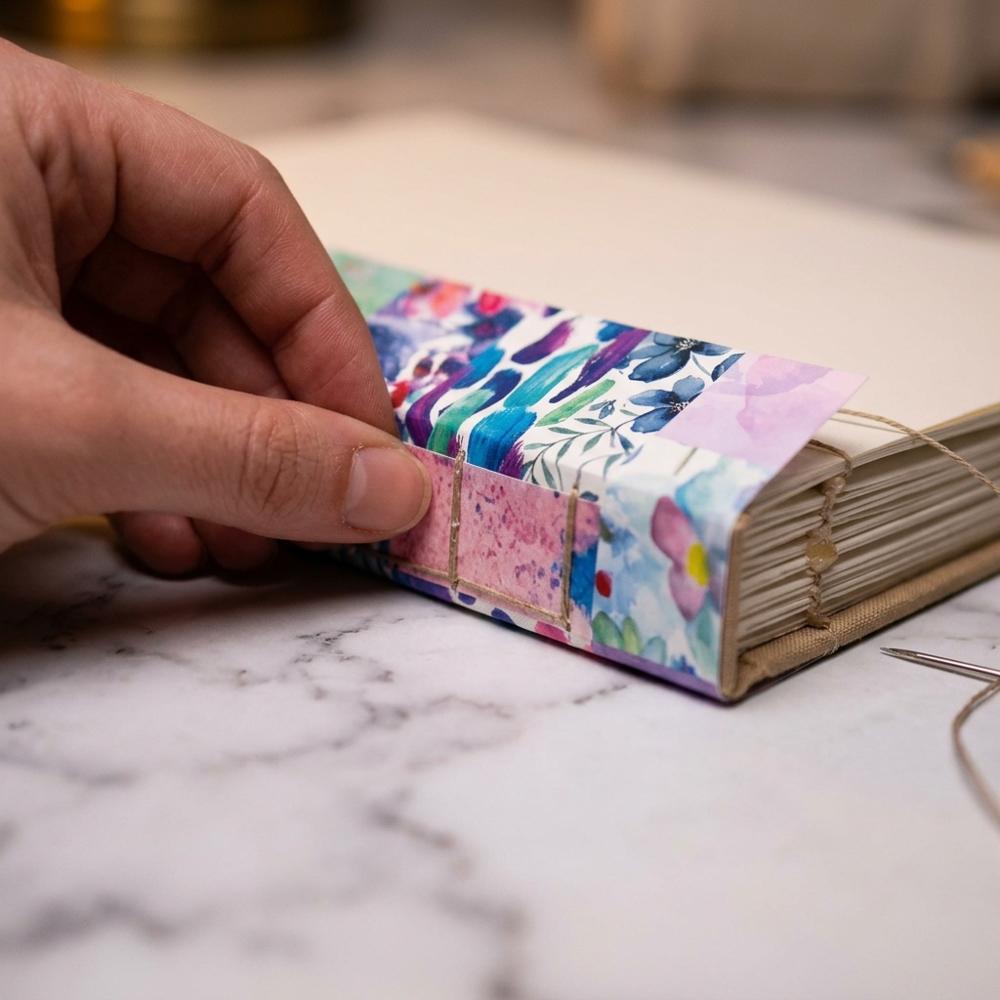
Decorative paper supplies the patterned sheets used for endpapers, the leaves that join the text block to the cover, and for wrapping covers in place of cloth. Heavier cardstock-weight sheets resist wrinkling when glued, and double-sided patterns give more design options. Beginners should pick sheets large enough to cover a board with margin to fold over the edges.
With board, cloth, and a few sheets of decorative paper you can wrap a cover that will outlast the notebook inside it. Grain direction matters more here than anywhere else: board and paper each have a grain, and if they fight one another across the cover, the whole panel will warp as the glue dries. Take your time, press the book flat under something heavy overnight, and the result will look far more accomplished than the effort it actually took.
Why Does My Handmade Book Never Quite Sit Right?
Why do my covers warp and curl a few hours after I glue them?
Warping almost always traces back to grain direction and uneven moisture. Beginners cut board and paper without checking which way the grain runs, so as the water in the glue evaporates the two layers shrink in different directions and pull the cover into a curve. To fix it, line up the grain of the board, the cloth, and the endpapers so they all run parallel to the spine, glue both faces of a board when a design allows so the tension balances, and press the finished book flat under weight until it is bone dry.
Why does my thread keep twisting and knotting while I sew?
This is usually too much thread combined with a twist that compounds with every stitch. Beginners cut an enormous length to avoid re-threading, and it loops back on itself and knots as it drags through each hole, which leads to uneven tension and the occasional torn station. Keep the working length to about four to five times the height of the book, and whenever the thread starts to coil, let the needle dangle free so it unwinds before you carry on.
Why do my folded pages crack white along the spine?
That cracking is the sign of folding against the grain. Paper fibres line up in one direction, and creasing across them fractures the surface so the fold looks pale and refuses to lie flat. Many beginners never test for grain at all. Before folding, flex a sheet gently both ways — the direction that bends with less resistance is the grain — and always fold along it, which also makes the finished book open noticeably flatter.
Why won't my finished book stay open on its own?
A book that springs shut has usually had its spine over-glued or its signatures sewn too tightly. A spine stiff with adhesive or cinched stitches cannot flex, so the pages push themselves closed even though the book looks finished. Use a flexible PVA in thin coats, keep your sewing tension snug rather than strangling, and for many sewn structures leave the spine unglued or only lightly lined so it can move.
Why do my sewing holes drift out of line from signature to signature?
This happens when each signature is punched separately by eye. Stations wander a millimetre here and there, and once you sew, the spine looks crooked and the thread pulls unevenly. Make a simple punching template — a folded strip of paper or scrap board with the stations marked once — and punch every signature against that same guide so all the holes line up exactly.
FORK_CTA_HINT

AFFILIATE_DISCLOSURE_TITLE: AFFILIATE_DISCLAIMER