
Beginner Linocut Setup: Carve, Ink, and Print Essentials
What You Actually Need to Pull Your First Print
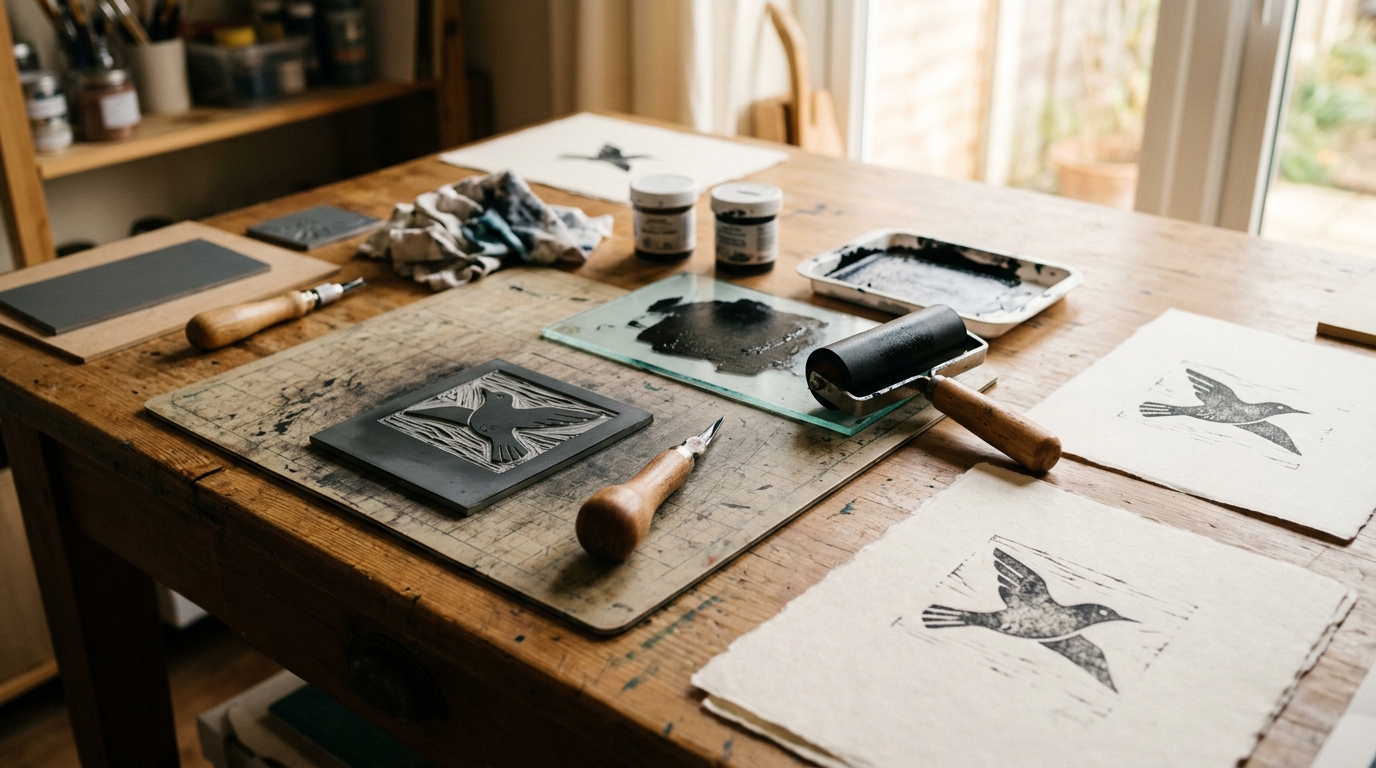
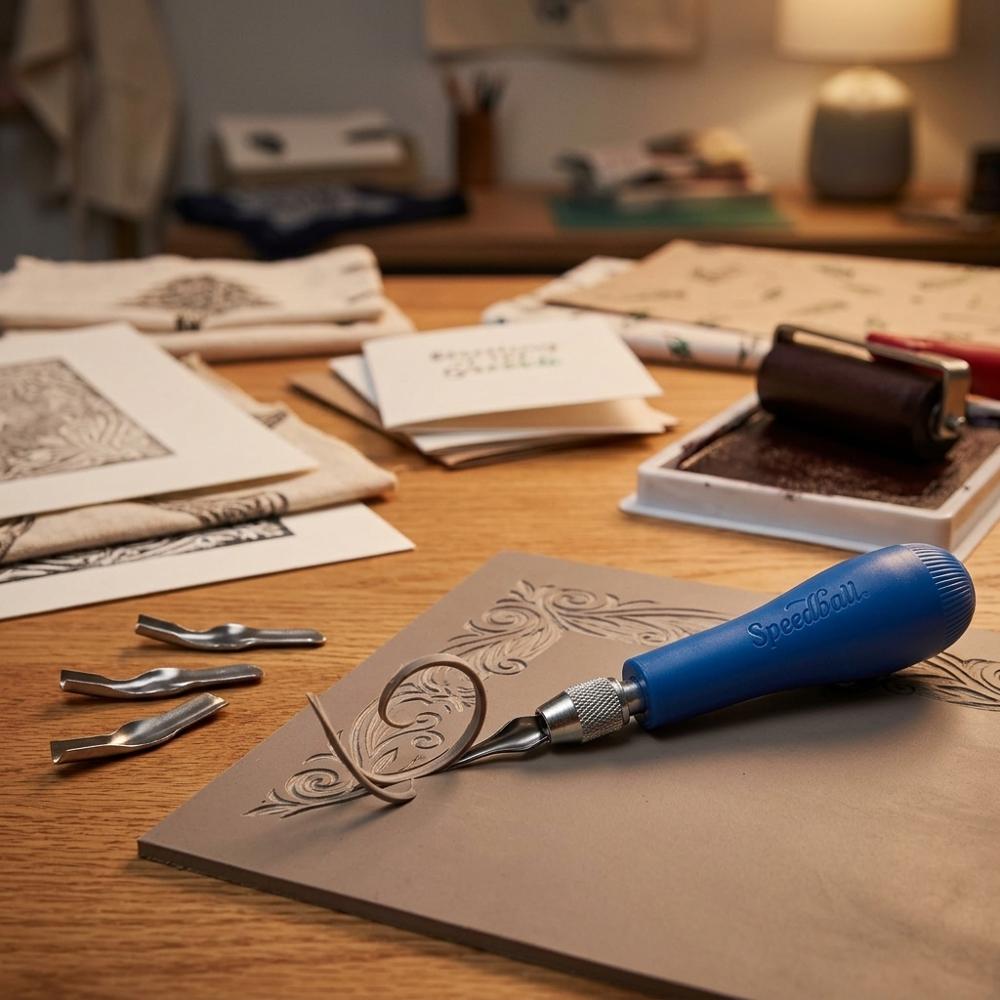
The first print almost always looks rougher than the carving felt under the knife, uneven ink here, a pale patch there, and that gap closes fast once you understand what each tool is doing. Five things stand between a blank block and a finished print: something to carve, something to carve with, ink, a roller to spread it, and paper to press onto. Each has a quality threshold that matters more than the price tag, and getting them right means the materials stop fighting you while you learn.
My advice is to keep the pile small at the start. A soft carving block, one cutter handle with a couple of blades, a tube of black ink, a brayer, and a stack of paper will carry you through your first dozen prints; the fancier additions can wait until you actually feel their absence.
I weighed the supplies that turn up again and again on printmakers' bench lists and settled on ones that are forgiving for a first-timer, easy to find in stock, and priced so a full kit does not sting.
Soft rubber carving block for relief printmaking
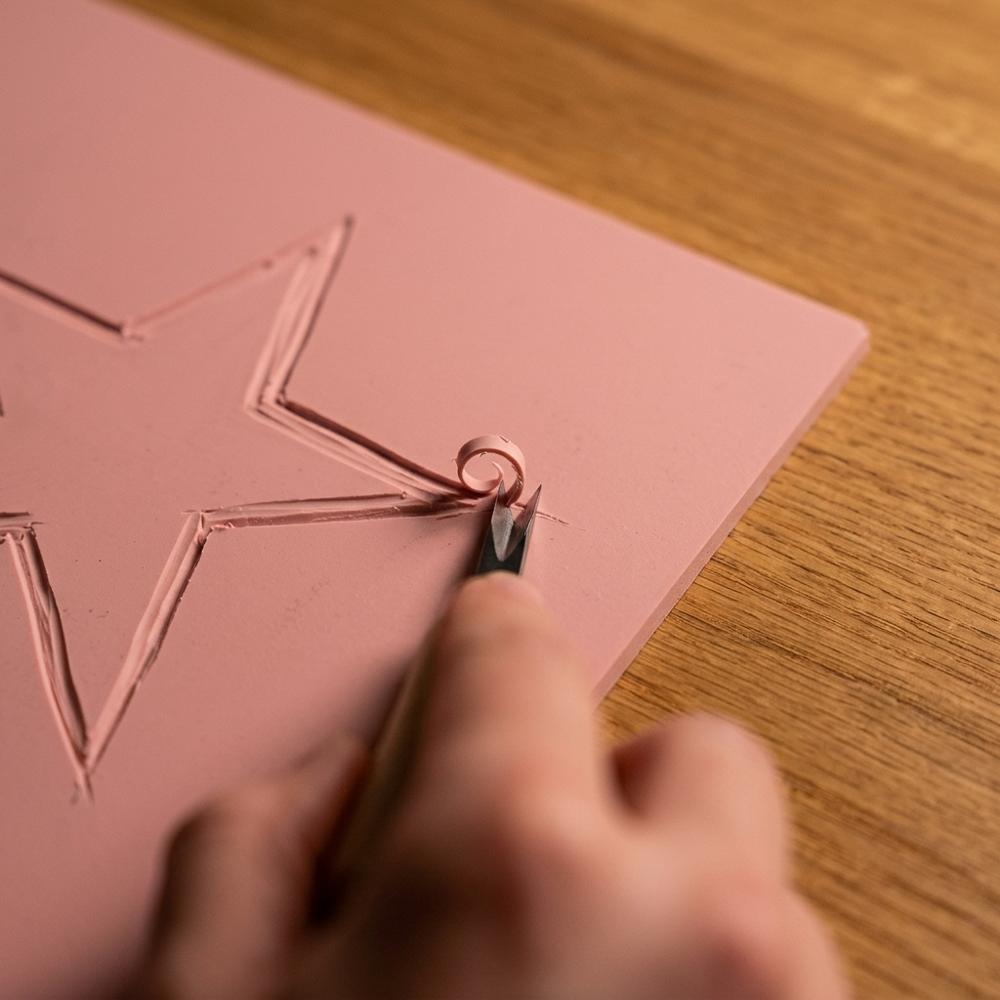
A soft rubber carving block is the modern beginner's alternative to traditional grey linoleum, cutting like a firm eraser so the blade glides without the wrist strain stiffer material demands. The pink surface shows your carved lines clearly against the uncarved areas, which makes it easier to track progress as you work. A larger sheet lets you cut several small designs from one block or commit to a single bigger image.
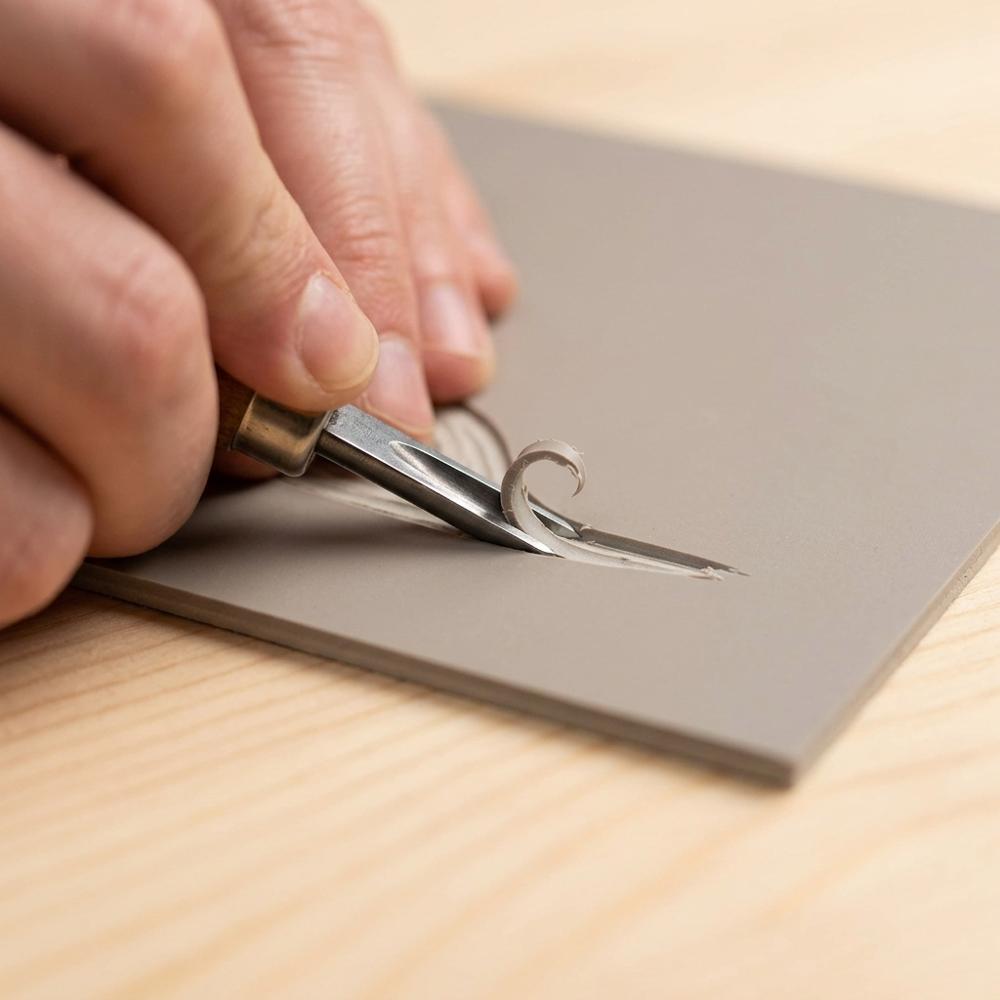
Linoleum cutter handle with assorted carving blades
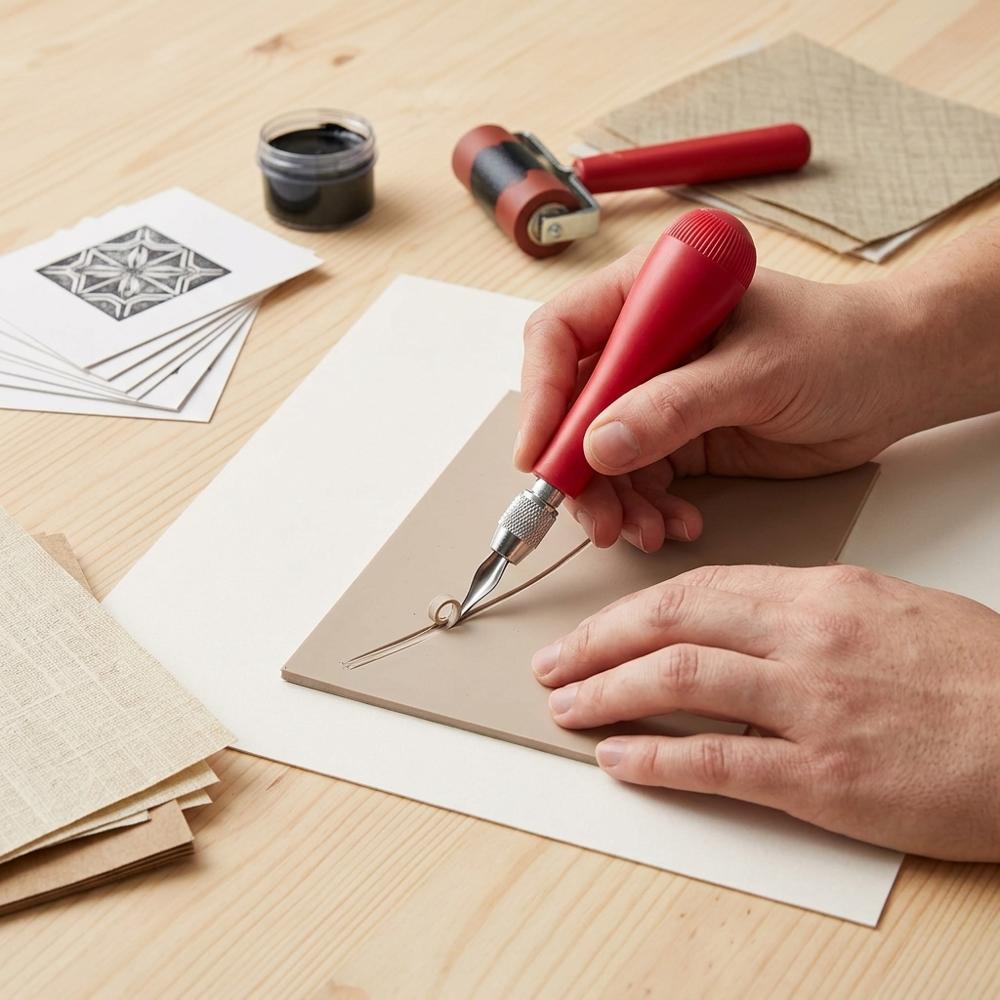
A lino cutter is a pen-style handle that holds interchangeable blades, typically a fine V-shaped gouge for outlines and detail plus wider U-shaped scoops for clearing larger areas. Swapping blades takes seconds and lets one tool do every job a beginner needs. The blades store inside the handle, which keeps the sharp edges contained between sessions.
Water-based black block printing ink
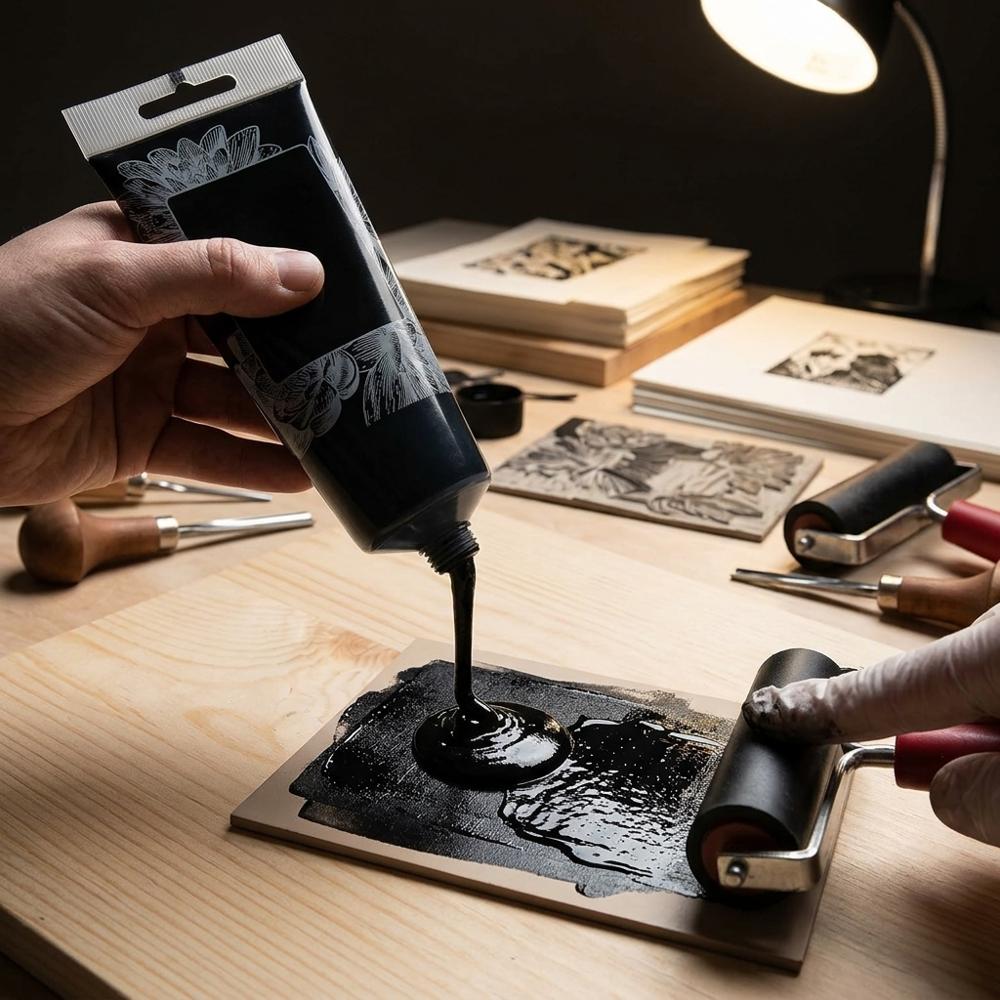
Water-based block printing ink rolls out to a smooth, opaque film and cleans up with nothing more than soap and water, which makes it far less intimidating than oil-based ink for a home setup. A single tube of black goes a long way because relief printing uses only a thin layer. The consistency is tacky rather than runny, so it clings to the raised surface of the block instead of flooding the carved channels.
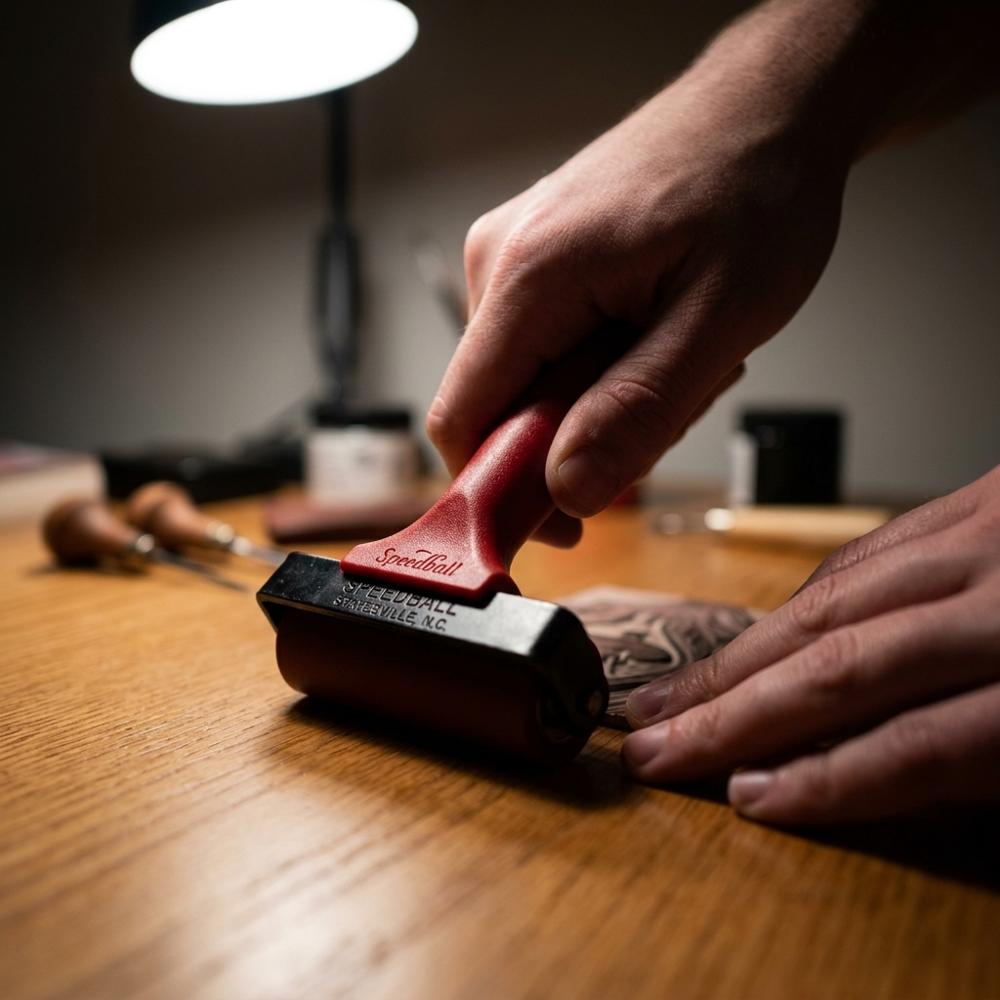
Soft rubber brayer for inking blocks
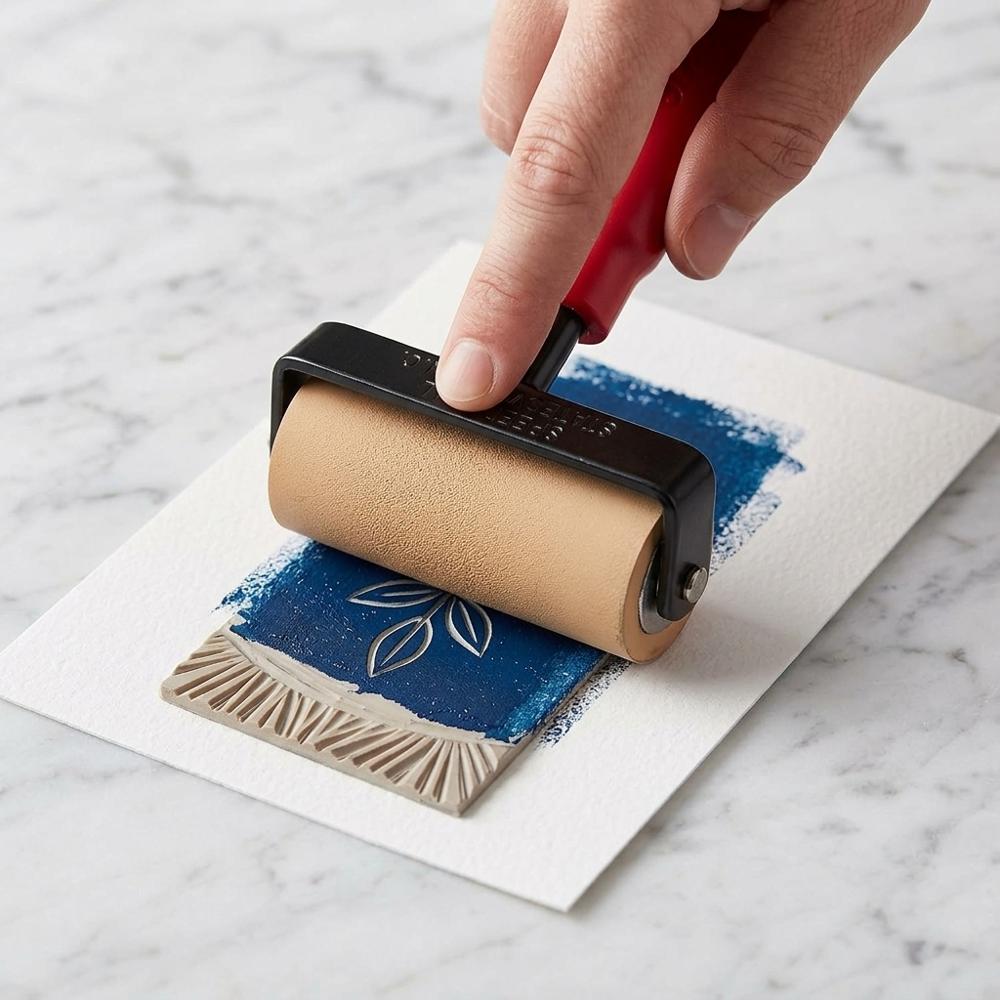
A brayer is a hand roller that spreads ink into an even film and transfers it onto the raised surface of your block. A soft rubber roller conforms slightly to the block and lays down a smoother layer than a hard one, which is what beginners want for solid coverage. A mid-width roller suits the small-to-medium blocks most people start with.
Smooth lightweight paper for relief prints
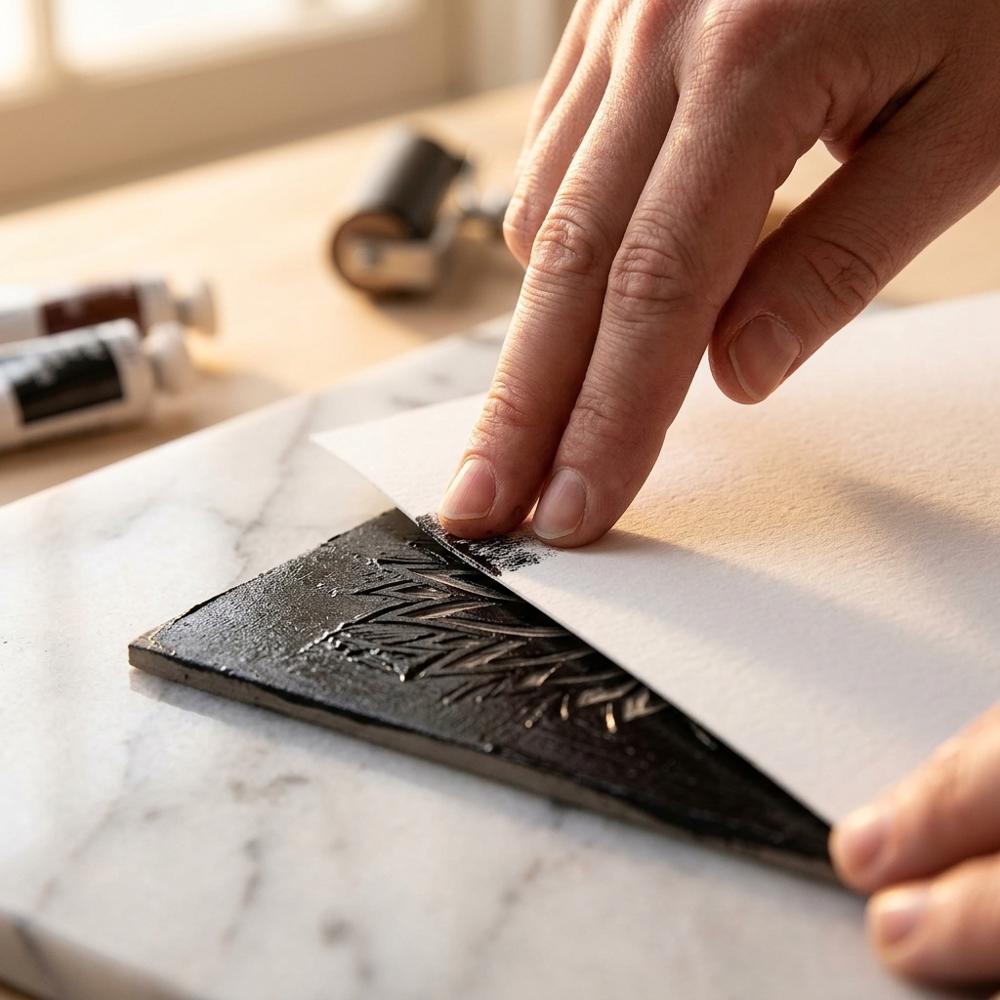
Relief printing works best on smooth, fairly lightweight paper that presses into the inked block and releases without sticking. A dedicated printmaking paper takes a hand-burnished print more reliably than thick, toothy sketch paper, which can leave gaps where the surface dips. Buying a pad of fifty sheets means you can print freely without rationing each pull.
With these five in hand you can carve a design, ink it, and pull a clean print on the kitchen table, no press and no studio required. Expect to waste your first sheet or two figuring out how much ink is too much; a thin, even film always beats a thick one. Linocut sits inside the wider family of relief work, so if you find yourself drawn to stamping repeated motifs you may enjoy the related beginner block printing setup as a companion direction.
Comfort, Safety, and Cleaner Results
None of these are required to make a print, but each one removes a specific frustration that tends to show up around your third or fourth attempt. The block sliding while you carve, the spoon-printed patch that never quite takes, the near-miss with the blade: these are the moments that send people back out for a second round of supplies. Linocut tends to rank high among the best starter hobbies for adults precisely because the gear stays this manageable, and a few small additions keep it that way.
Hand baren for burnishing prints without a press
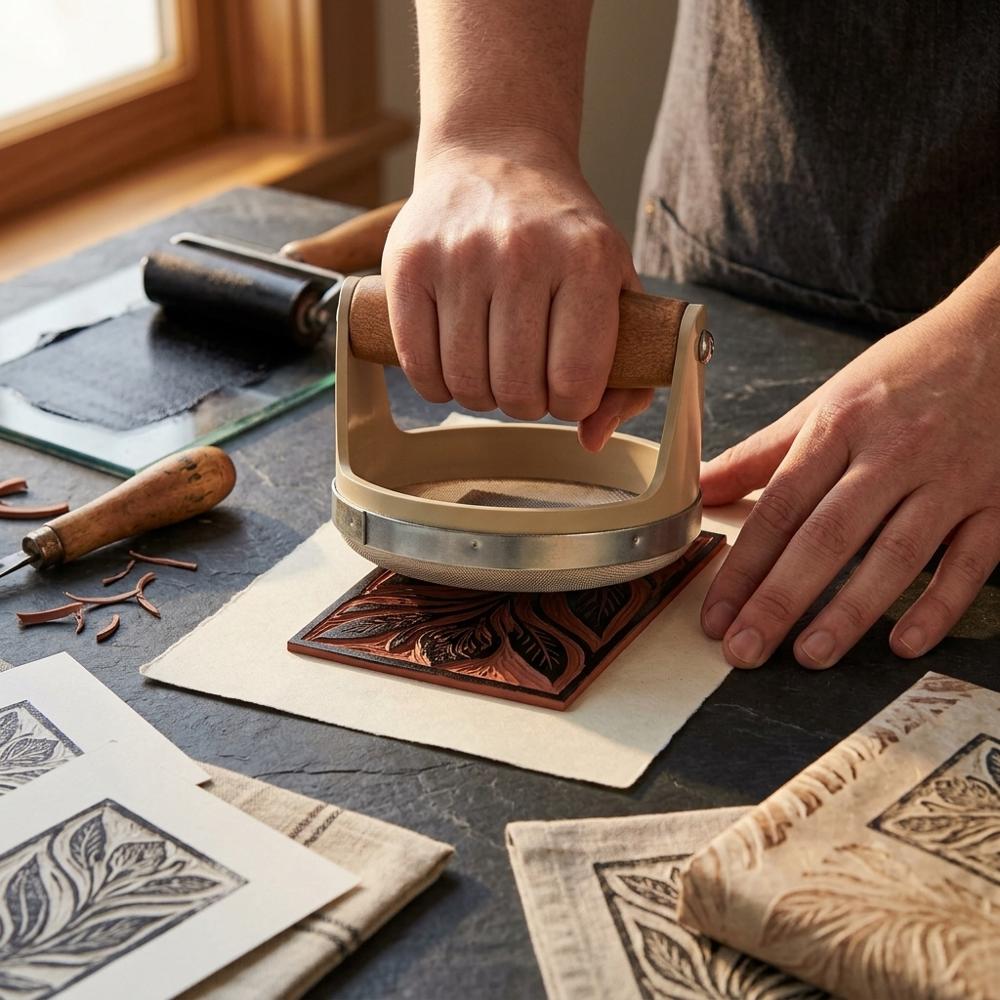
A baren is a flat, smooth disc you press and rub across the back of your paper to transfer ink from the block, the hand-powered stand-in for a printing press. It spreads pressure more evenly than the back of a spoon and covers more area per stroke, so large flat regions print more consistently. A comfortable handle lets you lean your weight in without your hand cramping.
Bench hook and inking plate for carving and rolling
This two-in-one board hooks over the edge of your table to brace the block while you carve, and its smooth reverse side doubles as a surface for rolling out ink. Bracing the block means you can push the tool with control instead of chasing a sliding block around the desk. The inking side gives you a clean, wipeable area to charge the brayer.
Cut-resistant glove for carving safety
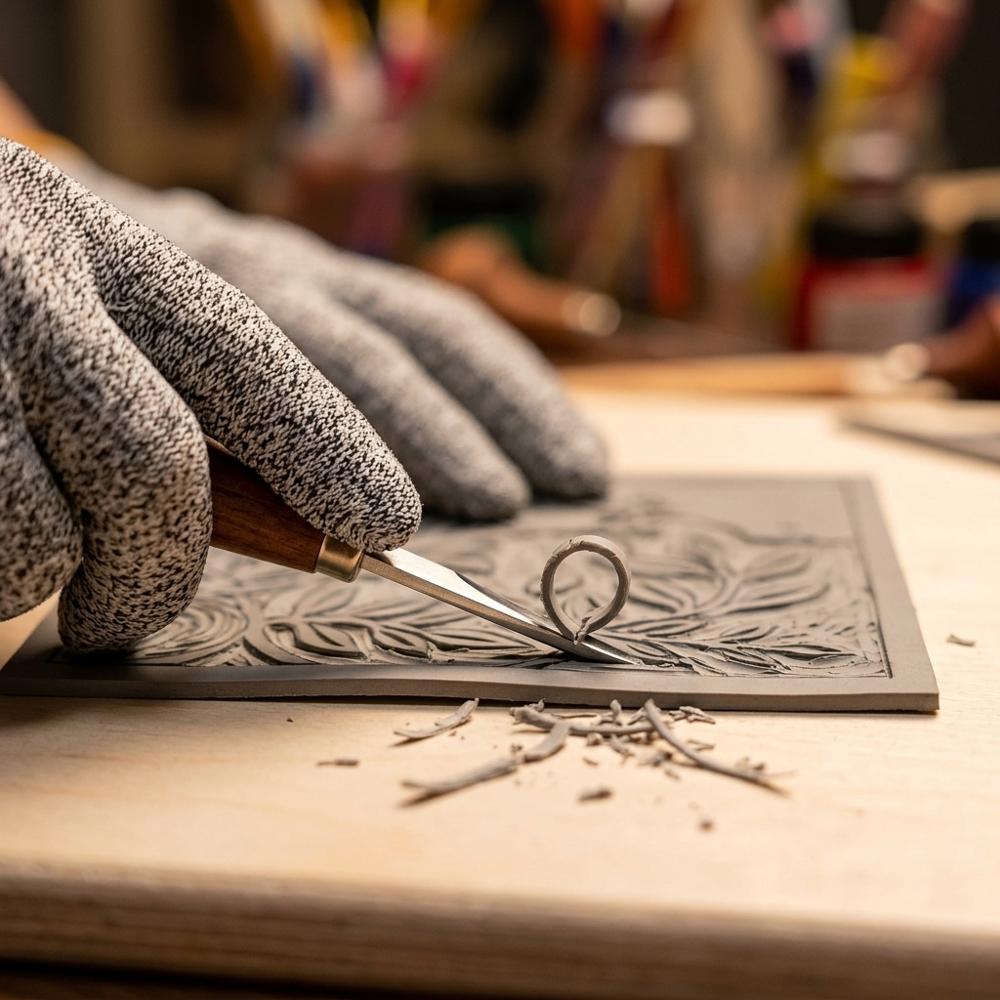
A cut-resistant glove is worn on the hand that steadies the block, the one most exposed when a gouge slips. Carving-grade gloves use tightly knit fibers rated to resist a blade's edge while staying flexible enough to grip the block and feel what you are doing. They rinse clean and last for years of occasional use.
Graphite transfer paper for moving designs onto the block

Graphite transfer paper carries a drawn design from your sketch onto the carving surface: you lay it graphite-side down, place your drawing on top, and trace the lines to leave a faint guide on the block. Wax-free, erasable sheets keep the transferred line from repelling ink or smudging into your carving. One pack lasts through many projects because each sheet is reusable until it wears out.
Together these make longer carving sessions safer and your prints more consistent, which matters once you start giving them away. The bench hook in particular is the upgrade most beginners wish they had bought first, since a sliding block is how most early cuts happen. If you find you like the inking-and-pressing half of the process more than the carving, the beginner screen printing setup leans entirely into that side of making prints.
Where Linocut Goes Next
After a handful of prints you start to notice the edges of what a starter kit can do: the soft block will not hold the finest lines, the small roller streaks on a bigger image, and you begin wondering what your work would look like in color. These three items pick up where the essentials leave off. None is urgent, and I would resist buying them until a real limitation pushes you toward one; if you enjoy the surface-pattern side of handmade printing, the beginner paper marbling setup scratches a similar itch through a completely different technique.
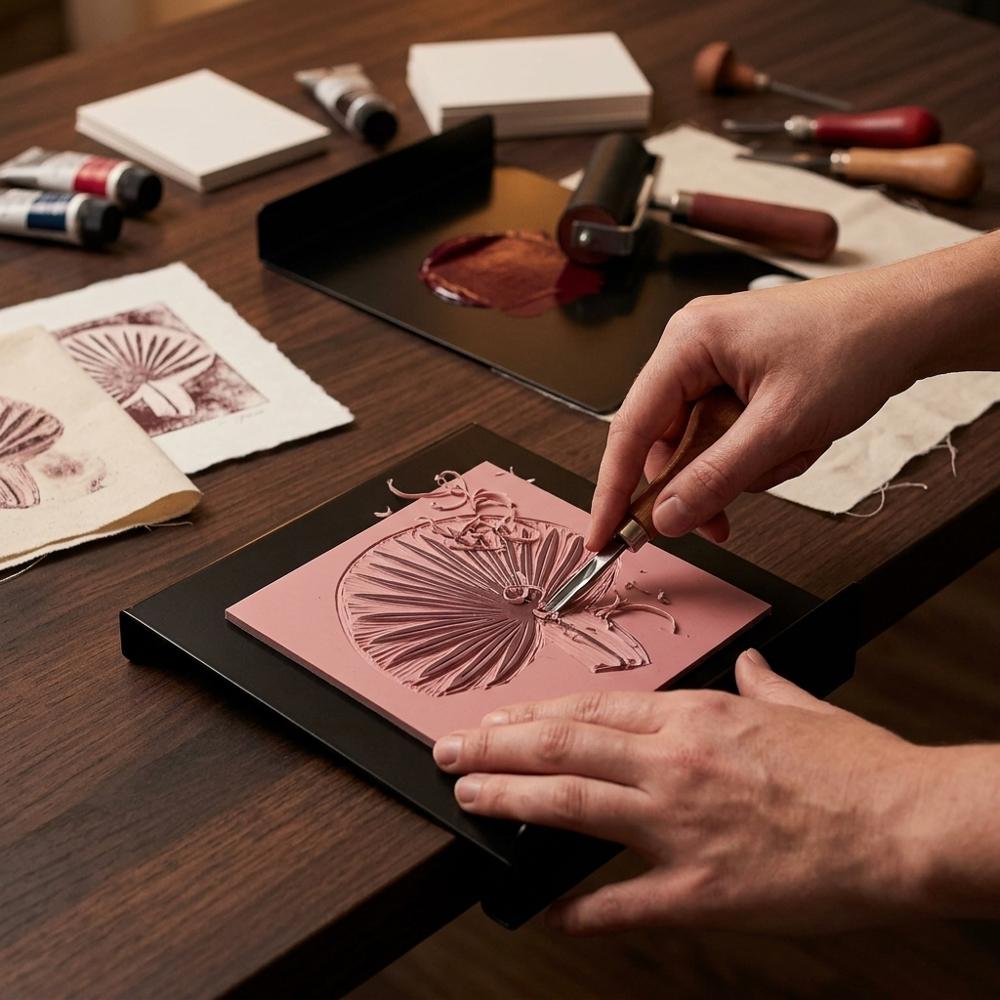
Professional two-handle gouge set for detailed carving
This carving set steps up from a basic single handle by adding a second grip and a wider range of professional-grade blades, including finer V-tools for delicate linework. Two handles let you keep a detail blade and a clearing blade ready at once instead of constantly swapping. Sharper, better-machined blades hold an edge longer and cut cleaner curves.
Traditional grey battleship linoleum carving block
Traditional battleship-grey linoleum is the classic relief surface: a firmer, slightly grainy material mounted on burlap that holds crisp detail and a sharp printed line. It resists the blade more than soft rubber, so cuts feel more deliberate, and warming it slightly makes it carve more easily. The matte grey surface is the material generations of printmakers learned on.
Wide soft rubber brayer for larger prints
A wider roller inks a big block in fewer passes, which keeps the film even across a large image where a narrow brayer would leave overlapping tracks. A heavier frame and soft roller help lay down consistent coverage on broad flat areas. It complements rather than replaces a smaller roller, which still wins for tight spots and small blocks.
There is no wrong order to add these in; let your own prints tell you which limit you have hit first. Carving traditional grey linoleum feels noticeably different from the soft pink blocks, and trying it early helps you decide which you prefer before you commit to one. If you are still weighing whether linocut is the right craft for you at all, our guide on how to choose your first hobby is a calmer place to start than a cart full of supplies.
Why Does My Print Look Worse Than the Block Did?
Why do tiny bits of my design keep snapping off as I carve?
Beginners almost always carve too deep and undercut their lines, leaving thin walls of rubber that tear away under the brayer or while burnishing. The fix is to keep cuts shallow and angle the blade so each line is wider at its base than its top, like a little pyramid. Shallow, beveled cuts hold fine detail far better than deep vertical ones. It feels backwards because deeper looks more carved, but only the top surface ever touches the paper.
Why does my print come out patchy and grey instead of solid black?
This is almost always too little ink rolled too few times, not a fault in the block. A properly charged brayer makes a quiet hiss-and-tack sound as you roll it on the plate, and the ink film should look like velvet rather than wet paint. If you can still see roller tracks on the slab, keep rolling thin layers until they vanish, then ink the block in two directions. Flooding it in one thick pass just fills your fine lines instead of coating the surface.
Why will the ink not wash off my hands and tools even though it is water-based?
Water-soluble block ink stays workable for a while but resists water once it has dried into a thin film, which is exactly what happens on a brayer left sitting for ten minutes. Clean everything while it is still wet and the whole lot rinses off with soap and water. Let it skin over and you will be scrubbing dried ink out of the roller's edges for ages. Set out a damp rag before you start, not after you finish.
Why do my prints come out backwards, especially any lettering?
A relief print is a mirror image of the block, so any text or asymmetric design carved exactly as you see it will print reversed, a trap that ruins many first lettering attempts. Draw your design normally, then flip it before transferring it onto the block, which is one reason transfer paper earns its place. Check the mirror direction before you cut a single line, because there is no fixing it afterward. Holding the drawing up to a bathroom mirror is the oldest check for this.
Why does my paper stick or tear when I lift it off the block?
Too much ink combined with too much pressure makes the paper bond to the block, and yanking it straight up tears the print or smears the edges. Use a thinner ink layer and peel from one corner in a slow, continuous motion. Lightweight, smooth paper releases far more easily than thick watercolor stock, which is another reason dedicated printmaking paper is worth using early. If it still grabs, you are almost certainly over-inking.
Love what you see here? Save individual picks with ⋮ on any item, or copy the whole list to your own wishlist in one click — great for coming back to later, or dropping as a not-so-subtle hint.
 A Few More Beginner Setups We Carefully Put Together
A Few More Beginner Setups We Carefully Put Together
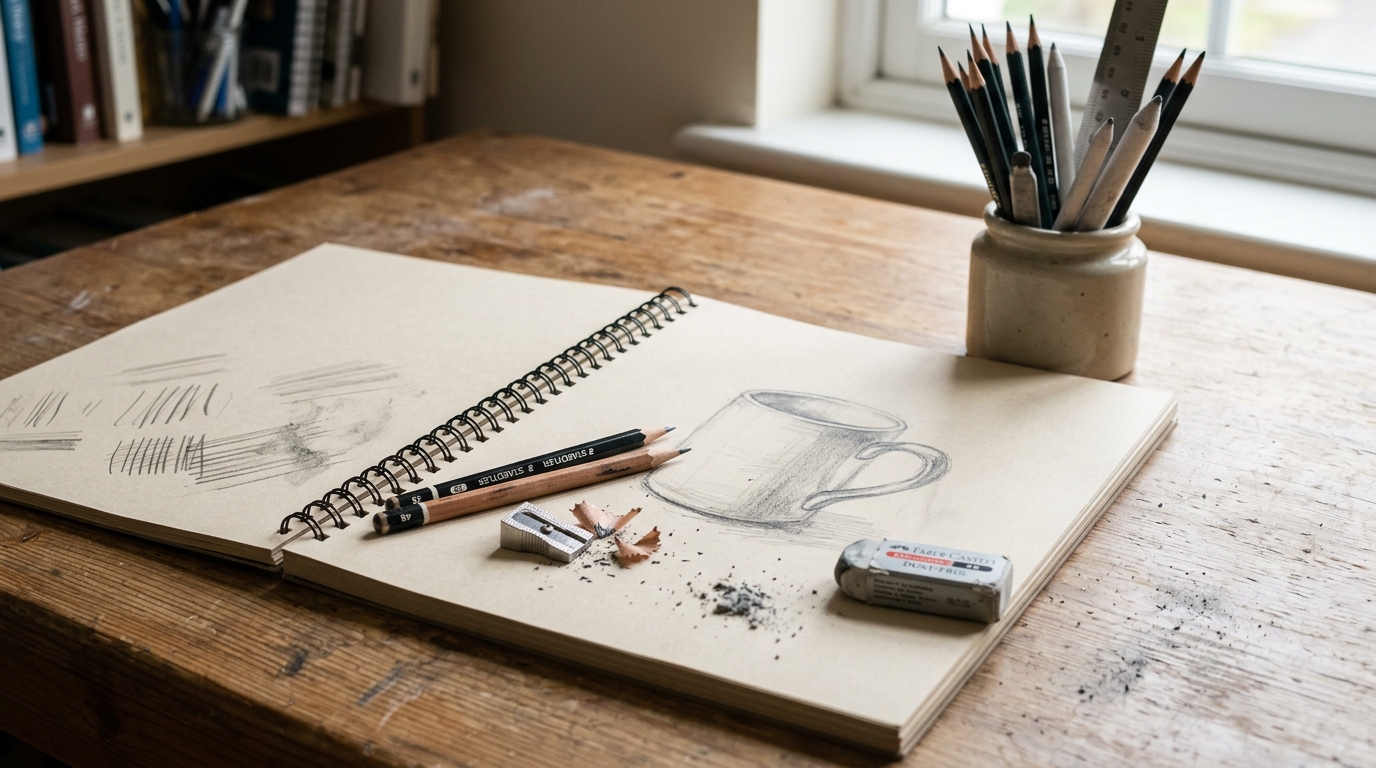
Beginner Pencil Sketching Setup: What You Actually Need
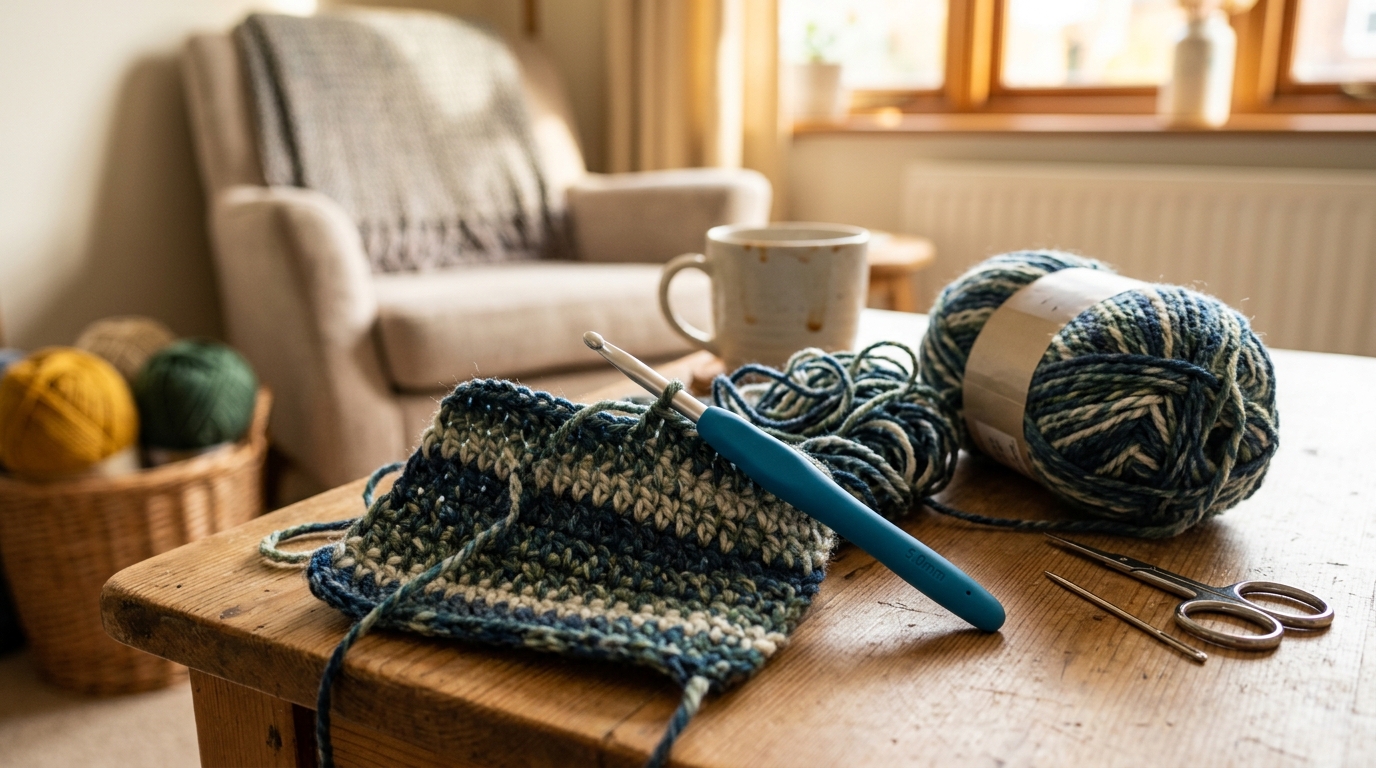
Beginner Crochet Setup: Hook, Yarn, and Starter Stitches
Disclosure: Some product links may be affiliate links. If you make a purchase through one of these links, we may earn a small commission at no extra cost to you.