Open the package and you get sheets of steel the colour of a kitchen sink, each one covered in hundreds of tiny parts still joined to the frame around them. You snip a part out, push its tab through a slot in another part, and either fold the tab flat or twist it a quarter turn. No glue. No paint. Two printed symbols govern the whole craft - a circle means fold, a triangle means twist - and the makers warn you on the instruction sheet that folding the same crease back and forth more than twice will weaken or snap it. Two chances per fold is the entire difficulty of the hobby, and nobody mentions it until you have already broken something.
Most people's first mistake happens before their first fold. They free a part by wiggling it loose from the sheet, the way you would snap a plastic piece off a sprue, and steel does not forgive that - the part comes away already bent, and a bent part never sits flat again. It's a quiet, fiddly, oddly absorbing way to spend an evening, somewhere between a patience craft with a jaw-dropping result and a puzzle that fights back.
Our philosophy: buy the smallest pile of tools you can and let the first kit teach you the rest. A kit, something to snip with, something flat to grip with, and tweezers that don't flex will build almost anything the big brands sell. The pens and drill bits already in your desk will handle the curves.
Everything below is cheap enough that if this turns out not to be your thing, you've lost the price of a pizza.
Where This Little Kit Can Take You
A few real moments and results from this hobby — made with tools no fancier than the ones below.
A steel car the size of a thumbEvery panel on it started as a flat shape on a sheet.
Rolling a flat panel roundThe curve has to go in before any tab gets closed.
An easy-rated kit takes under an hour once your hands find the rhythm, which is a fast way to find out whether you like this. If you do, the next few evenings vanish pleasantly. It's the colder, shinier sibling of wooden mechanical model kits, and the two hobbies share almost nothing except the feeling of a box of flat parts turning into a thing.
Four Things on the Table Before You Open Anything
The kit instructions name four tools and that's genuinely all you need: a clipper, flat nose pliers, needle nose pliers and tweezers. I'd drop the needle nose pair for a first build - the flat ones do ninety per cent of the work and the rest you can fake with tweezers. What you cannot fake is the clipper. Builders who try to start without one spend the evening straightening parts instead of assembling them, and the smell of warm metal on your fingers is a lot more enjoyable when the parts are going together rather than coming apart.
Disclosure: This section may contain affiliate links to Amazon. We may earn a small commission from qualifying purchases at no extra cost to you.
01Pick 01 of 12
3D Metal Motorcycle Model Kit
A 3D metal model kit arrives as flat steel sheets with every part still attached to the frame around it. You snip the parts out, fold or twist the little tabs through matching slots, and the shape stands up on its own with no glue and no paint. For a first kit, look at the part count before anything else; under about a hundred parts keeps a first build to one evening instead of three.
Why we picked this exact one: The Piececool 72-piece motorcycle sits in the sweet spot for a first build: enough parts to feel like a real model, few enough to finish in an evening. It holds 4.3 stars across a few hundred ratings, and the curved fenders give you honest practice at rolling flat steel without being the whole model. The wheel spokes are the fiddliest thing in the box, so do those when your hands are fresh.
Flush cutters have small, flat-backed blades that cut right up against a part and leave a square edge instead of a pinched one. On a metal kit they do one job constantly: freeing each part from the sheet at the two or three tiny points holding it. Look for a short, fine jaw rather than a general-purpose wire cutter, which is too chunky to get in close.
Why we picked this exact one: The BOOSDEN mini flush cutters are the cheap version of the tool practitioners actually reach for, and at ten dollars there is no reason to start a kit without one. The jaw is short enough to get between parts packed tight on a sheet. They will not stay razor-sharp forever on steel - harder sheets dull any cutter eventually - but they will outlast a dozen kits.
Flat nose pliers have two broad, parallel jaws with no teeth. That flat face is what lets you press a tab down evenly instead of creasing it in one spot, and the grip is firm enough to twist a tab a quarter turn without it slipping. Smooth jaws matter here more than they do in most crafts, because serrations leave marks on polished metal that never come out.
Why we picked this exact one: The Miular 5-inch flat nose pliers are smooth-jawed, which is the detail worth paying attention to - plenty of cheaper jewellery pliers come serrated and will print a waffle pattern onto a visible panel. They sit at 4.5 stars over several hundred ratings. The spring is a little stiff out of the packet and loosens up after a build or two.
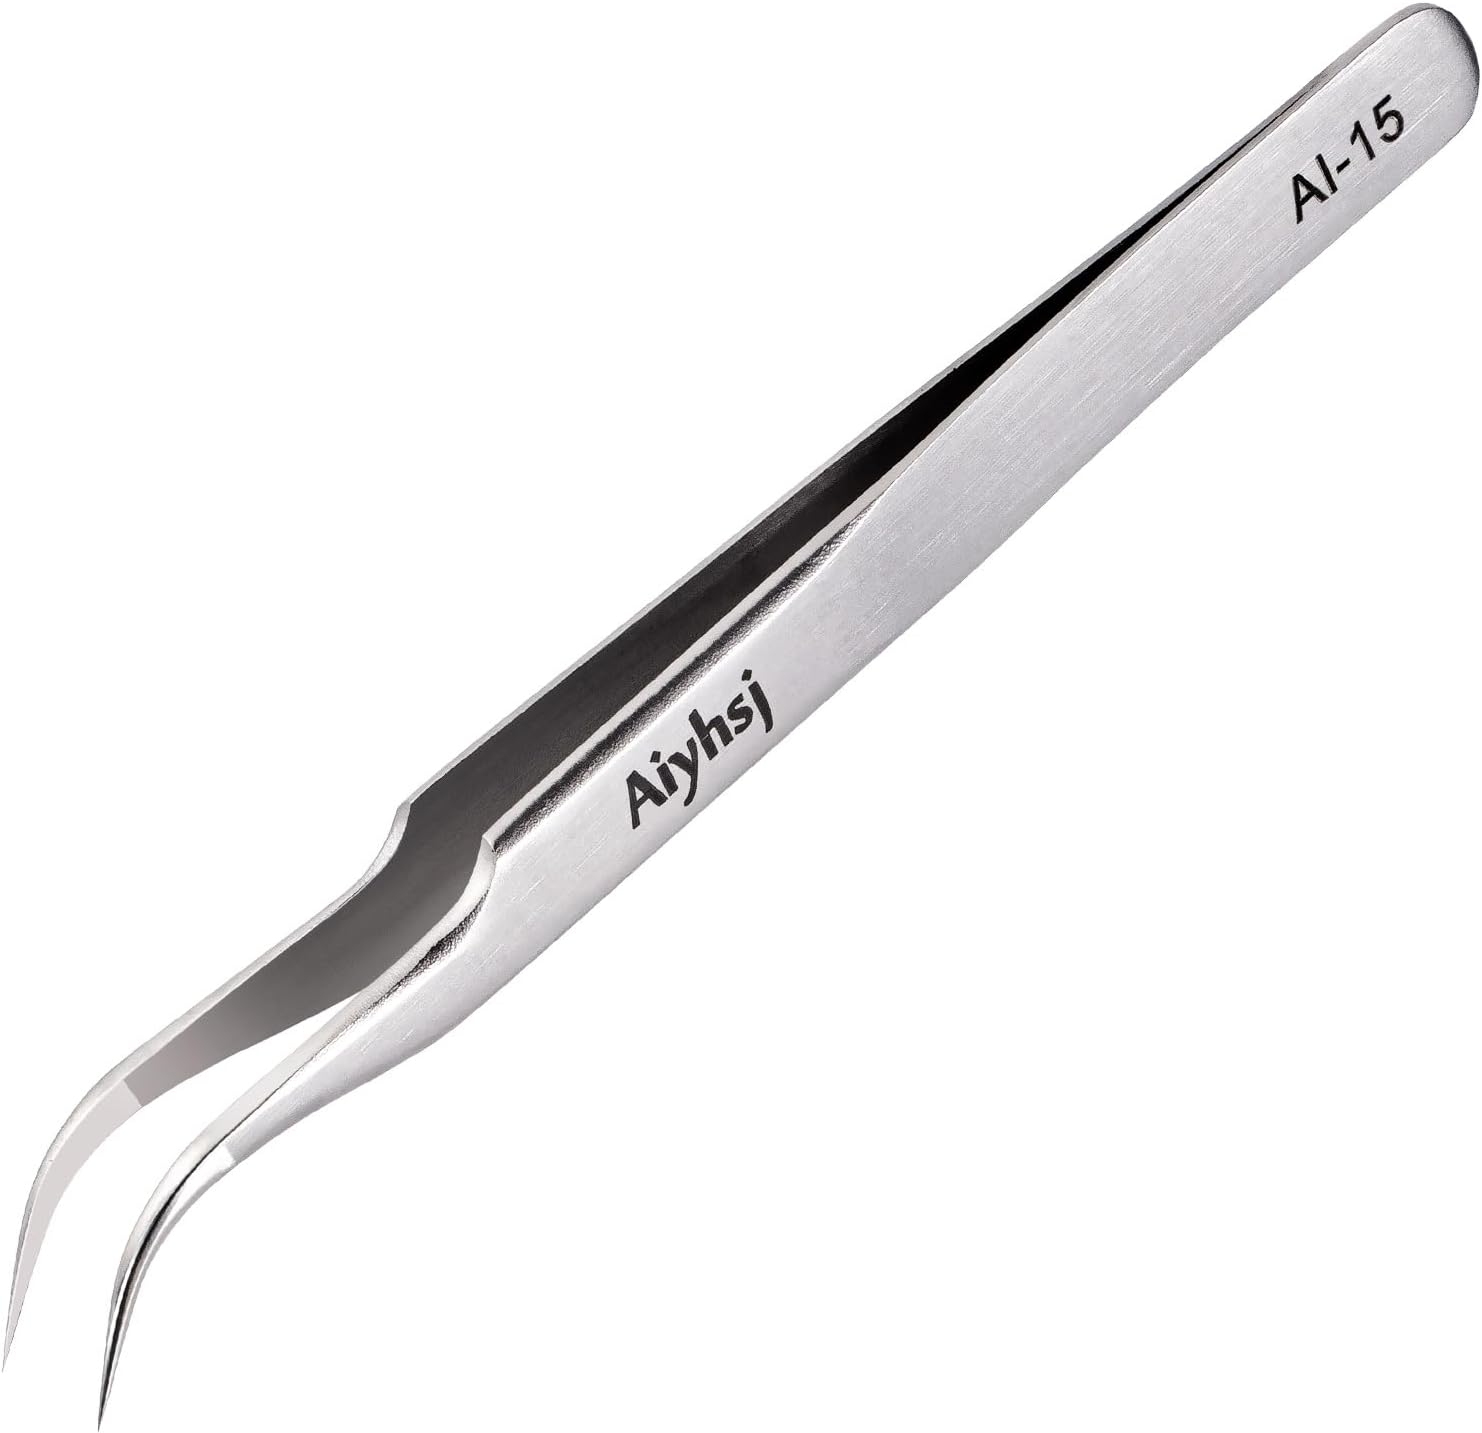
Precision tweezers hold the parts your fingers are too big for, and on a metal kit they do double duty: picking up a two-millimetre part and gripping a tab tight enough to twist it. A curved tip reaches around a part that is already in place. The thing to check is stiffness, not sharpness - the tips have to meet under pressure without splaying apart.
Why we picked this exact one: This Aiyhsj curved precision tweezer is stainless and genuinely firm, which is more than you can say for the free pair that sometimes comes taped into a kit box. It carries 4.7 stars over three hundred-odd ratings. The tips are fine enough to be worth keeping off hard surfaces - drop them point-down once and the alignment goes.
That's forty-odd dollars for a complete start, and three of those four things will outlast every kit you ever buy. Keep the tools together in one tin from the beginning, because the moment they migrate into the general kitchen-drawer population you will never find the tweezers again. If you're still deciding whether tiny metal is your medium at all, it's worth seeing how the miniature formats compare before you commit a shelf to it.
The Things You'll Want by the Third Kit
None of this is needed to finish a model, and I'd resist buying any of it until a specific build has annoyed you in a specific way. That's how most builders' toolkits actually grow: a kit full of funnels sends you looking for cone formers, a kit with parts the size of a grain of rice sends you looking for light. The same creeping-tool-collection problem shows up in every small-scale craft - anyone who has built a whole scene inside a walnut shell knows the feeling.
05Pick 05 of 12
Clamp-On Lighted Magnifier
A clamp-on magnifier fixes a glass lens and a ring of light over your work so both hands stay free. On a metal kit the useful part is as much the light as the lens: the part numbers are etched, not printed, so they only show up when light rakes across them at an angle. Modest magnification beats extreme magnification, because a very strong lens gives you a working distance too short to get pliers underneath.
Why we picked this exact one: The Coyeth 10X clamp magnifier is the budget end of the lighted-magnifier category and still has a real glass lens rather than acrylic, which matters because plastic lenses haze. Over sixteen hundred ratings put it at 4.3 stars. The clamp wants a desk edge under about two inches - check yours before ordering.
Chain nose pliers taper to a narrow tip, and a bent version angles that tip away from the handles. That angle is the point: it lets you reach a tab down inside a closed shape without the handles fouling on the model. They complement flat nose pliers rather than replacing them, since the narrow jaw grips in tight places but does not press a long fold flat.
Why we picked this exact one: The Beadsmith bent chain nose pliers have a polished head and double-leaf springs, and the brand is a long-standing jewellery-tool name rather than an anonymous import. They sit at 4.8 stars, though on a modest sixty-odd ratings. At six inches they are longer than most kit tools, which is good for reach and slightly clumsy on a small model.
These are simple steel rods in graded diameters, some tapered into cones, that you roll a flat part against to curve it. The cones handle shapes that narrow along their length - funnels, nose sections, tower tops - which a single-diameter rod cannot do smoothly. Pens, drill bits and dowels do the same job for free, so the thing you are buying is having the right diameter already to hand.
Why we picked this exact one: This Piececool six-piece set is made for exactly these kits rather than borrowed from jewellery-making, and the cone tools are the part that earns the money. It holds 4.6 stars across several hundred ratings. Honestly, you can get a long way with a set of drill bits first and buy this once you hit a kit full of tapered shapes.
Cyanoacrylate, the stuff sold as super glue, is the standard repair for a broken metal part. The gap-filling grades are slightly thicker than the watery kind and are more forgiving on a joint that does not close perfectly. Metal to metal is a slow bond compared with plastic, so expect to hold the pieces still for a minute rather than a few seconds.
Why we picked this exact one: Zap-A-Gap is the cyanoacrylate most metal-model builders keep on the bench, and at 4.8 stars over eighteen hundred ratings it is about as settled a recommendation as this category gets. Apply it with a pin or a toothpick rather than straight from the bottle; more glue sets slower and weaker, not faster. Buy the small bottle - opened cyanoacrylate has a short life and bulk is false economy.
The one thing on this list I'd argue for early is the light. Etched part numbers only appear when light rakes across them at an angle, and squinting at a steel sheet under a ceiling bulb is a miserable way to spend twenty minutes. Once you have a few finished models, the storage question arrives fast, and a shadow box setup solves it better than a dusty shelf does.
Where This Goes After Your First One
After two or three kits the hobby forks, and which way you go changes what you buy. Architecture rewards patience and gives you repeating detail no other miniature medium can match cheaply. Vehicles ask you to get things square. Mechanical kits add a motor and punish loose joints. And a colour-printed kit finishes looking like an object rather than a model, which matters if the thing is going in a living room rather than a workroom. Builders who've come from dollhouse miniature making usually gravitate straight to the architecture end.
09Pick 09 of 12
Metal Cathedral Model Kit
Architectural kits are where the format shows off: repeating arches, tracery and spires that would be miserable to carve and are trivial to etch into flat metal. They run to several sheets and several hundred parts, and most of the work is repetition rather than difficulty. Part count is the honest measure of how many evenings one will cost you.
Why we picked this exact one: The Piececool Notre Dame runs to 382 pieces and is the obvious step up from a one-evening kit without jumping straight to a thousand-part ship. It carries 4.3 stars over five hundred ratings. Set aside several sessions and a tray - the flying buttresses are small, repetitive and easy to mix up with each other.
Vehicle kits bring in two things the flat-and-upright models do not: running tracks made of many near-identical links, and a turret that has to seat squarely on a hull you have already closed. The reward is a model that reads as a machine rather than a silhouette. They sit at a middling part count, which makes them a sensible second or third build.
Why we picked this exact one: The Piececool Centurion tank is 172 pieces, roughly double a starter kit and a fraction of a cathedral, which makes it a good bridge. It sits at 4.3 stars over a couple of hundred ratings. The track runs are the tedious part and the wheels underneath them barely show, so nobody will know if you rush those.
Mechanical kits add a small motor, axles and linkages to the usual folded sheet, so the finished model does something instead of just standing there. The assembly is the same tab-and-slot technique with tighter tolerances, because a joint that is a little loose becomes a wobble you can watch. They cost noticeably more than static kits of the same size.
Why we picked this exact one: The ROKR Manta Ray is an electric mechanical build with a wing motion that genuinely works, and ROKR has a long track record in moving model kits. It sits at 4.6 stars, although on under a hundred ratings so far. At sixty dollars it is the most expensive thing on this page, and it is the wrong first kit - come back to it once your tabs are landing square.
Some makers print colour onto the sheet before cutting, so the finished model comes out shaded rather than silver. The building is unchanged; what changes is handling, because a scratch across a printed panel shows far more than a scratch on bare metal. Botanical and insect subjects suit the format, since petals and wings are thin flat shapes to begin with.
Why we picked this exact one: The MU Flower and Butterfly kit is colour-printed rather than plain steel, and MU is one of the few makers doing that well at this price. It sits at 4.2 stars over a hundred-odd ratings, the lowest rating on this page. Printed parts mark easily, so this is the one kit here where you want smooth-jawed pliers rather than whatever is nearest.
One honest warning about the step up: a 400-part kit is not four times harder than a 100-part kit, it's four times longer, and the difference between those two things is the difference between a hobby and a chore. Finish the small ones first. If you'd rather build a whole scene than a single object, diorama building scratches a similar itch with far more room to improvise.
Why Your Second Fold Is the One That Breaks Everything
Why did my tab snap when I was only straightening it?
Beginners treat a wrong fold as something you can simply undo, because in every other craft you can. Steel keeps a count: the makers state plainly that folding a piece back and forth along the same line more than twice will weaken or break it, so the fold, the correction and the re-correction use up everything you have. Once a tab snaps off, don't try to reattach it - it's too small to hold and would need folding again anyway. Glue the two parts the tab was supposed to join instead, and from then on read a step twice before committing the first fold.
Why do my parts come out of the sheet already bent?
Because they're being torn out rather than cut out. Flexing a part back and forth until it pops free puts exactly the kind of repeated bending into it that the fold limit warns about, and it usually bends the part along its weakest line rather than at the attachment point. Snip each connection flush with cutters while the sheet lies flat on the table, then flatten any little burr with the pliers before the part goes anywhere near a slot.
Why does my cylinder come out looking like a hexagon?
Because it was closed before it was curved. A flat strip forced round into a slot takes the shape in a few sharp creases instead of one continuous curve, and once a crease is in steel it stays. Roll the part back and forth around something round - a pen barrel, a drill bit, a dowel - working from the middle outward until the metal already holds roughly the shape you need, and only then start closing tabs.
Why does the instruction sheet tell me to do something impossible?
Occasionally it does, and beginners assume they have misread it. The printed order sometimes has you close a section in one step and then asks you, two steps later, to fold tabs that are now sealed inside it - there are kits rated easy that are nearly unbuildable if you follow the sheet literally. Read the whole thing before you start and look for anything you will need to reach into later, then leave that section open until the end.
Where do the tiny parts go when they vanish?
Onto the floor, and they're too small to spot there. The parts are steel, though, so a strip of magnetic tape on your work surface will hold clipped parts in rows, and a magnet swept over the carpet will usually find a runaway. Two cautions: don't drag parts across the magnet, because that scratches them, and the gold-finished kits often aren't magnetic at all, so those need a tray instead.
People Worth Following Into This Hobby
Real practitioners we found while researching this setup — people who do the work, show their process, and publish on sites they run themselves. No sponsorships, no affiliations; we just think they're worth your time.
Scratch-builds and kit-bashes models and photographs the brass and photo-etch work step by step, including the parts he ruined first.
His photo-etch page covers the exact two skills this setup starts with - cutting thin etched metal off a fret without pinching it, and folding it without a crease - and explains why ordinary plastic nippers are the wrong tool for the job.
Builds 3D metal kits and writes up each one, down to which tab snapped and what he did about it.
The FAQ here warns that a crease only survives two folds; his tab post is the illustrated version, showing when to twist instead of fold and why adjacent tabs bent the same way leave a part loose.
Has built over 250 metal kits, posts a report on each, and maintains public checklists of every model the main brands have released.
His bare-minimum tool list is the honest test of the four picks in the essentials section here, and he explains the clipping-versus-popping problem that the FAQ answers.
Love what you see here? Save individual picks with on any item, or copy everything to a list of your own in one click — great for coming back to later, or dropping as a not-so-subtle hint.