Knot Your First Wall Hanging: Macramé Made Approachable
The Four Things You Actually Need for Your First Knots
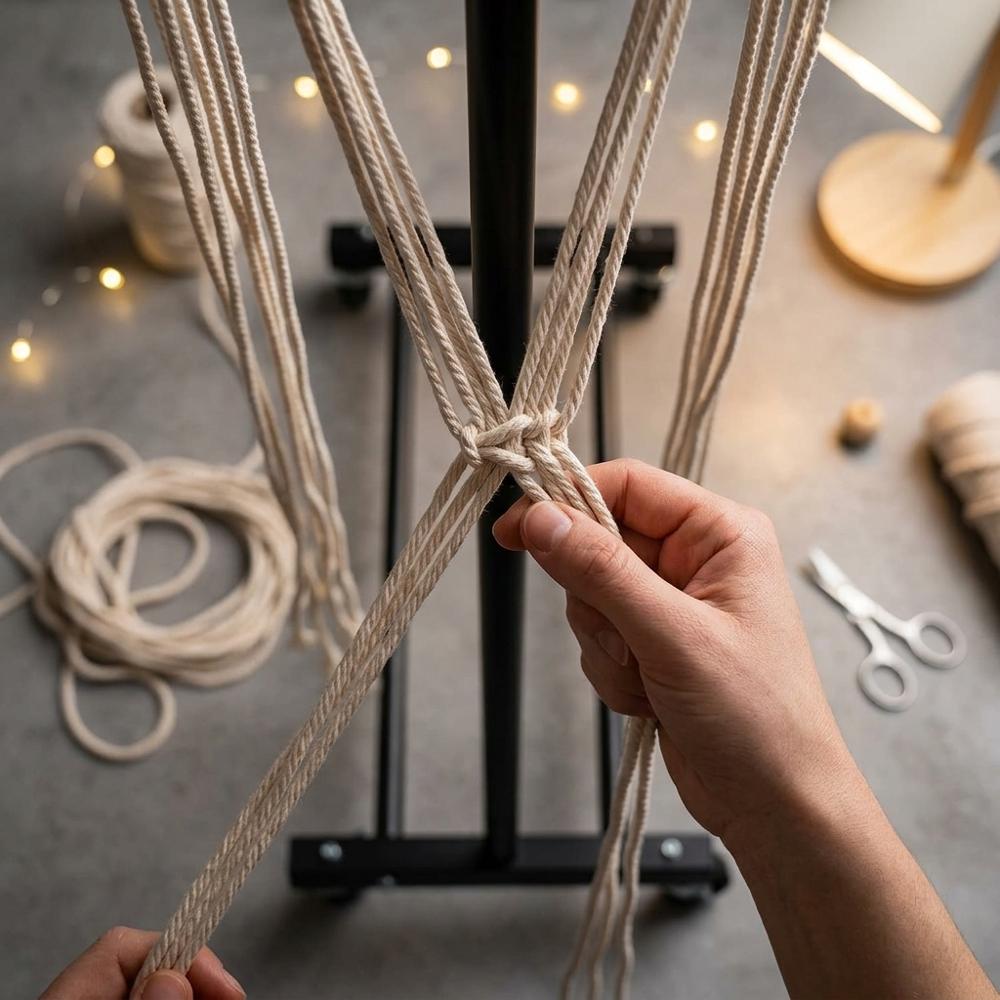
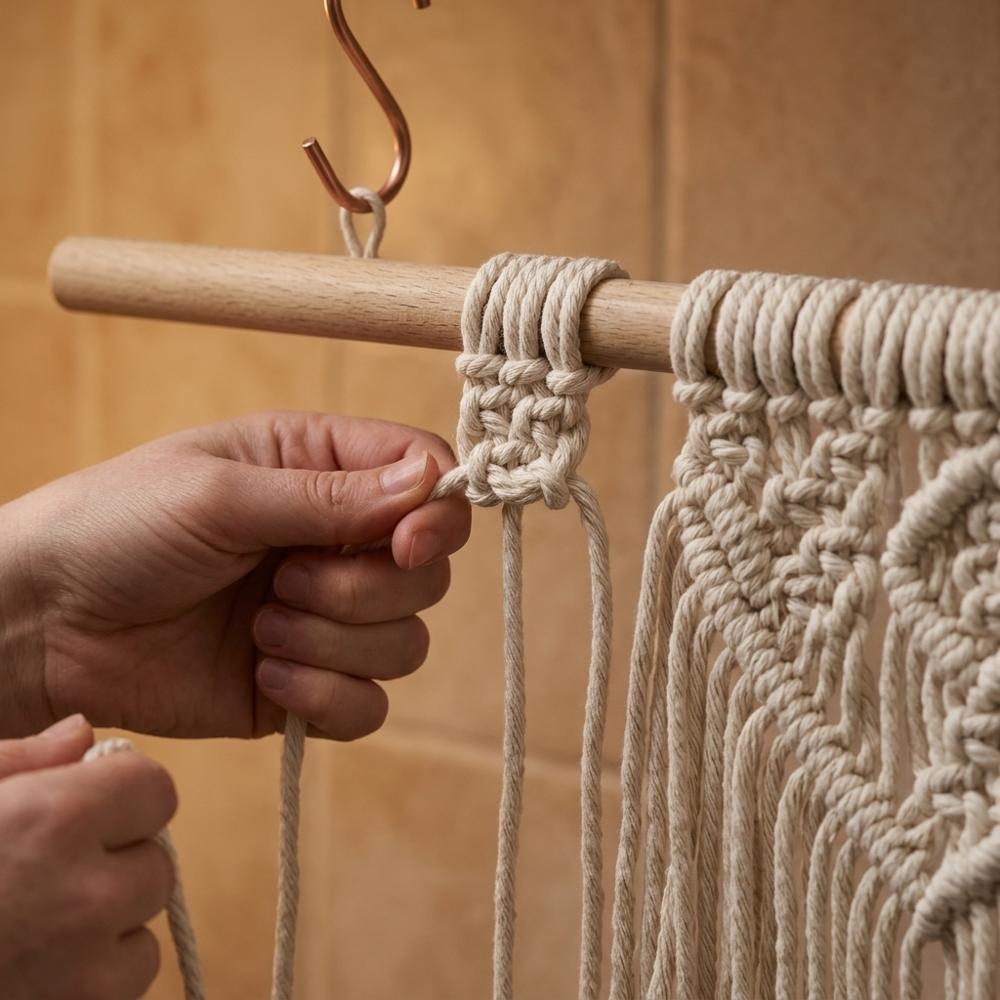
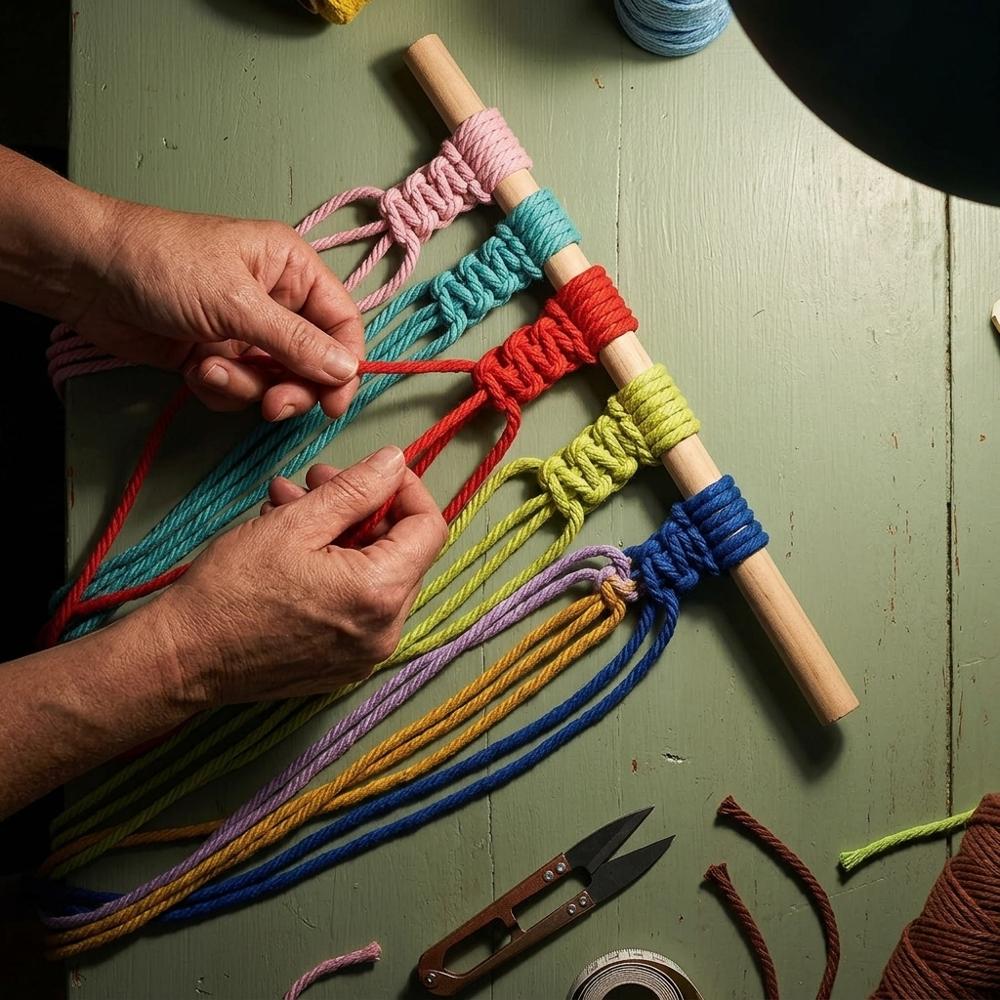
Macramé asks for less than almost any textile craft: a length of cotton cord, something to hang it from, and a sharp pair of scissors will carry you through a first wall hanging. The mistake beginners make is not buying too little but buying the wrong cord — a stiff three-ply rope when they wanted a soft single-twist, or a 6mm cord that swallows the detail of a small piece. If you have tried a hooped textile craft like beginner embroidery, the feel of working under tension carries over, though here the pattern is built from knots rather than stitches. Start with a soft 4mm single-strand cotton cord, a wooden dowel, sharp scissors, and a tape measure, and you can begin the same afternoon.
Pick 01 of 12
Durable Cotton Macramé Cord
4mm single-strand cotton macramé cord for wall hangings and plant hangers
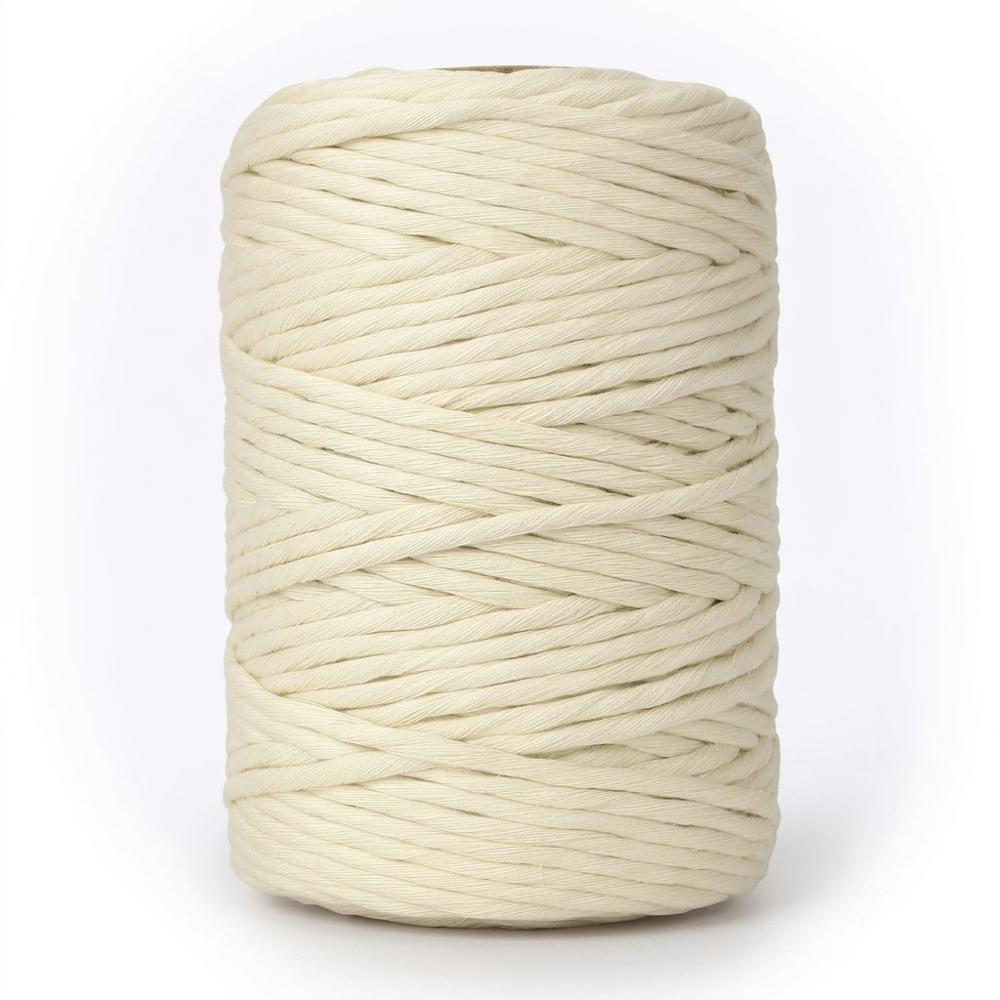
Single-strand (single-twist) cotton cord is the standard material for macramé, soft enough to knot by hand and able to be combed out into fringe at the ends. A 4mm thickness is a common beginner choice because the knots stay clearly visible without being bulky. Look for 100% cotton that feels soft rather than waxed or stiff, and check the listed length so you have enough for a full project.
Cord is the entire medium of macramé — every knot, pattern, and fringe is made from it, so its weight and twist shape how a project looks and feels.
Pick 02 of 12
Pack of Hardwood Dowel Rods
Unfinished wooden dowel rods for hanging macramé wall pieces
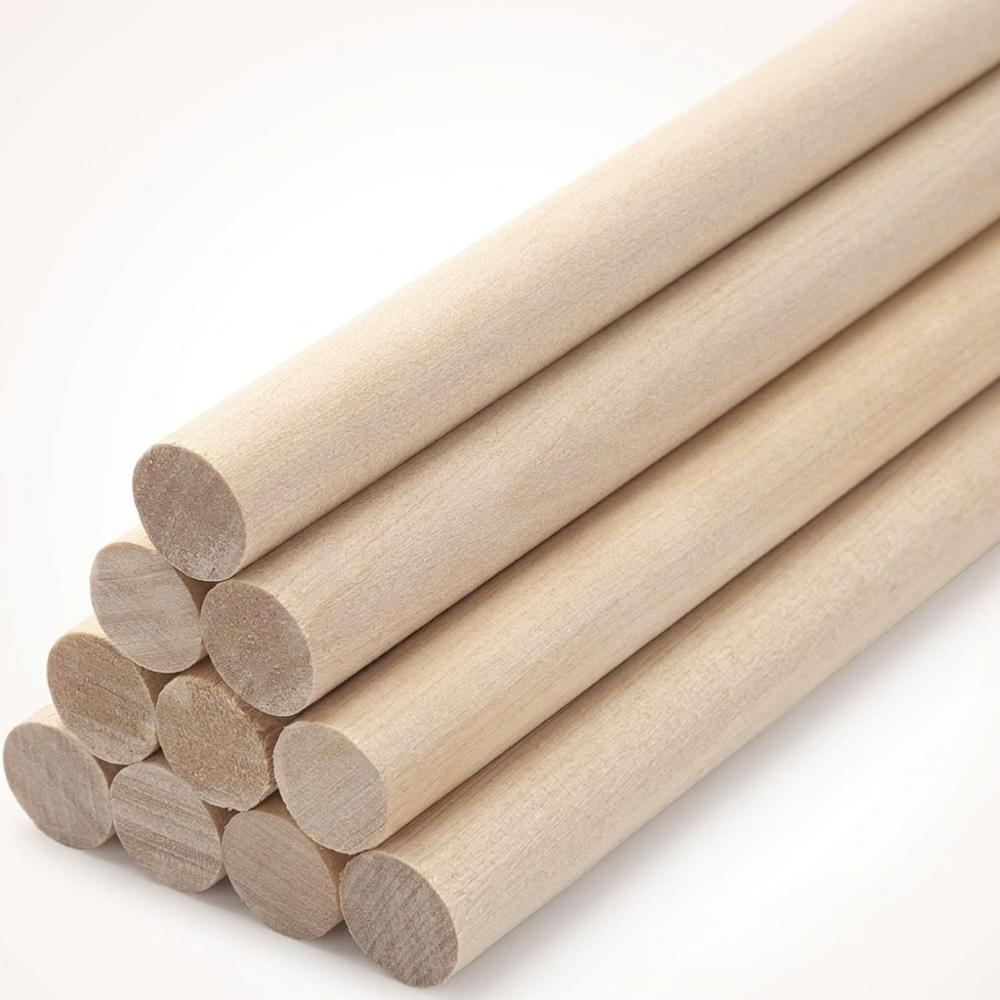
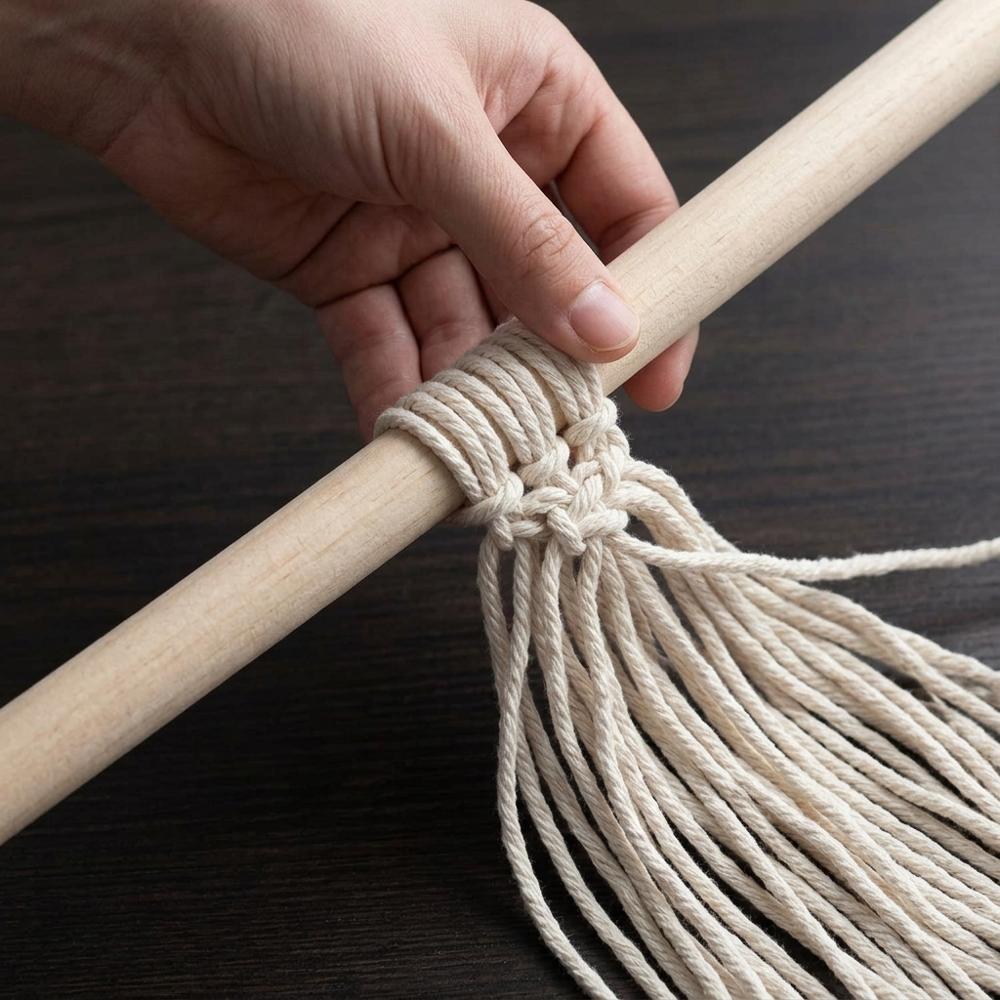
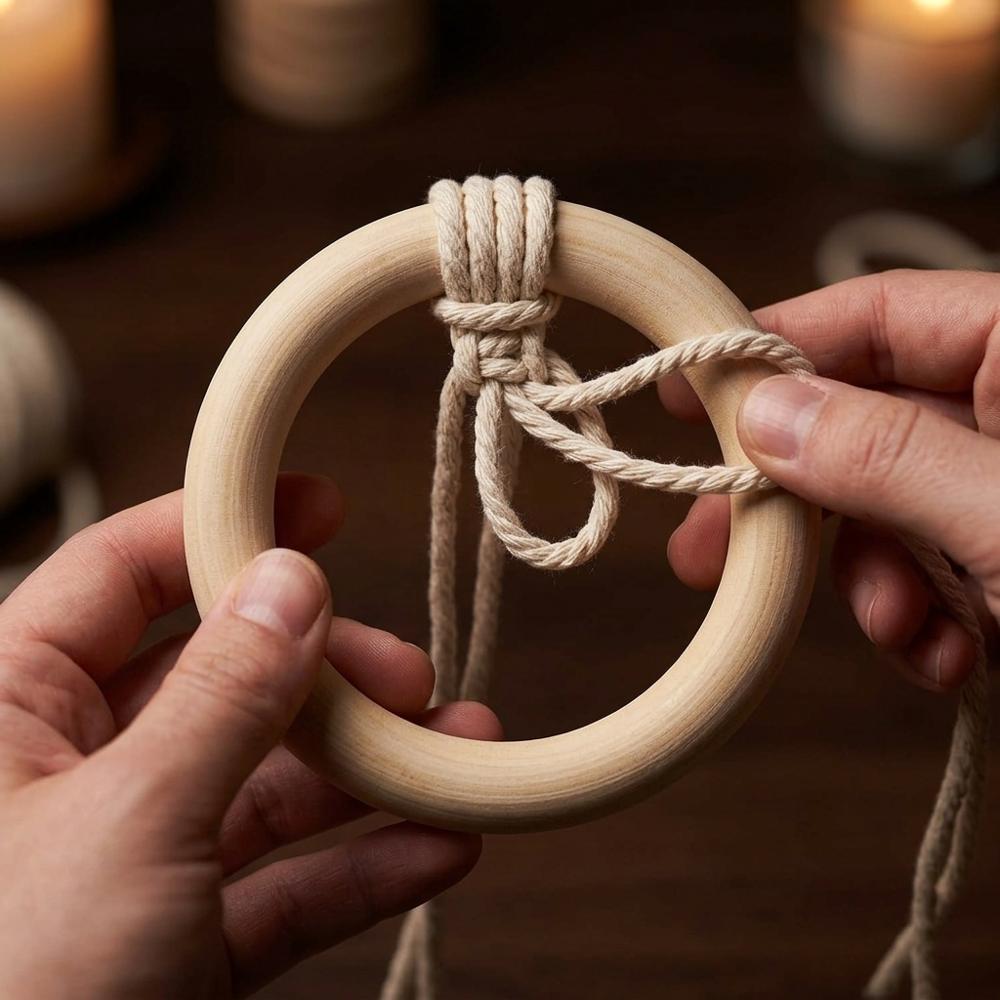
Wooden dowel rods give a wall hanging its top anchor — cords are mounted to the rod with lark's head knots and the rod is what hangs on the wall. Unfinished hardwood around half an inch thick is sturdy enough to hold a row of cords without bowing. A multi-pack is practical because most makers go through several as projects accumulate.
A wall hanging needs a rigid horizontal anchor to mount cords onto; without a dowel or branch there is nothing to knot against and the piece has no structure.
Pick 03 of 12
Heavy-Duty Tailoring Scissors
Heavy-duty fabric shears for clean cord and fringe cuts
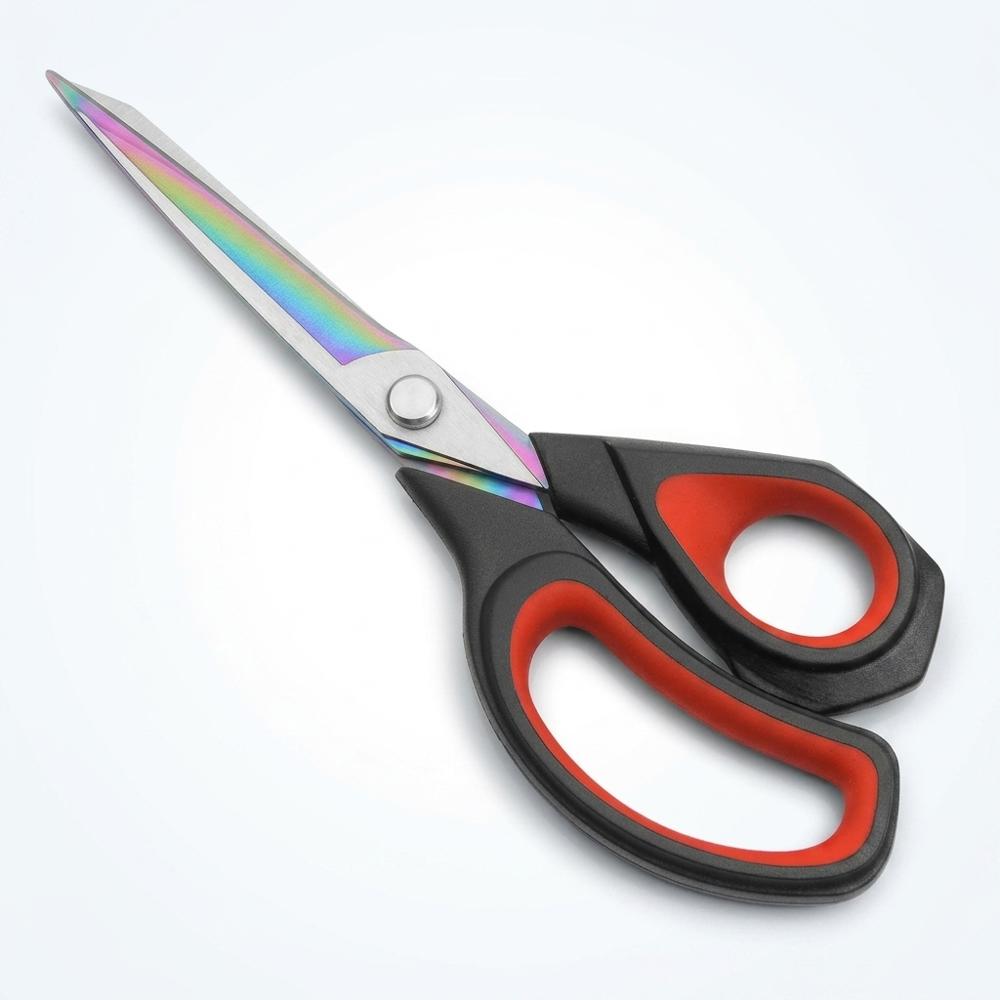
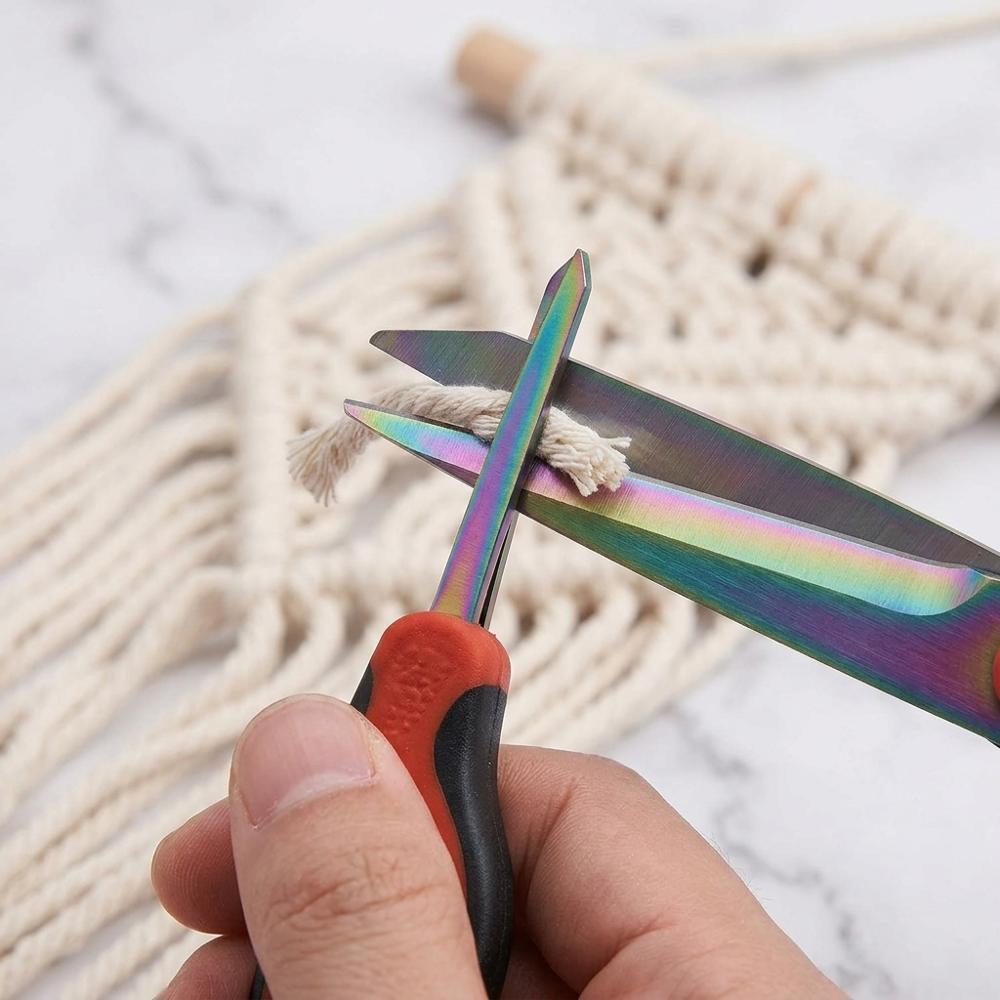
Macramé requires clean, square cuts through several plies of cotton, which dull craft scissors tend to crush rather than slice. A heavy fabric shear with a long blade cuts thick cord in one stroke and trims fringe evenly. Look for forged stainless steel and a comfortable handle, since fringe trimming involves many repeated cuts.
Ragged cord ends fray unevenly and spoil the look of fringe; a sharp blade is what separates a tidy finished edge from a messy one.
Pick 04 of 12
Dual-Scale Retractable Tape Measures
Retractable soft tape measure for cutting macramé cord to length

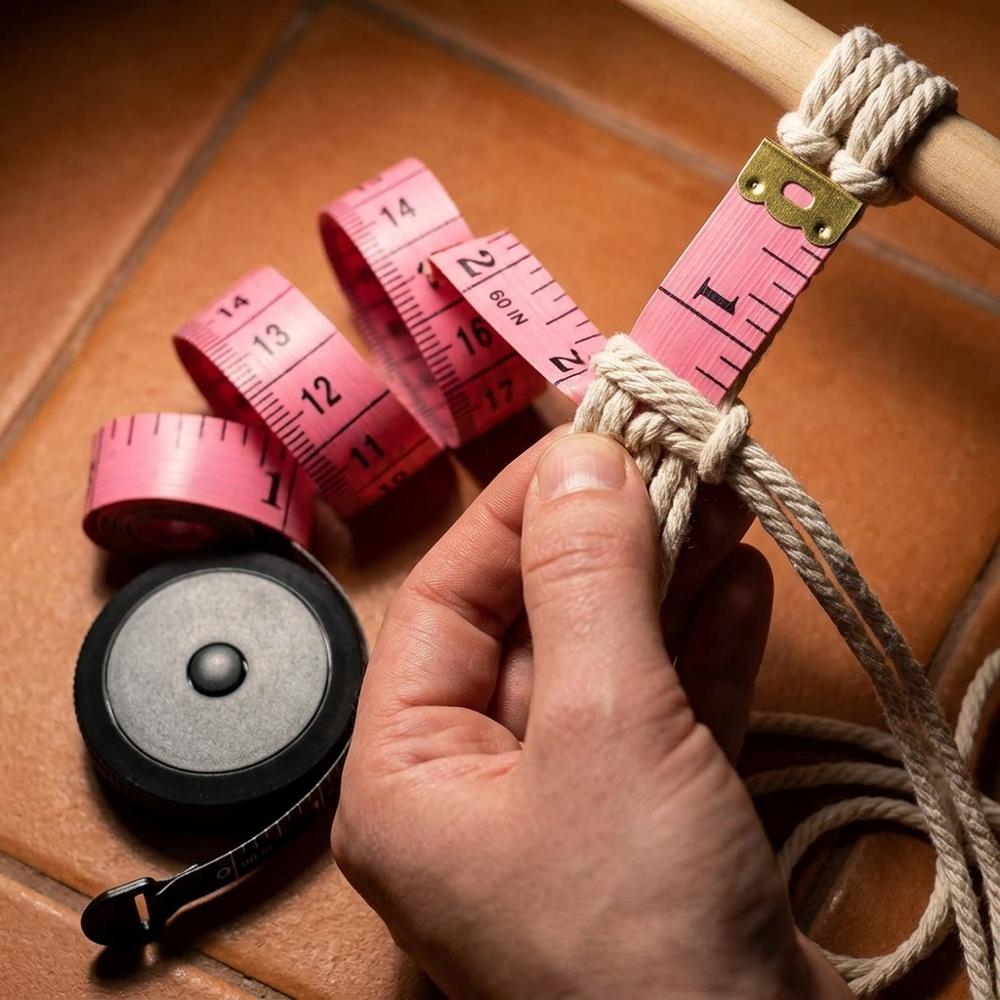
A soft, flexible tape measure is used to measure and cut cord to length before knotting, which matters because macramé uses far more cord than the finished piece suggests. A 60-inch retractable tape is easy to handle and stores flat. Dual centimeter and inch scales help when following patterns written in either unit.
Cutting cord to the right length up front prevents running short mid-project, the single most common reason beginners have to start a piece over.
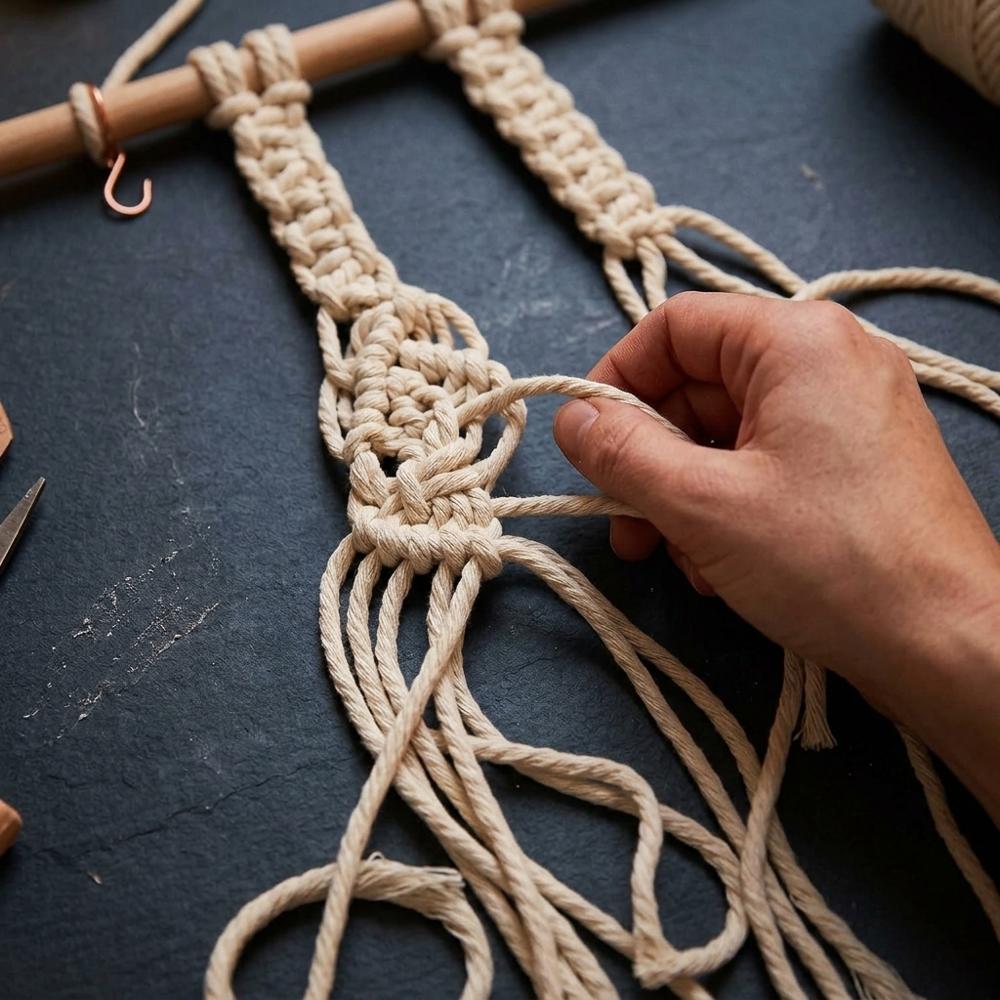
With these four items you can finish a small wall hanging using just two or three knots — the lark's head, the square knot, and the half hitch cover most beginner projects. Buy more cord than you think you need; knotting eats roughly four times the finished length, and running short mid-row is the quickest way to abandon a piece. Macramé earns its place among the more forgiving starter hobbies for adults precisely because mistakes are easy to untie and redo, which makes the next layer of tools worth a look.
Tools That Fix the Frustrations, Not the Skill Gap
Once you have finished a piece or two, the limits you feel are usually about your workspace, not your hands. Holding a growing wall hanging in your lap quickly turns awkward, and cords slip out of position the moment you set the work down. The items here solve those specific problems — a way to hang work at eye level, pins to lock knots while you plan the next row, a reference to widen your knot vocabulary, and a comb for tidy fringe. None are mandatory, much as the wool and barbed needles of a beginner needle felting setup stay optional until you commit to that craft, but each clears an obstacle that slows people down early on.
Pick 05 of 12
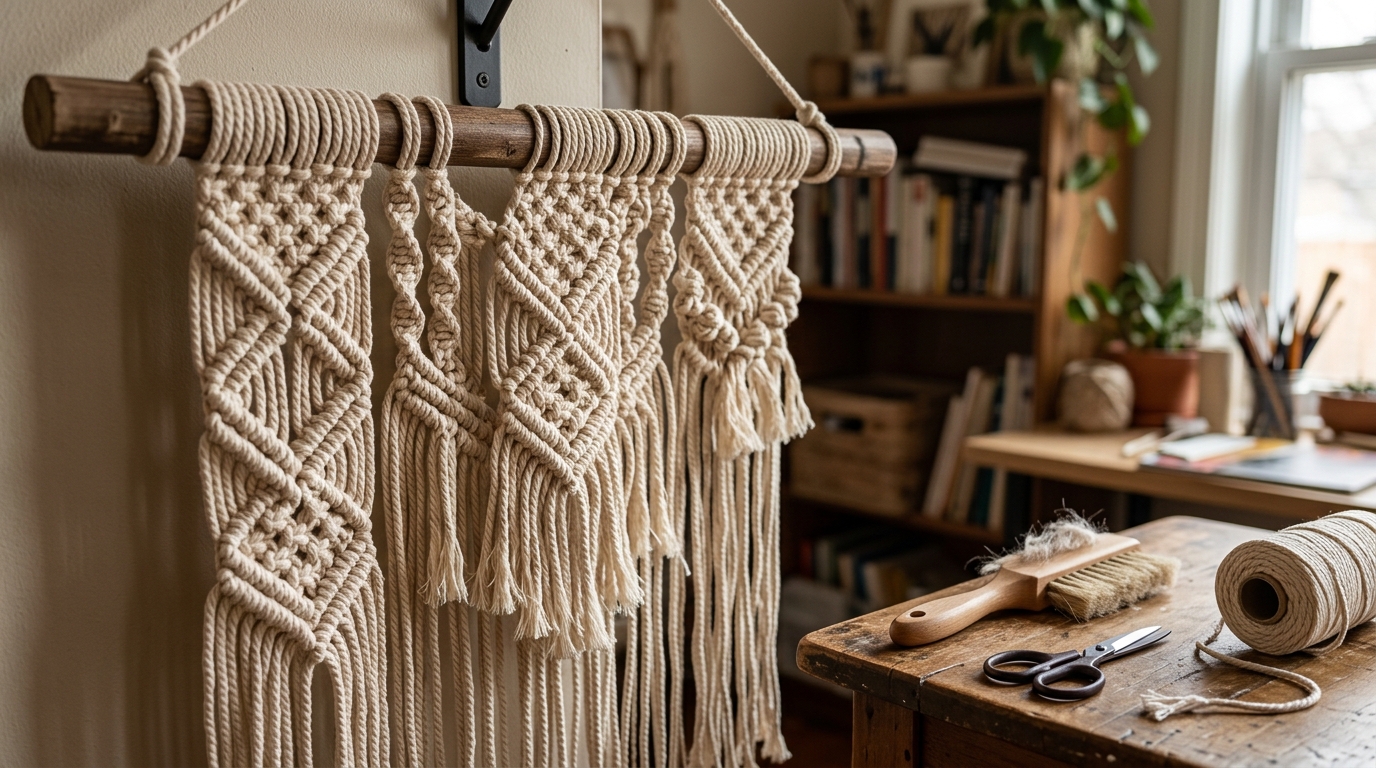
Portable Rolling Clothes Rack
Rolling garment rack as a vertical macramé workstation
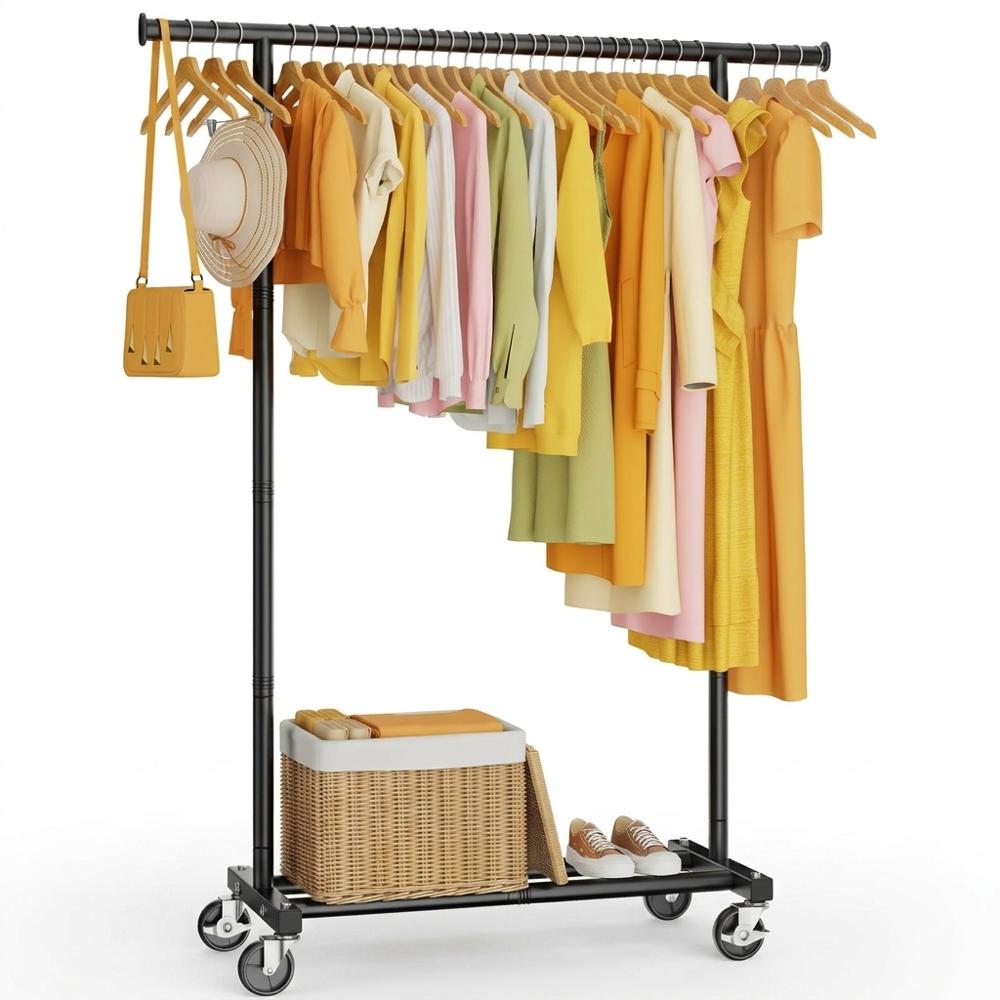
A rolling garment rack serves as a vertical workstation, letting you hang a dowel or project at eye level so the piece falls naturally as you knot. Working against gravity keeps tension even and lets you step back to check the pattern. An adjustable-height rack on wheels can be moved aside between sessions.
Knotting a long piece flat or in your lap distorts tension; hanging the work vertically is how makers keep rows straight and read their own progress.
Pick 06 of 12
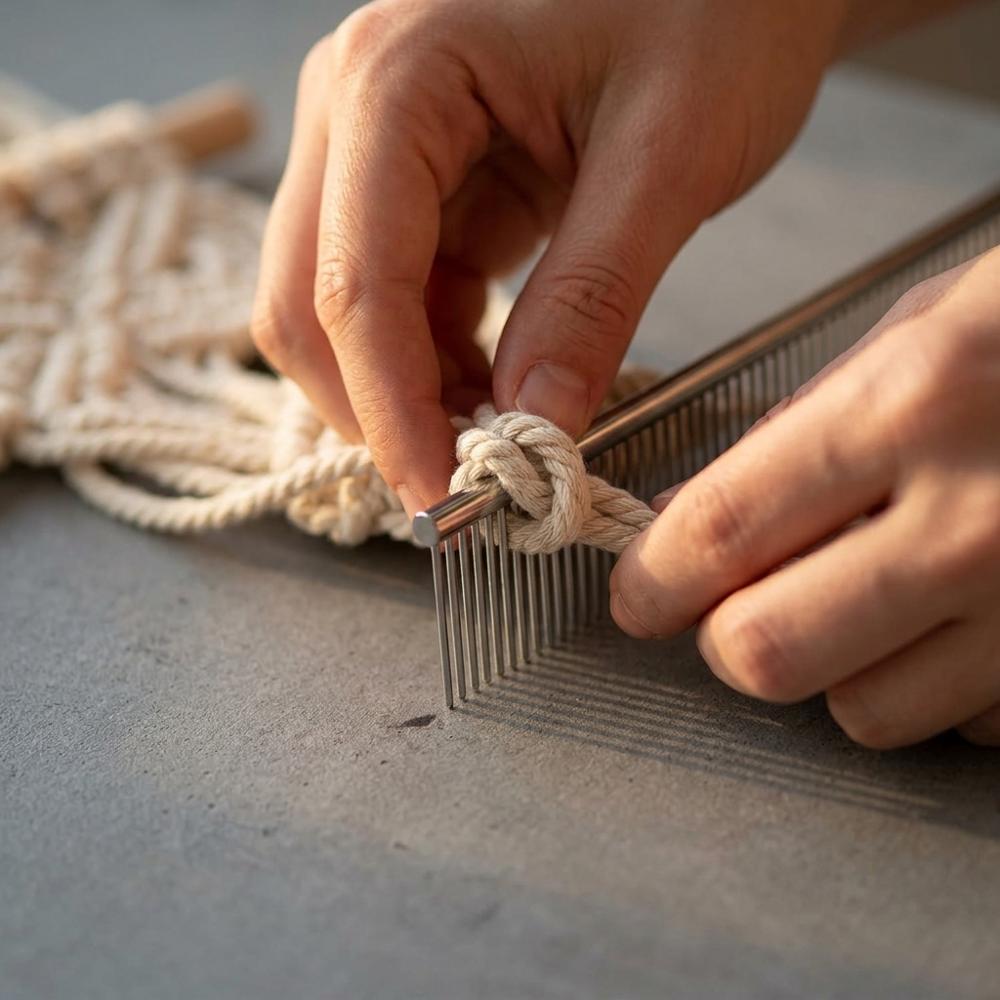
Stainless Steel Sewing T-Pins
Stainless steel T-pins for pinning macramé knots in place
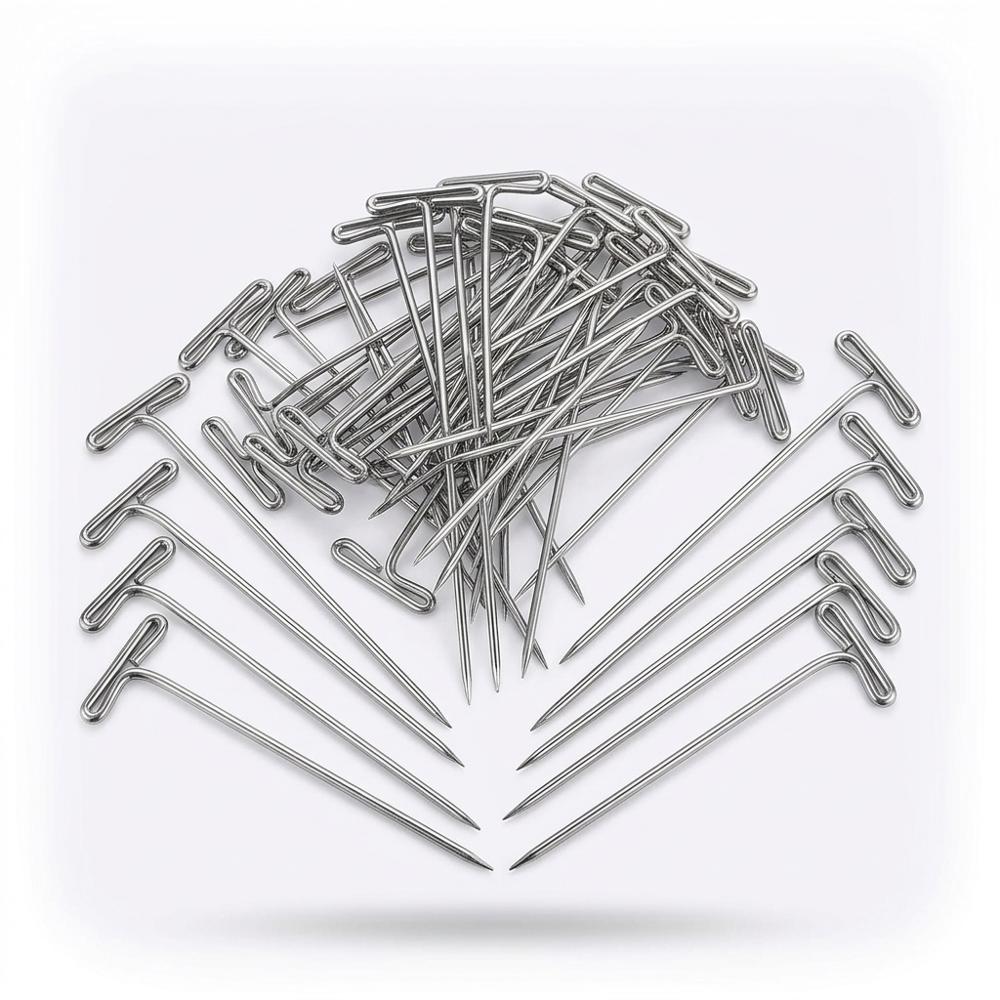
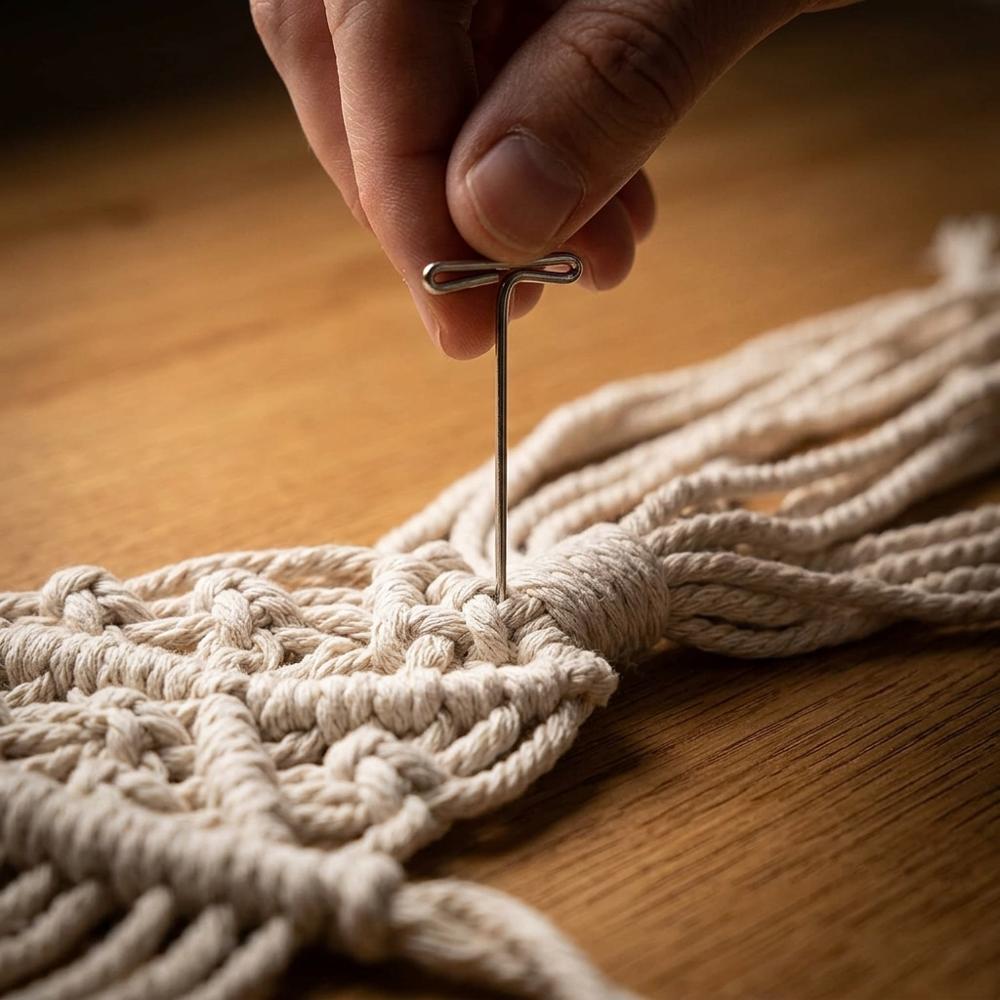
T-pins hold cords and partly finished knots in place against a board or foam surface while you work out the next row. The T-shaped head is easy to grip and push. Stainless steel pins resist bending when pressed into dense cotton.
Knots can slide or loosen before a piece takes shape; pinning the work down fixes spacing and lets you plan a row before committing to it.
Pick 07 of 12
Complete Macramé Knot Guide
Illustrated macramé reference book of knots and patterns for beginners
A printed reference collects the core macramé knots and common patterns in one place, with step-by-step diagrams that are easier to follow than scrubbing through videos. A good beginner guide covers the lark's head, square knot, and half hitch before moving into combinations. Look for clear photographs of each knot stage rather than only finished pieces.
Macramé is built from a small set of knots combined in different ways; a reliable reference shortens the time spent learning those building blocks correctly.
Pick 08 of 12
Macramé Crafting Comb Set
Stainless steel comb for combing out macramé fringe
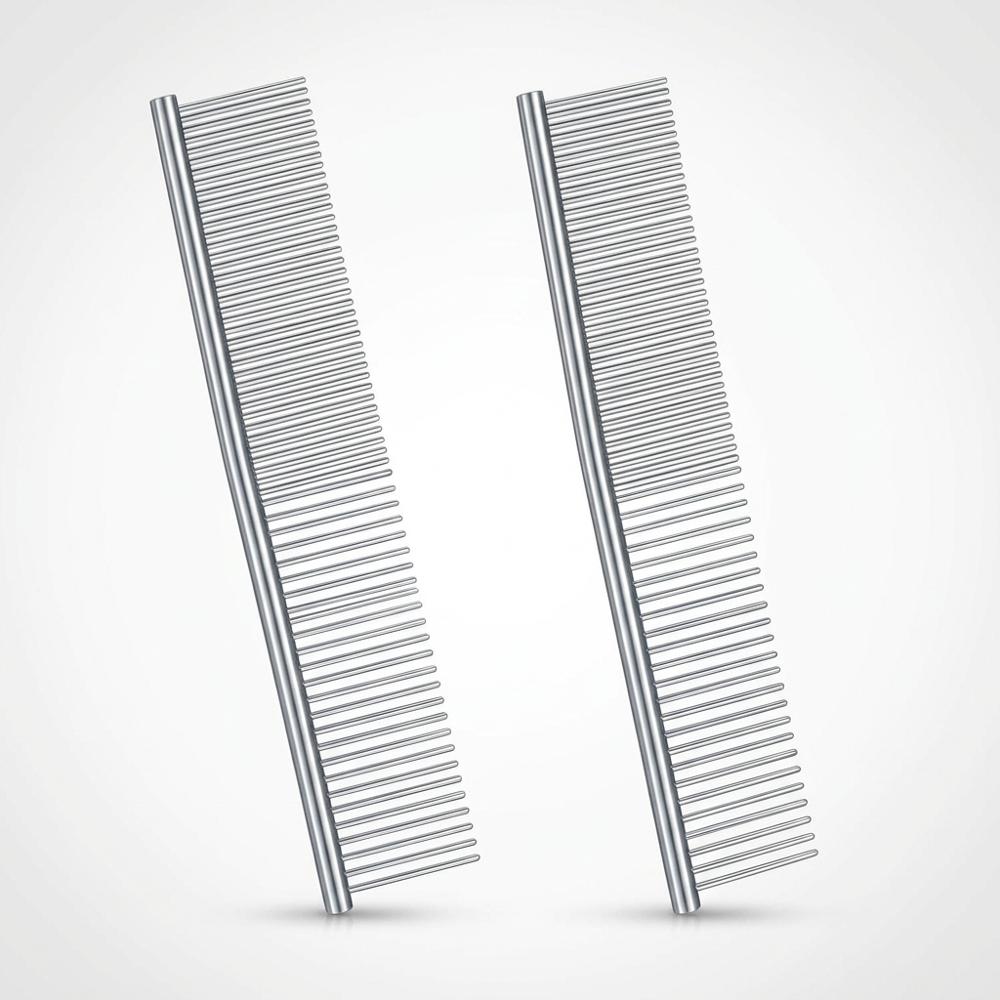
A stainless steel comb is used to brush out the plies of single-twist cord into soft fringe, a finishing step that defines the look of many wall hangings. Fine metal teeth separate the fibers without snagging. A two-piece set usually pairs a comb with a tassel brush for different fringe densities.
Fringe is the signature finish of macramé wall hangings, and combing cleanly is what turns cut cord ends into a smooth, even sweep rather than a frizz.
A rack or wall hook that holds your work vertically changes how clearly you can read your own tension, and a comb turns frayed cord ends into the soft, brushed fringe that makes finished pieces photograph well. If you take to the rhythm of repetitive handwork, you may feel the same pull toward a beginner knitting setup and its looped stitches. The next group of items is where macramé stops being only wall hangings and becomes plant hangers, jewelry, and colorwork.
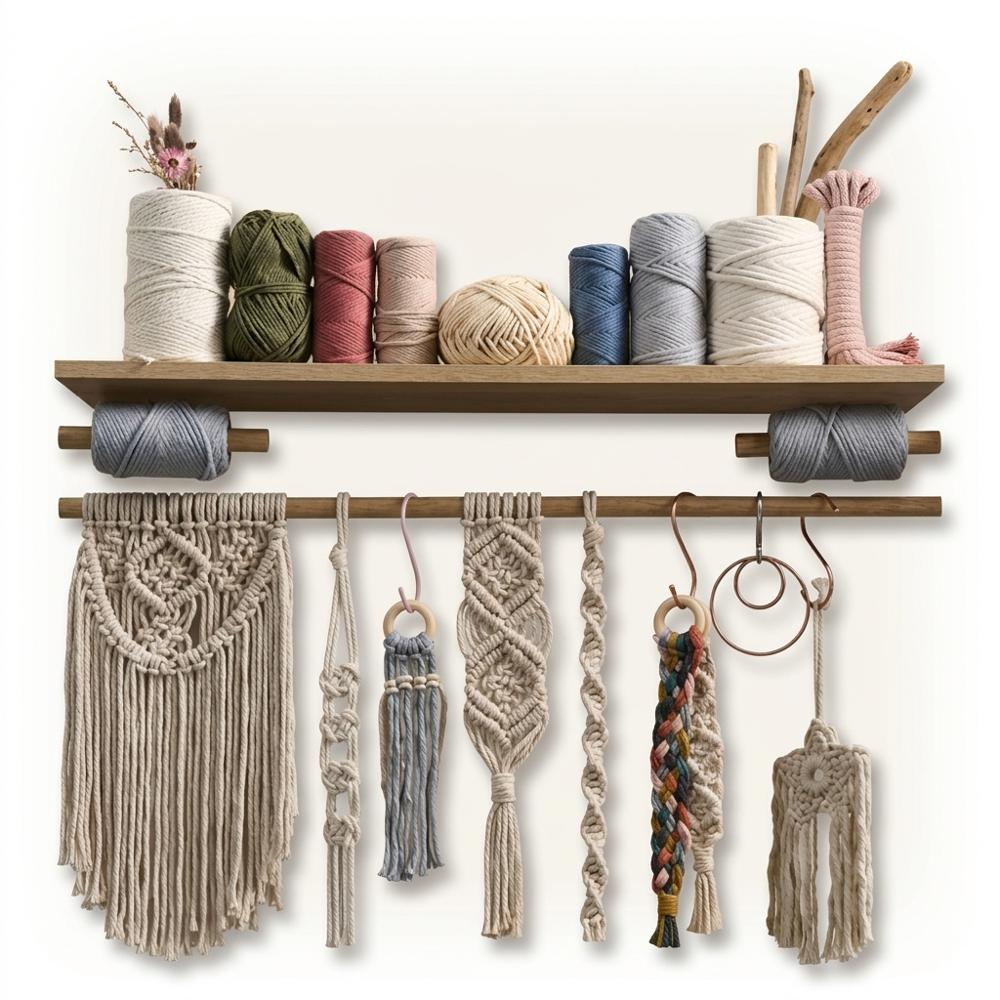
Where Macramé Stops Being Just Wall Hangings
This is the stage where the craft branches. Wooden rings turn a flat panel into a hanging hoop or a plant holder, beads add weight and rhythm to a fringe, and colored cord moves you past the natural-cotton look most beginners start with. Reaching for these too early is a common trap — a drawer of beads and dyed rope does nothing if your square knot is still uneven. Folding short, regular sessions into a steady beginner creative routine does more for your knots than any accessory, and it is worth building that habit before you expand your materials.
Pick 09 of 12
Set of Natural Wood Craft Rings
Unfinished wooden rings for macramé plant hangers and hoops
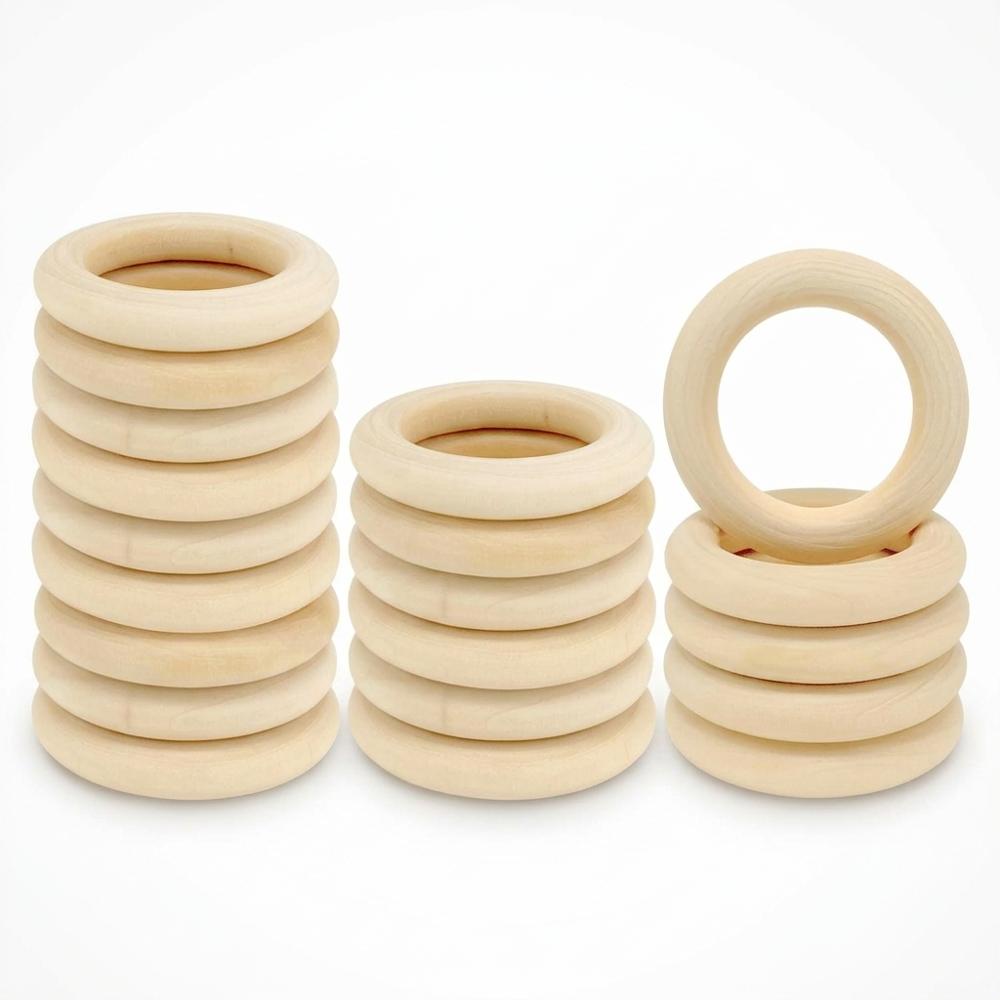
Wooden rings act as the top anchor for plant hangers and as frames for hooped wall pieces, replacing the straight dowel with a circle. Unfinished rings can be left natural or painted to match a project. A pack of single or mixed sizes covers most beginner plant-hanger designs.
A plant hanger needs a ring at the top to gather the cords and hang from a hook; it is the structural starting point the way a dowel is for a flat wall hanging.
Pick 10 of 12
Natural Wooden Craft Beads Set
Large-hole wooden beads for threading onto macramé cord
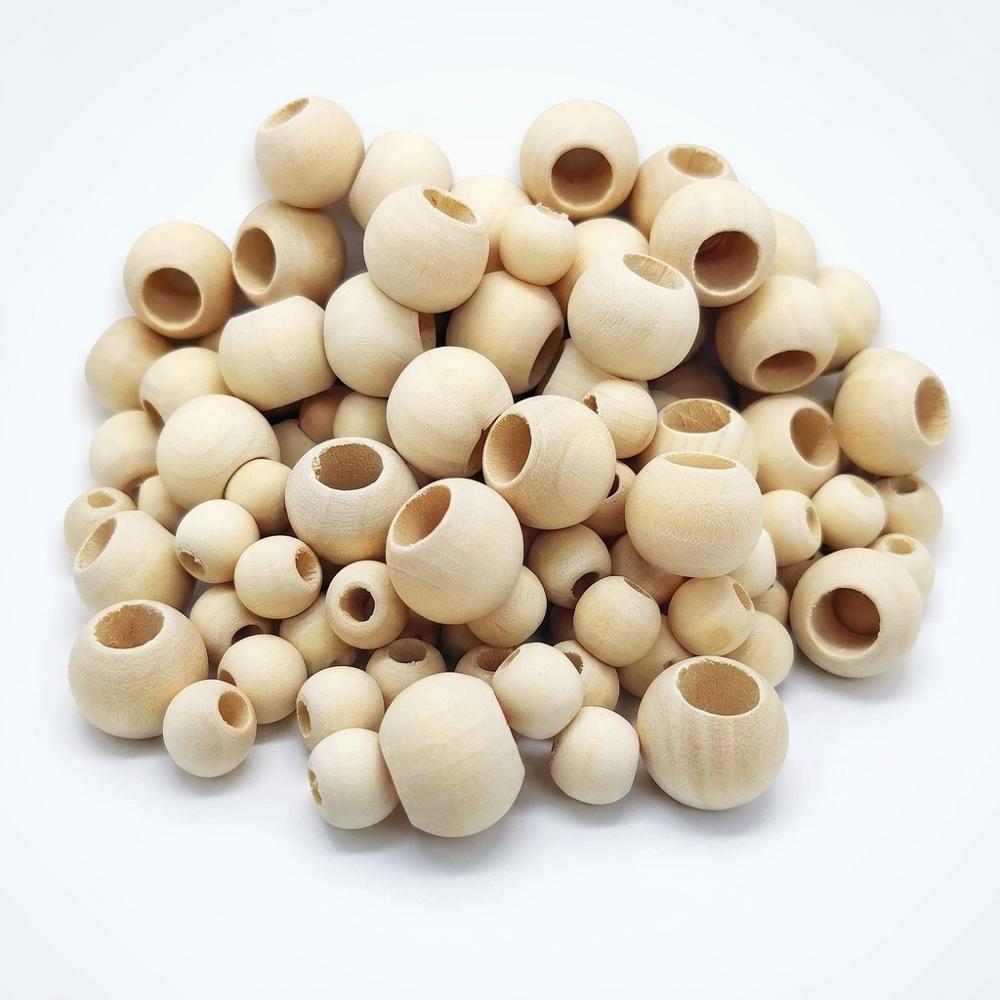
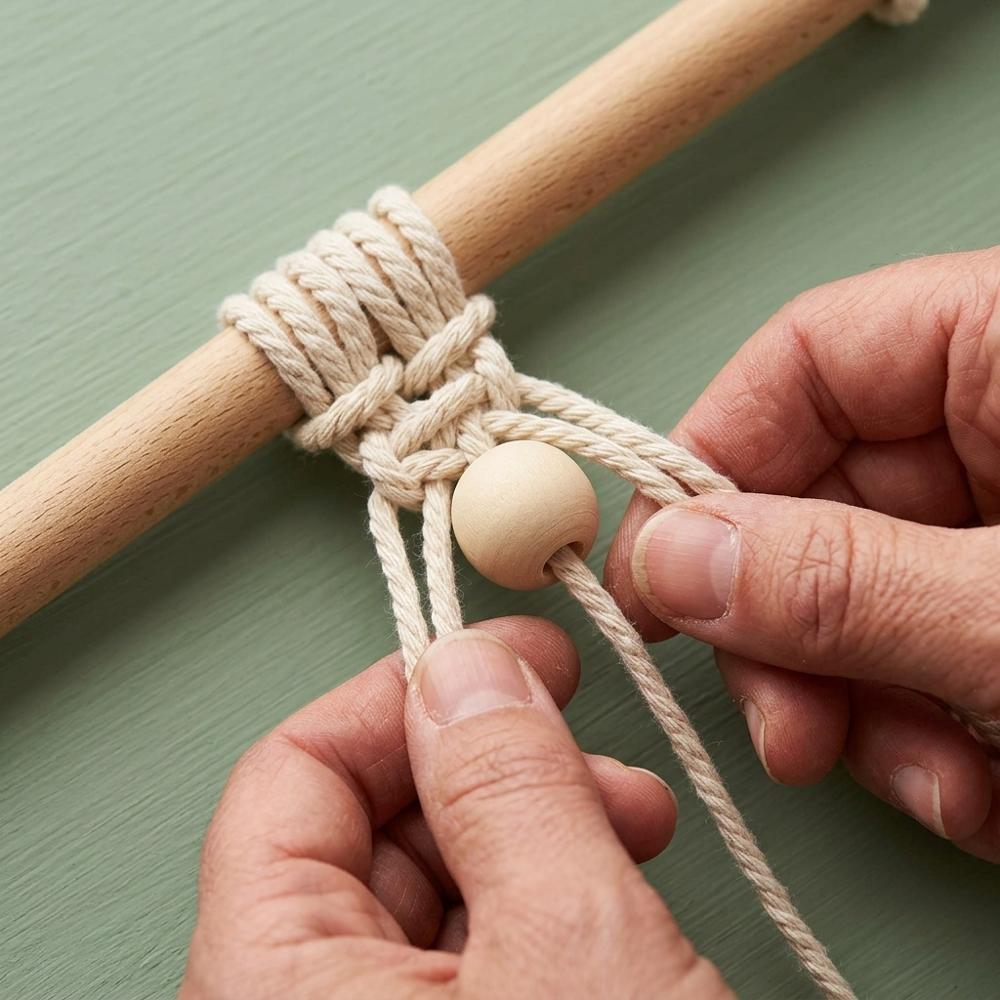
Large-hole wooden beads thread onto grouped cords to add detail, weight, and rhythm to a piece — common in plant hangers and fringe. The hole has to be wide enough to pass several strands of your chosen cord. Unfinished natural beads can be stained or left plain.
Beads are one of the simplest ways to vary a design beyond knots alone, but the bead's hole size has to match the cord or it simply will not thread on.
Pick 11 of 12
Colorful Cotton Macramé Cord Kit
Multi-color cotton macramé cord set for colorwork projects
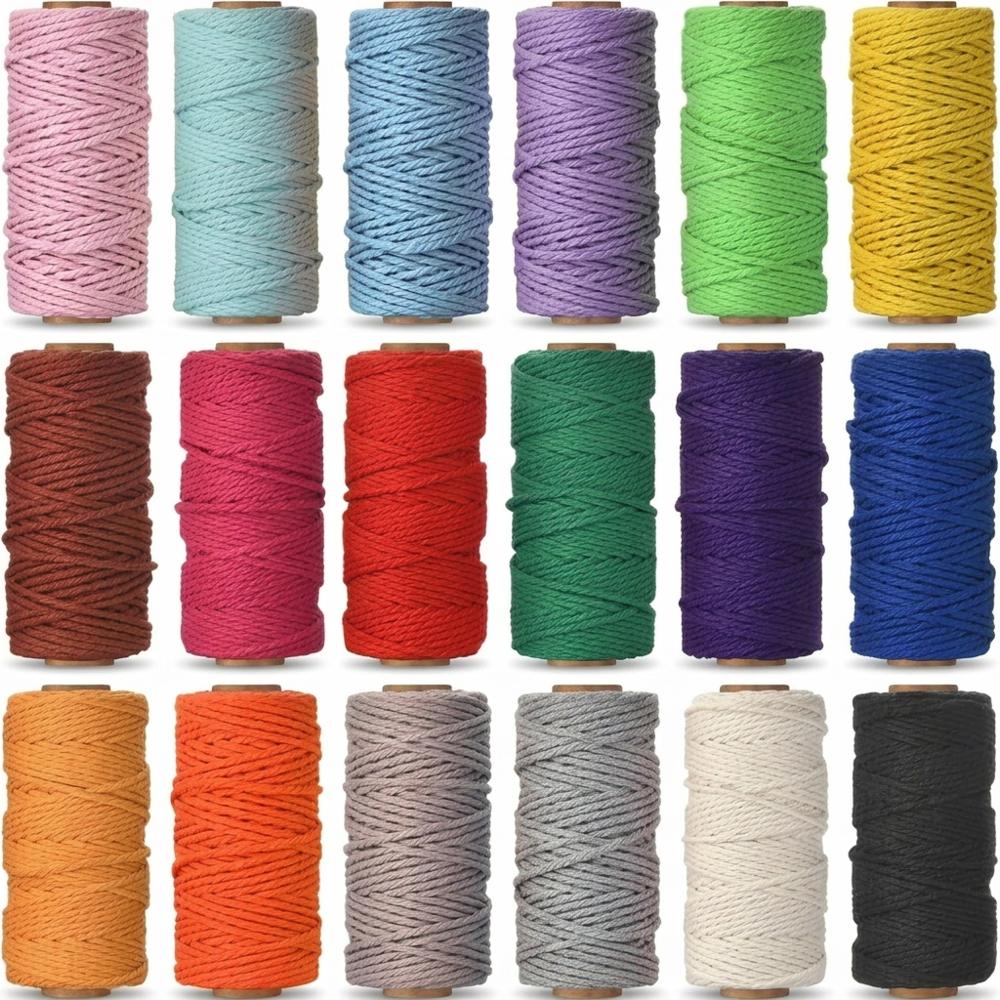
A multi-color cotton cord set introduces color into work that usually starts in natural cream. The same single-twist construction knots and combs like standard cord. A kit of several smaller rolls lets you try accents and gradients without buying a full spool of each shade.
Color is how a maker moves past the uniform natural-cotton look; a varied set makes it possible to plan a palette before investing in large quantities.
Pick 12 of 12
Complete Macramé Crafting Kit
Gridded macramé project board with pins for small knotted pieces
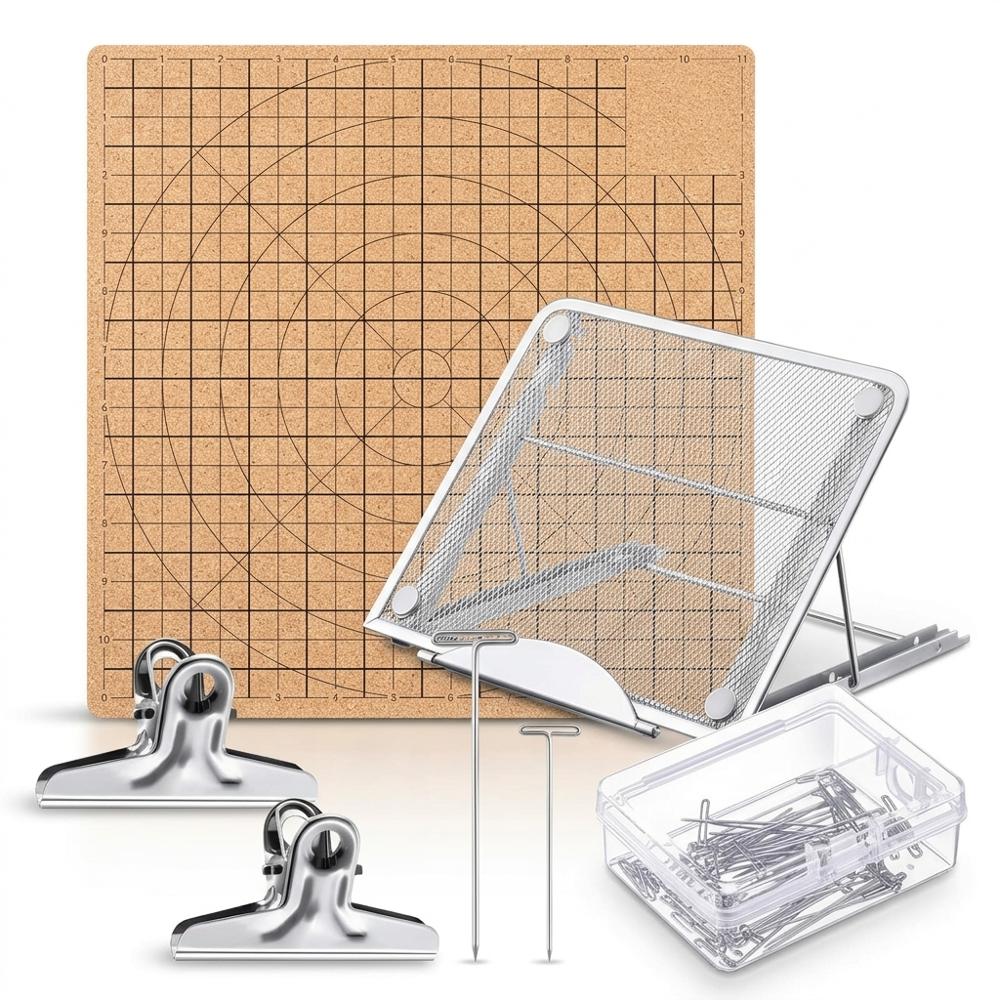
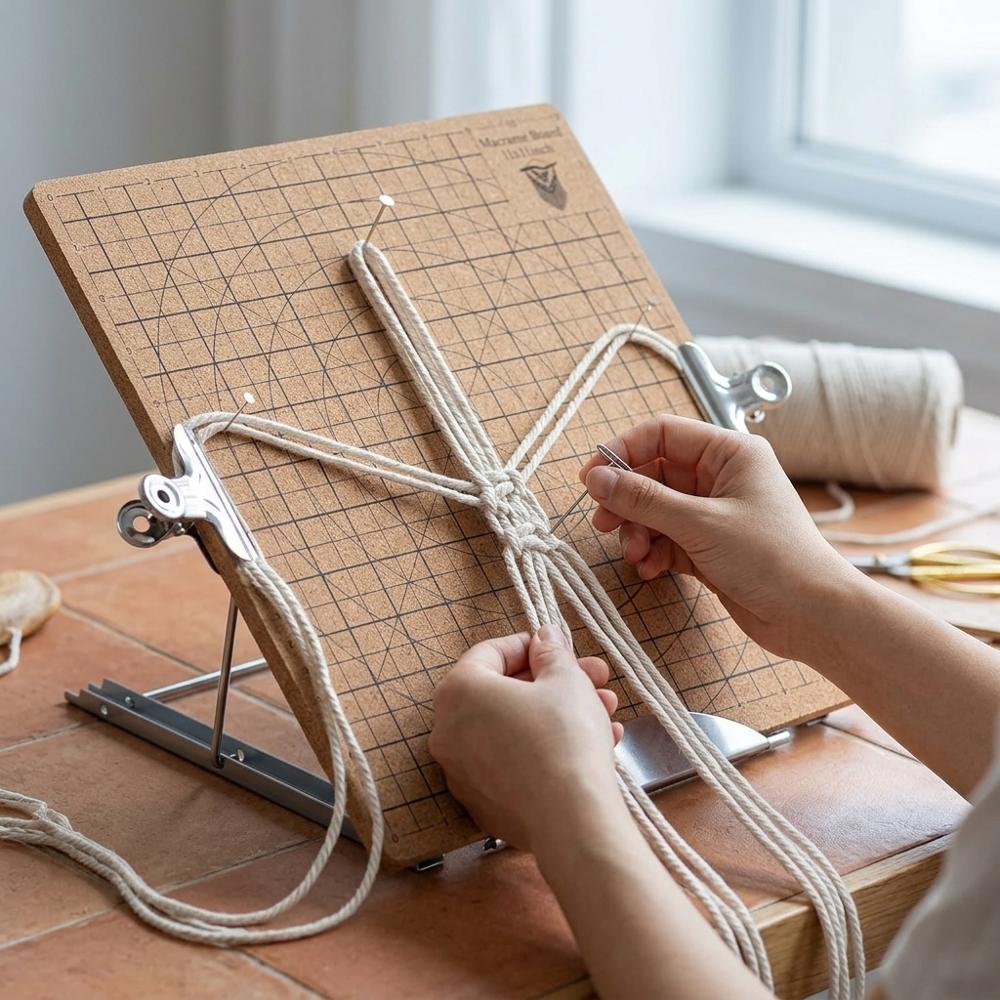
A gridded macramé board provides a firm, marked surface to pin small projects like bracelets, keychains, and jewelry while keeping rows square. The printed grid helps measure spacing and angles. Many boards include an adjustable holder and pins so the work stays at a usable angle.
Small, detailed pieces are hard to keep even when held loosely; a gridded board gives the alignment and stability that fine knotting needs.
With rings, beads, colored cord, and a gridded board, you can move from a single wall hanging into plant hangers, garlands, and small knotted jewelry. Add one new variable at a time rather than all at once — a new bead size or a single accent color teaches you more than a full kit of unfamiliar materials. Most of the trouble from here is not about what you own but about how the cord behaves, which is worth understanding before your next project.
Why Won't My Wall Hanging Lie Flat?
Why does my piece pull into an hourglass shape instead of hanging straight?
This is uneven tension, and it creeps in because beginners tighten some square knots harder than others without noticing. The edges of the panel curve inward and the whole hanging looks pinched in the middle. Fix it by working against a fixed anchor — a dowel hung at a set height — and pulling each knot snug with the same gentle, repeatable pressure rather than yanking. Checking the width of a row against the row above catches the drift early.
Why does my fringe come out frizzy and tangled instead of smooth?
Two things cause this: combing a braided or three-ply cord that was never meant to fringe, and combing roughly from the top down. Single-twist cord is the kind that opens into soft fringe, and dragging a comb hard through it shreds the fibers. Comb gently in short strokes from the bottom edge upward, then mist the fringe with water or pass it over steam so the fibers relax and hang straight.
How much cord should I really cut for each strand?
Beginners almost always cut short because the finished piece looks small. A working rule is roughly four times the finished length per strand, then doubled when the strand is folded onto the dowel, and more again for dense patterns with many knots. Run out partway up and there is no clean way to add length without an obvious join. When in doubt cut long; leftover cord becomes fringe or a smaller project.
Why do my knots keep sliding around or sitting at uneven heights?
This happens when the work is loose in your lap with nothing holding it in place, so each knot settles wherever gravity leaves it. The spacing ends up irregular and the pattern looks unplanned. Pin the work to a board or hang it from the dowel at a fixed point, and use T-pins to hold a knot's position while you set the ones around it. Locking placement before you tighten is what gives rows their even, deliberate look.
Is thicker cord really easier for a beginner?
It is a common assumption that bigger cord is more forgiving, but very thick rope above 6mm hides the structure of your knots and burns through your supply fast, while very thin cord is fiddly to handle. A 3mm to 4mm single-strand cotton sits in the sweet spot: the knots are clearly visible so you can see your mistakes, and the cord is thick enough to grip comfortably. Match the cord weight to the project rather than defaulting to the thickest roll on the shelf.
Love what you see here? Save individual picks with on any item, or copy the whole list to your own wishlist in one click — great for coming back to later, or dropping as a not-so-subtle hint.