Blend Color With Your Hands: Soft Pastels for Beginners
Your Fingertips Are the Paintbrush
A soft pastel is almost nothing but pigment — the same powder that goes into oil paint, pressed into a stick with a whisper of binder to hold it together. No other art material puts color on paper this concentrated, which is why finished pastel pieces seem to glow. It's also older than you'd guess: Leonardo da Vinci learned the technique from a French court artist around 1499, and eighteenth-century Paris was so devoted to pastel portraits that its star, Maurice Quentin de La Tour, never painted in oils at all. Degas made it his main medium late in his career. The world's oldest pastel house still hand-rolls sticks in France today, offering more than 1,200 colors at roughly the price of a nice dinner per stick.
Here's what the art store won't tell you: the paper decides whether you fall in love with this medium or quit in a week. Soft pastel needs tooth — a fine texture that grabs the powder and holds it. On smooth printer paper the color just slides around and turns to grey mush, while the exact same stick sings on proper pastel paper. That's the one place I'd never cut corners, and the comparison of art supplies that last versus cheap ones that fail you applies to nothing in this hobby more than paper.
My philosophy here is stubbornly minimal: one set of student pastels, one pad of toothy paper, a few paper stumps, and a kneaded eraser. That's it. Easels, fancy fixatives, and specialty papers can all wait until you know you enjoy having rainbow-stained fingers.
Everything below was picked with a beginner's wallet in mind, partly so none of it ends up on the list of art supplies beginners waste money on.
Student-grade soft pastel sticks, 64-color square set


Square-profile student soft pastels are slightly firmer than professional sticks, so they release pigment gradually and forgive a heavy hand. The square edges double as drawing tools for lines and crisp marks, while the flat sides lay down broad swaths of color for skies and backgrounds. Look for a set with a full run of greys and muted tones, not just brights — landscapes eat muted colors.
Toned pastel paper pad with a textured, toothy surface


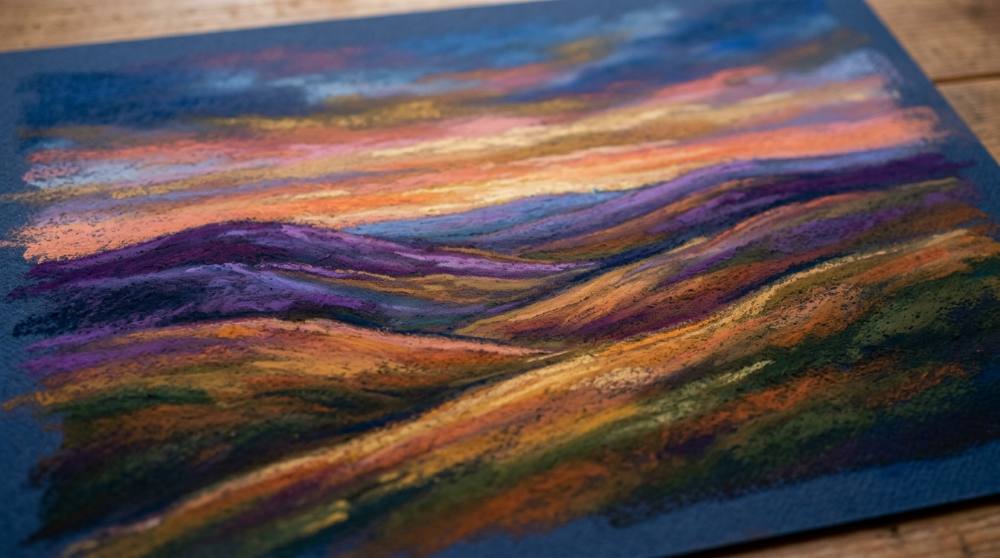
A pastel pad with genuine tooth holds pigment in its texture instead of letting it slide, and the mid-tone colored sheets do half the compositional work for you — a grey-blue page already reads as sky before you make a mark. At 160gsm the sheets take blending and correction without buckling. Each sheet typically carries a stronger texture on one side than the other, so you can choose the grip you want.
Paper blending stumps and tortillons in assorted sizes


Blending stumps are tightly rolled paper sticks that smooth and soften pastel where fingers are too broad or too warm, and tortillons are their smaller, pointed cousins for tight spots. A mixed-size set covers everything from softening a whole sky to feathering the edge of a shadow. When the tips get dirty, a quick rub on sandpaper renews them.
Kneaded putty erasers for lifting pastel without smearing


A kneaded eraser is a soft, moldable putty that lifts pigment off the page by pressing and dabbing rather than rubbing, so it removes color without grinding it deeper into the tooth. Shaped to a point, it pulls highlights out of a finished passage — picking a bright moon out of a pastel sky, say. Folding it over itself cleans it for the next use.
With these four things you can finish an actual small landscape on day one — no drying time, no cleanup beyond washing your hands. Two habits to start immediately: tilt your board so falling dust drops away from the picture instead of settling back on it, and keep a damp cloth beside you, because a quick finger-wipe between colors is the difference between a crisp sky and a muddy one. If you've done any charcoal drawing, the kneaded eraser will feel like an old friend — it lifts pastel the same way, by dabbing rather than rubbing. The next section covers the add-ons I'd actually get second.
Worth Adding Once the Dust Settles
None of this belongs in your first order, and that's deliberate — beginners in every dusty medium tend to buy accessories before they've worn down a single stick. Come back after a few sessions, once you know what's missing. For most people it's detail: a soft pastel stick is a blunt instrument, and the moment you try to put a glint in an eye or single blades of grass into a field, you'll want a pastel pencil or a firm stick with a real edge. If you've already worked through a colored pencils setup, pastel pencils will feel familiar in the hand while behaving completely differently on paper — the core is powdery chalk-pastel, not wax. Fixative is the most debated item on this page: plenty of pastelists refuse to spray at all because it can dull and darken colors, so treat it as insurance for storing work rather than a required finishing step.
Chalk-pastel pencils for eyes, edges, and fine detail


Pastel pencils put a sharpenable point on the same dry pigment as your sticks, so detail work stays in the same medium instead of fighting it. They're the tool for whiskers, eyelashes, grass blades, and any line thinner than a stick's edge. A small assorted tin is plenty to start — most detail work leans on darks, lights, and a handful of accents.
Casein-based fixative spray for finished pastel work


Fixative binds the loose pigment on a finished pastel so the piece can be stored or handled without smearing. A casein-and-alcohol formula in a pump bottle has little odor and is far gentler on colors than traditional aerosol lacquers, which are notorious for darkening work. Whatever the formula, always test on a scrap before touching a finished piece.
Sanded pastel paper pad for heavy layering


Sanded pastel paper carries a fine abrasive coating that grips far more pigment than ordinary textured paper, so you can build layer after layer without the surface filling up and rejecting new color. Heavyweight sheets stay flat under pressure and take correction well. Assorted muted tones give ready-made backgrounds for landscapes and portraits alike.
Firm pastel sticks for sketching and crisp lines


Firm pastels carry more binder than soft sticks, giving them a harder body that sharpens to an edge and doesn't crumble under a confident stroke. They're the traditional tool for the initial sketch under a soft pastel painting and for crisp accents over it. They also shed far less dust, which makes them pleasant for quick studies.
Add these gradually and each one unlocks something specific: pencils give you detail, firm sticks give you drawing-like control, sanded paper takes layer upon layer without filling up, and fixative lets a finished piece survive a bookshelf. If the buttery, low-dust cousin of this medium sounds more your speed, oil pastels are a different experience entirely — waxier, bolder, and far less fragile. Either way, don't let accessories crowd out the real work: pushing powder around with your fingers until a picture shows up.
The Questions Everyone Asks After Their First Dusty Afternoon
Why do my colors keep turning into grey-brown mud?
Almost always it's one of two things: you're blending every stroke to death, or your fingers are still carrying the last five colors you touched. Over-blended pastel loses the fresh surface sparkle that makes the medium special, and a pigment-coated finger is basically a mud applicator. Wipe your hands on a damp cloth between color families, blend once instead of five times, and let some strokes stay unblended — the texture reads as energy, not sloppiness.
Can I just blow the loose dust off my drawing?
It's the most natural instinct in the world, and nearly every pastel teacher will beg you not to. Blowing sends ultra-fine pigment into the air you're breathing, and there's a real chance of spitting on the paper, which leaves a permanent mark. Tap the back of the board firmly over a bin instead, or work with the surface tilted so dust falls away on its own — the drawing loses nothing and your lungs stay out of it.
Why did my picture get darker after I sprayed it?
Fixative binds the loose pigment, and bound pigment reflects less light — so sprayed areas often shift darker and duller, sometimes dramatically. Beginners usually discover this on a finished piece they were proud of, which is the worst possible moment. Always test the can on a scrap of the same paper first, spray in light mists from a distance if you spray at all, and remember that paper with strong tooth may hold the pastel well enough to skip fixing and go straight under glass.
Is there a cheap way to practice without burning through good paper?
Yes, and it's hiding at the hardware store: fine wet-and-dry sandpaper in the 1000–1200 grit range behaves remarkably like professional sanded pastel paper at a fraction of the price. It isn't archival, so nothing made on it will last decades, but for daily practice that doesn't matter. One warning — it's still sandpaper, so only blend with your fingers where a layer of pastel is already down, or you'll sand your fingertips instead of the drawing.
Love what you see here? Save individual picks with on any item, or copy the whole list to your own wishlist in one click — great for coming back to later, or dropping as a not-so-subtle hint.