Furniture upcycling starts the same way for almost everyone. You spot a battered chest of drawers at a flea market, on a thrift-store floor, or sitting at the curb with a free sign taped to it, and you decide it's coming home. What happens next happens in a garage or on a driveway, spread across a weekend of cleaning, scuffing and painting. Refinishing used to be a trade you learned - strippers, solvents, patience - until matte, ultra-chalky paints arrived that grip varnished wood without anyone stripping it first. The detail nobody puts in the before-and-after photos is that the most important thing about an old piece isn't its style or its joinery, it's whether it was built before 1978, the year lead was banned from household paint in the US.
The appeal lands the first time you do it. A piece you'd never pay full price for becomes the thing visitors ask about, and the whole transformation costs less than a decent dinner out. It's forgiving in a way most crafts aren't, too: the paint goes on, and if you hate the colour you paint over it next weekend. That forgiveness is a large part of why it works so well as a first creative hobby to commit to. The catch is that beginners almost always buy the wrong five things first.
So start with as little as you can get away with. Sandpaper, a jar of chalk-style paint, one decent brush and something to seal it with will carry you through an entire dresser, and every other item on this page is a convenience rather than a requirement.
Nothing below costs enough to sting if the dresser turns out to be a mistake.
Where This Little Kit Can Take You
A few real moments and results from this hobby — made with tools no fancier than the ones below.
Five drawers, second lifeThe whole payoff of the hobby is a piece that no longer looks secondhand.
Working the finish in by handMost of a flip is this: one panel at a time, a cloth, and no hurry.
If you've never painted anything bigger than a canvas, the scale is the surprise. A dresser drinks far more paint than you'd guess, and the second coat always looks better than the first - which is just as well, because the first one looks alarming. People arriving from beginner acrylic painting tend to adapt fastest, since the brush habits carry straight over. The rest is mostly waiting for coats to dry.
Five Things Between You and a Finished Dresser
Here's where the money actually goes, and it isn't much. None of this is specialist kit - four of the five live in any hardware store, and the fifth is a choice rather than a purchase. The one instinct I'd push back on is buying the cheapest version of everything, because a brush that sheds bristles into wet paint costs you an hour with a pair of tweezers, which is exactly the false economy behind the case for supplies that outlast the first project. Buy properly on the brush. Be cheap everywhere else.
Disclosure: This section may contain affiliate links to Amazon. We may earn a small commission from qualifying purchases at no extra cost to you.
01Pick 01 of 12
Assorted Grit Sandpaper Sheets
A multi-grit pack of full-size abrasive sheets, coarse through fine, that you tear down and wrap around a block or your fingers. On a painted-furniture job the coarser sheets knock the shine off an old varnish and level filled holes, and the finer ones smooth the surface between coats. Look for a pack that actually spans the mid grits rather than jumping from very coarse to polishing grades.
Why we picked this exact one: The AOZHONG 25-piece assortment covers 80 through 400 grit, which matters more than the brand here: a dresser flip uses 120 on an original stained finish, 180 on something oil-stained, and 220 or finer between coats. Sheets this size need tearing down before they fit a block, and the silicon-carbide backing is thinner than a premium aluminium-oxide sheet, so it wears out faster on filler. At under a dollar a sheet that is a trade worth making.
A thick, flat-finish water-based paint formulated to bond to sealed and previously finished surfaces without a separate primer. It dries quickly, which means a second coat the same afternoon, and it sands easily if you want a distressed edge. A 16-ounce jar covers a small to mid-size chest in two coats; a tall dresser will want a second jar.
Why we picked this exact one: FolkArt's Home Decor Chalk line is the budget pick that still behaves like a proper furniture paint, carrying a 4.8-star average across more than three thousand ratings. The coverage is genuinely good from the second coat, and it stays sandable for distressing. The jar is small for a full dresser, which is the honest limitation - buy two if the piece is taller than waist height.
Short, densely packed natural-bristle brushes with a rounded head, shaped to push thick paint into the corners and mouldings of furniture rather than lay a flat film like a wall brush. The round profile holds a lot of paint, so you reload less often across a big drawer front. A second brush kept only for wax or topcoat saves you cleaning the first one mid-project.
Why we picked this exact one: The Modern Art Supplies two-pack is the one place on this list worth spending slightly above the floor, and nearly ten thousand ratings sit behind a 4.6 average. You get a paint brush and a wax brush in one box, which is exactly the pair this job needs. They do shed a little on the first wash - run them under water and pick the loose bristles out before the first coat goes on.
These 2 do the same job. You only need one of them, so pick the one that suits you better.
04Pick 04 of 12Option A
Clear Beeswax Furniture Paste
A soft paste wax you rub into porous chalk-style paint with a cloth or brush and buff back once it hauls up. The wax soaks into the paint rather than sitting on it, which is why the result reads as a soft inner glow rather than a coating. It is a low-traffic finish by nature and wants redoing from time to time.
Why we picked this exact one: Colorantic's clear natural furniture wax is made for chalk-based paint specifically, which is why it goes on thinner and buffs out more evenly than a general-purpose paste wax. Around 1,400 ratings put it at 4.5 stars. The real trade-off is maintenance rather than quality: a waxed dresser in daily use wants redoing roughly once a year, and a hot mug will still leave a ring.
Pros
Soft matte sheen a film finish cannot imitate
Touch up a worn patch by buffing in more wax, no sanding
Cons
Wants redoing roughly once a year on a piece in daily use
A water-based protective finish brushed on in thin coats over painted or bare wood, curing to a hard, wipeable film. Water-based versions dry clear instead of ambering the way oil-based varnishes do, which matters on a white or pale piece. An ultra-flat sheen keeps the chalky, matte look while adding the durability a painted surface on its own does not have.
Why we picked this exact one: Minwax Polycrylic in Clear Ultra Flat is the pick for anyone who wants the matte chalk look and a surface they can actually clean, and the ultra-flat sheen is the specific reason to choose it over the gloss and satin versions of the same product. A quart is far more than one dresser needs. It shows brush marks if you work it too long, so lay thin coats and leave them alone.
Pros
Cures hard, so the top survives daily handling
Wipes clean with a damp cloth without lifting the finish
Cons
Brush marks show if you overwork a coat
Touch-ups mean sanding and recoating the whole panel
With these you can take a piece from grimy to finished across a weekend, allowing for drying time between coats. Expect that first coat to look thin and blotchy - that's normal with chalk-style paint and the second coat evens it out, so don't panic and pile it on. A thick coat is how you get brush marks. Once a painted finish feels routine, decoupaging paper and napkins onto furniture is the obvious next trick to try on a set of drawer fronts.
The 1978 Question You Have to Ask First
Before sandpaper touches anything built before 1978, test the finish for lead. Swab kits from the hardware store take about a minute. You snap the swab, rub it on a notch cut down through every layer of paint, and read the colour change against the card that comes in the box. Cut through all the layers, not just the top one, because a newer coat can sit over something much older. A positive result doesn't mean the piece is ruined - it means you don't sand it. Painting over old paint you leave undisturbed is a different proposition from grinding it into dust.
And if you do sand anything of that age, a paper dust mask is worse than useless, because it lets you feel protected while lead particles go straight past it. A respirator rated N100 or P100 is the floor. Work outdoors, keep children and pets away from the area, and wet-wipe rather than sweep afterwards so the dust ends up in a cloth instead of back in the air. Fine dust and fumes catch beginners out across the whole craft family - the same rule shows up in woodburning, where the smoke is the hazard rather than the dust.
None of this is a reason to walk away from old furniture, and plenty of flippers work on pre-war pieces every week. It's a reason to spend a few dollars on a test before the first weekend, and to pick a 1990s pine chest for your very first attempt if you have the choice. If a piece turns out to be structurally tired rather than just scruffy, the repair is usually a separate skill - a sagging seat, for instance, is really a drop-in seat waiting to be re-covered.
What Speeds It Up Once You Know You Like This
Everything here is optional on a first dresser and close to inevitable by the third. The pattern I'd warn against is buying this list before the essentials one, which is what happens when somebody watches a few makeover videos and orders the tools they saw rather than the ones the job needs. A sander makes prep quicker; it doesn't make a beginner's first piece better. The decorative end of the craft runs much deeper than paint, incidentally - gold leaf on drawer edges and frames is a whole discipline sitting one step sideways from this one.
06Pick 06 of 12Worth the upgrade
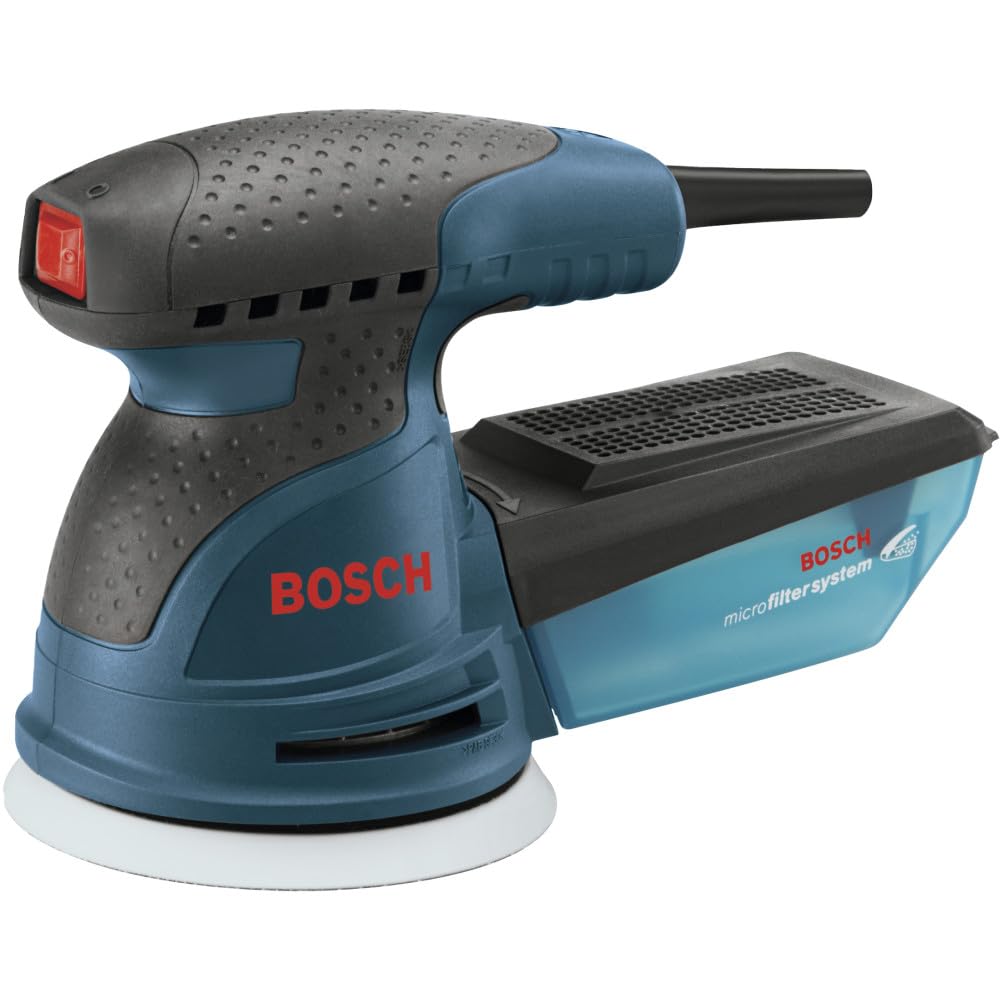
Variable Speed Random Orbital Palm Sander
A handheld sander that spins and oscillates its disc at the same time, so it removes material fast without leaving the circular scratch pattern a rotary tool does. Variable speed matters on furniture: slow for a gentle scuff of an existing finish, fast for taking a tabletop back to bare wood. Most pair with a dust bag or a shop vacuum.
Why we picked this exact one: The Bosch ROS20VSC is the step up worth making once you know you will flip more than one piece - the variable speed dial is the feature that justifies it over a single-speed sander, because the low end lets you dull a finish without burning through it. At 4.6 stars across roughly five thousand ratings it is a long-standing workshop default. Do your first dresser by hand anyway: you will sand better afterwards for knowing what the surface should feel like.
A paste you press into damaged wood with a putty knife, let harden, then sand flush. On a secondhand piece it does two jobs: filling the gouges that come with age, and plugging the old handle holes when the new hardware does not line up with them. Look for one that sands easily and does not shrink back as it dries.
Why we picked this exact one: Boncart's white wood putty is the simple choice here because it goes on white and sands easily, which is all a painted finish asks of a filler - there is no point paying for a stainable, colour-matched product you are about to cover up. Over two thousand ratings hold it at 4.5 stars. Deep holes want two passes rather than one thick one, since a thick fill sinks slightly as it cures.
Straight bar handles sold in multipacks with the screws included, sized by the distance between their two screw holes rather than their overall length. Swapping hardware is the single change that most alters how a secondhand piece reads, and on a sound dresser it is sometimes the only change worth making. Measure the existing holes before ordering anything.
Why we picked this exact one: These khtumeware 3-inch bar pulls come ten to a box at under a dollar each, which is the right scale for a dresser with five or six drawers, and they sit at 4.7 stars across 515 ratings. They are plated rather than solid blackened metal, so a hard knock can mark them. Check your own spacing first - 3 inch and 96 mm are both common, and they are not interchangeable.
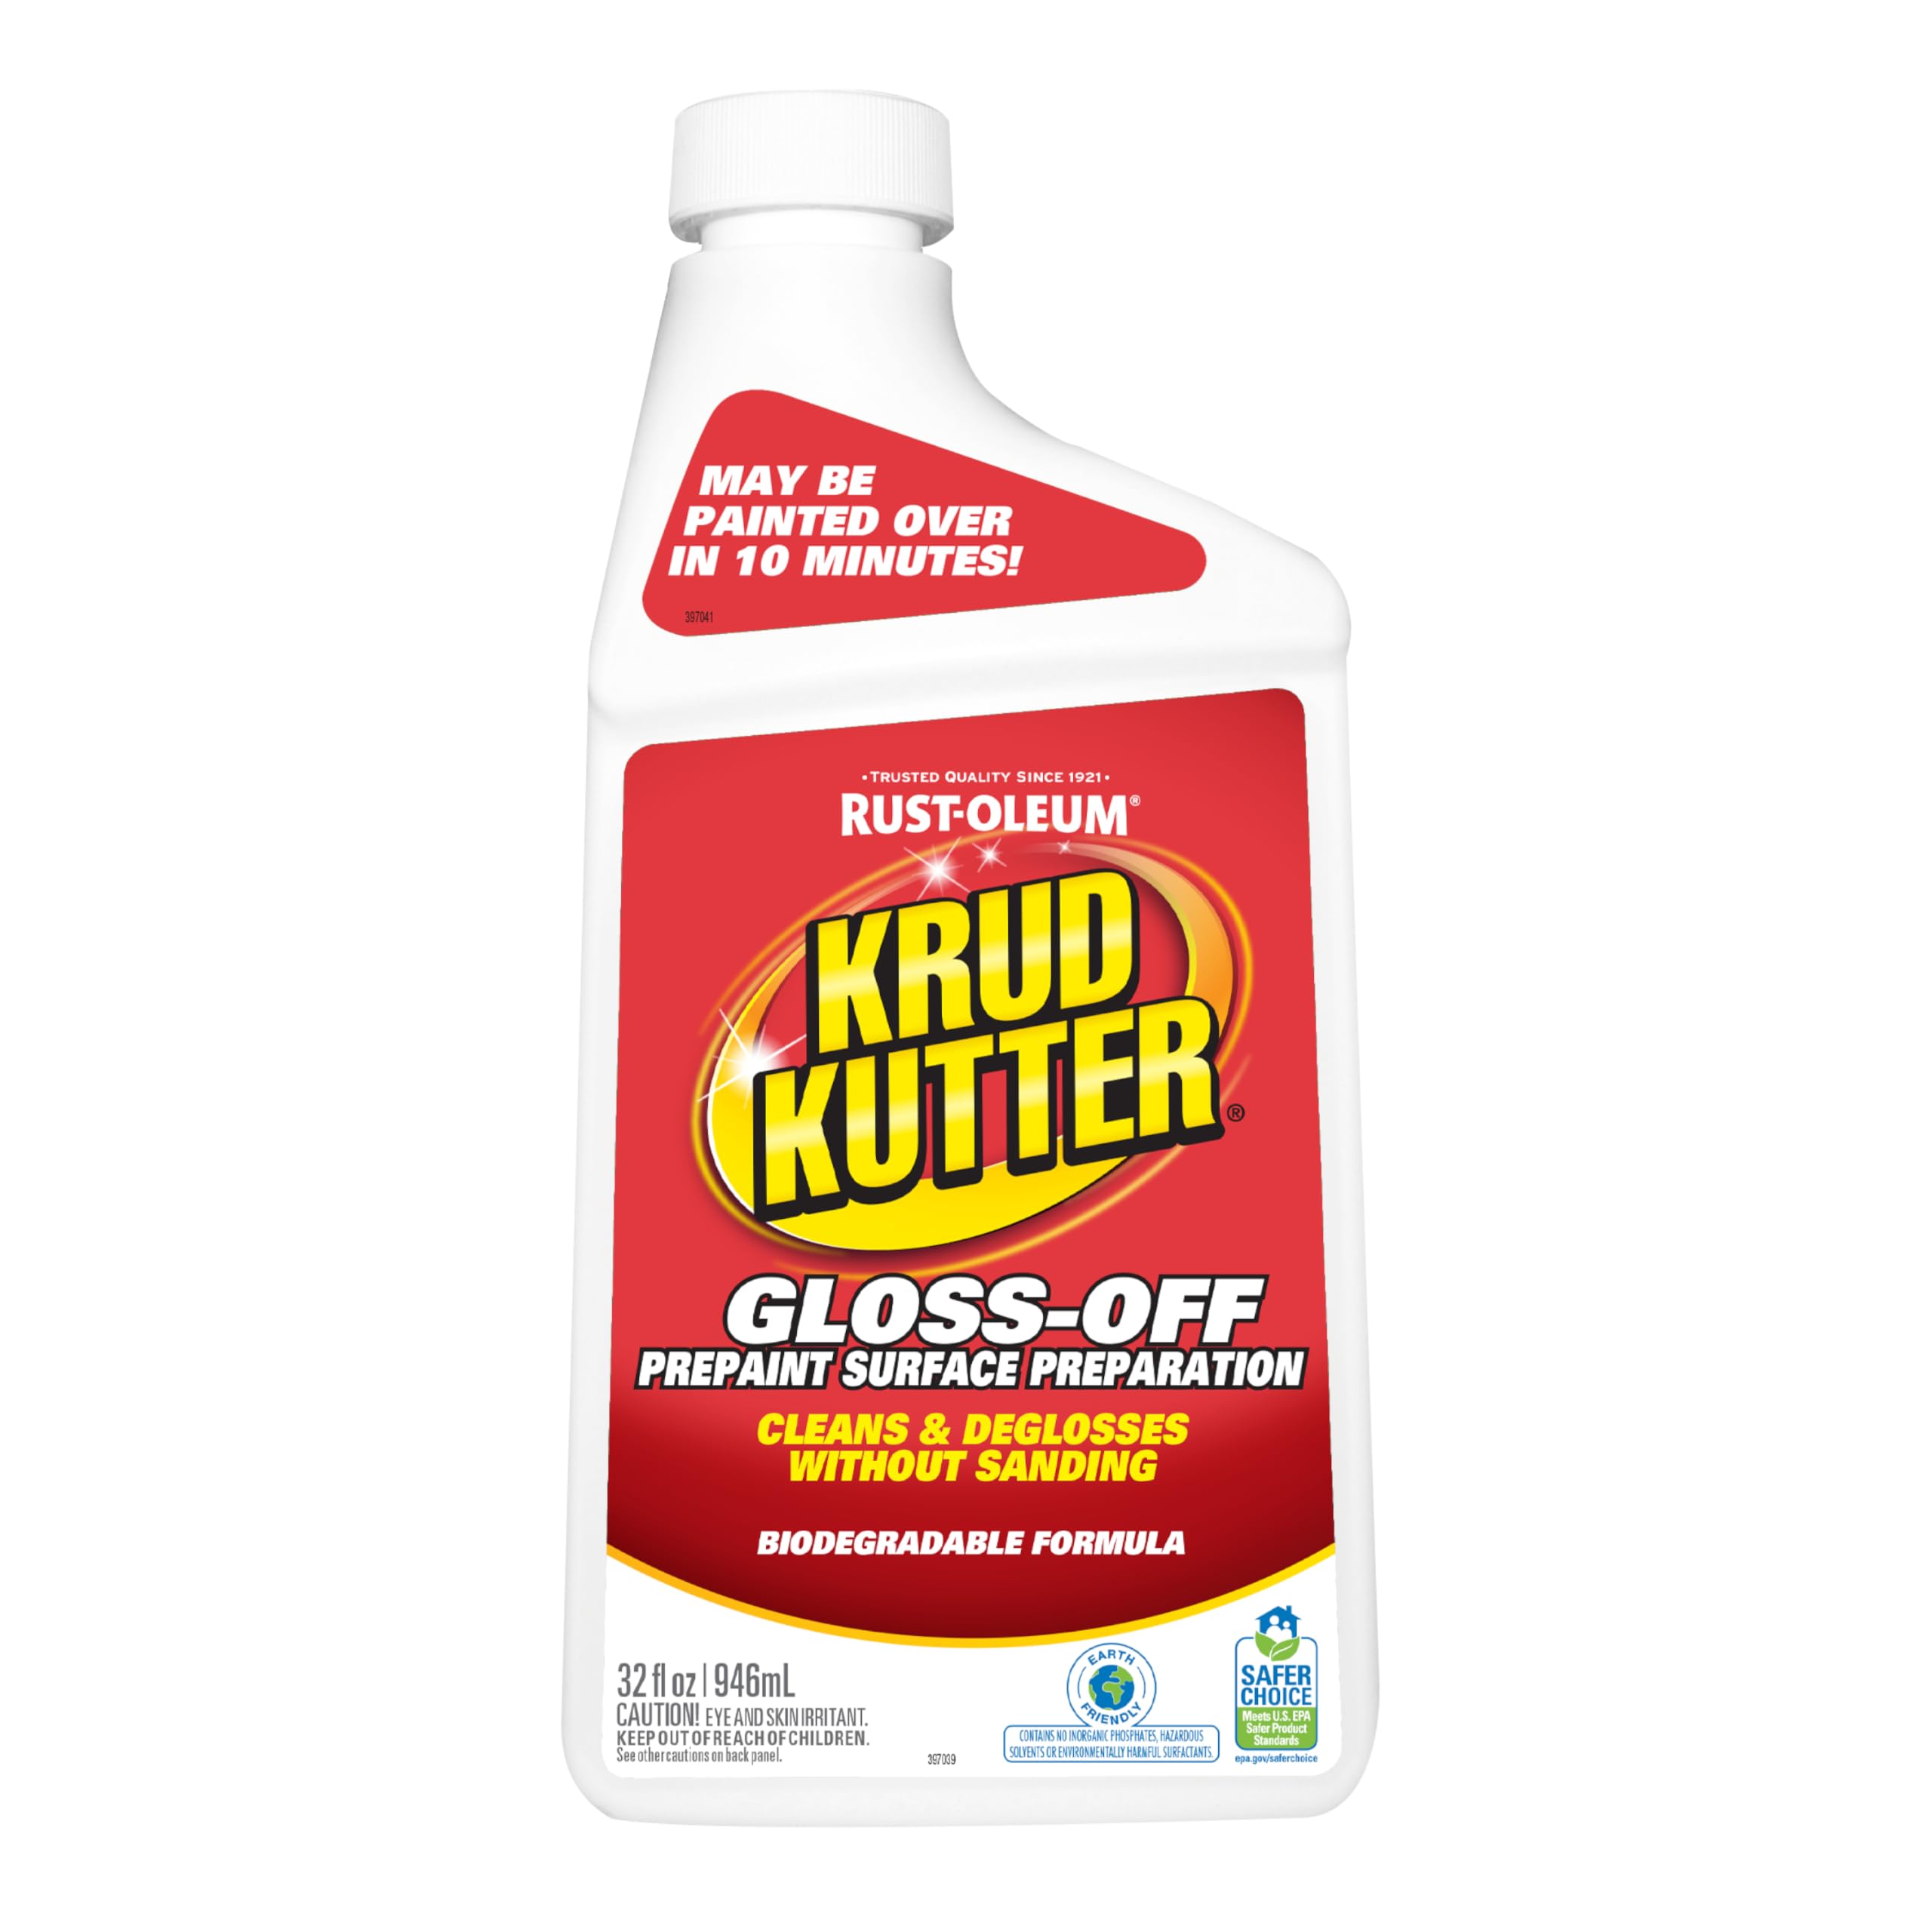
A wipe-on liquid that cuts grease and etches a glossy finish enough for paint to grip, used in place of sanding on carved or detailed areas. You flood it on with a cloth, let it work, and wipe the surface dry. It is the practical answer for spindles, mouldings and any shape a sanding block cannot reach.
Why we picked this exact one: Krud Kutter Gloss-Off does the cleaning and the deglossing in one wipe, which is why it earns a place over a plain degreaser, and 2,600-odd ratings put it at 4.3 stars. A 32-ounce bottle lasts for many pieces. It is not a substitute for sanding on a flat top that needs levelling - treat it as the tool for the shapes you cannot sand properly.
Large printed sheets whose design releases onto a painted surface when you rub the backing with a stick. Unlike a stencil there is no paint to dry and no bleeding under an edge, and the result sits flat enough to seal straight over. Apply them after the paint has cured and before the topcoat goes on.
Why we picked this exact one: The BEUNITONE magnolia set is a sensible first transfer because the motif is large and loose, so a slightly crooked placement still reads as intentional - a tight geometric pattern punishes any wobble. It sits at 4.4 stars over 608 ratings. Transfers are unforgiving once down, so position the sheet, tape one edge as a hinge, and commit a section at a time.
Pick one or two of these rather than the lot. The sander is the genuine time-saver and the filler is the one that quietly improves the result, since flat matte paint shows every dent the old varnish used to hide. Hardware is worth a special mention: on a solid piece with a decent finish, swapping the pulls alone can be the entire project, done in twenty minutes for nine dollars. Structural rescues are a different matter, and a chair with a blown-out seat belongs in caning and rush seating rather than under a paint brush.
Two Books Worth Owning Before the Third Dresser
Furniture painting is badly served by its own search results, which are thick with near-identical listicles and a rising tide of self-published filler. These two are the real thing: written by people who flip furniture, built around finished projects, and specific about the decisions rather than the shopping. A book also sidesteps the trap described in the supplies beginners waste money on, because it tells you which techniques need the gear and which don't.
11Pick 11 of 12Book worth reading
Furniture Makeover Project Book
A techniques book built around complete worked makeovers rather than isolated tips, covering preparation, colour, stains, papered surfaces and stencilling. Each project runs start to finish with the reasoning for the choices made along the way. It is the kind of reference that answers the question behind the question a beginner is asking.
Why we picked this exact one: Barb Blair's Furniture Makeovers is the standing reference in this corner of the craft, and the reason to start here rather than with a general refinishing manual is that every project is a secondhand piece, not a workshop exercise. It holds 4.4 stars across 476 ratings. The styling reads of its moment, so take the colour palettes as examples rather than instructions.
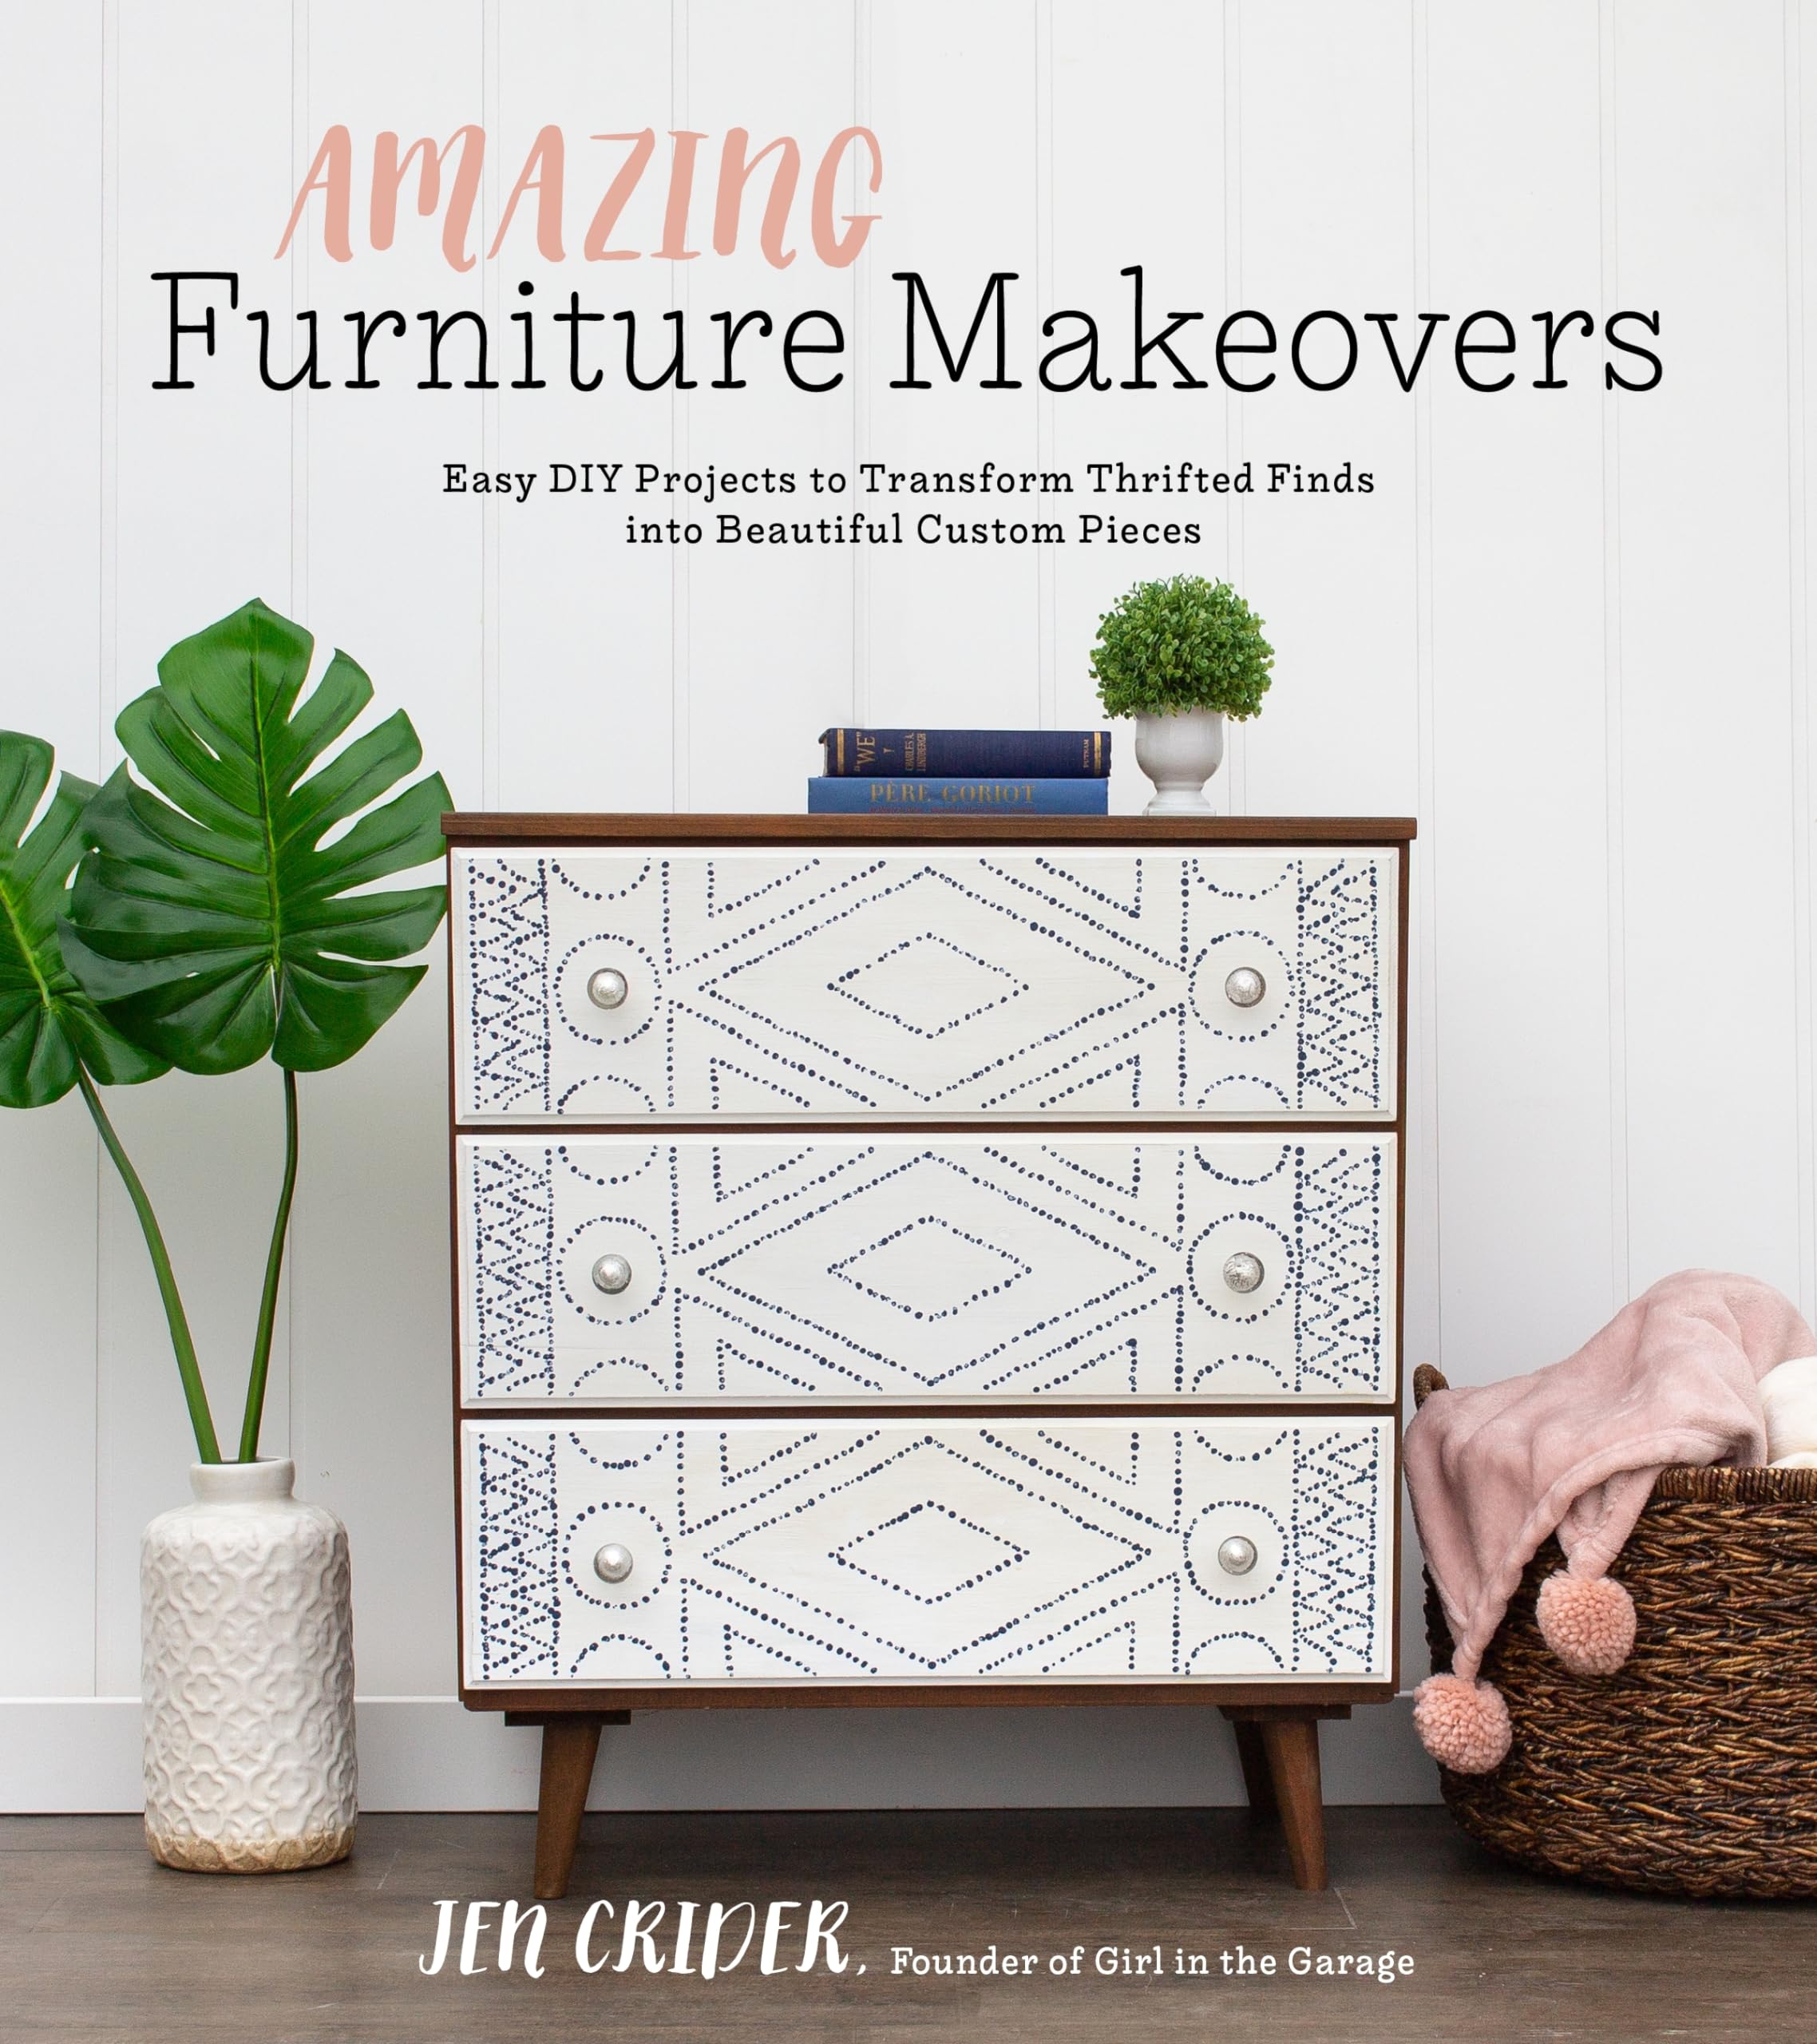
A step-by-step collection aimed squarely at people working in a garage with ordinary tools, walking through sourcing, prep, paint and the decorative techniques that follow. The projects are scaled to what a first-timer can realistically finish. Written by someone who documents her own work publicly, including the parts that go wrong.
Why we picked this exact one: Jen Crider's Amazing Furniture Makeovers is the more practical of the two for a first dresser, because the prep chapters go further than most books bother to - and she publishes free tutorials under the same name, so you can read her voice before buying. It carries 4.6 stars over 350 ratings. It covers fewer advanced surface techniques than a dedicated techniques book would.
Read either one before you source your second piece rather than your first. You want a dresser's worth of mistakes behind you so the chapters land on something real, and most of what they teach only makes sense once you've felt a coat go wrong. Flipping rewards a steady rhythm more than a burst of enthusiasm, which is the whole argument in building a creative routine you'll actually keep.
The Questions That Come Up Halfway Through Your First Dresser
Why is pink or brown bleeding up through my white paint?
Mahogany, cherry and other red-toned woods carry tannins that dissolve into water-based paint and travel to the surface, and it catches beginners out because the first coat often looks fine before the stain creeps through overnight. More coats won't fix it - you can put on ten and the blush still arrives. The fix is a shellac-based stain-blocking primer over the affected area before you paint; ordinary water-based primers routinely fail at this job. If it has already started, stop, let everything dry hard, seal with shellac, and carry on.
The tin says no sanding. Do I really need to sand?
Mostly no, and that is the honest appeal of chalk-style paint, but the no-prep claim gets taken further than it holds. Where a surface is genuinely glossy - a thick old varnish, a laminate drawer front - paint sitting on that sheen will scratch off under a fingernail. You aren't stripping anything back, just dulling the shine: 120 grit on an original stained finish, 180 if it's been oil-stained, and nothing coarser than that. Stop at 220 or finer, because sanding too far burnishes the wood closed and then nothing takes to it.
Wax or a poly topcoat? Everyone tells me something different.
They're answering different questions, which is why the advice conflicts. Wax soaks into porous chalk paint and gives a soft matte glow nothing else matches, but it stays semi-permanent: a piece in daily use wants rewaxing roughly once a year, a hot mug leaves a ring, and wiping a spill can take the wax off with it. A water-based poly cures to a hard film you can clean normally. Decide by traffic - wax a hallway console, poly the top of a dresser that gets opened every morning. One warning: you cannot paint or poly over a waxed surface later without removing the wax first, because nothing will stick to it.
I bought new handles and the screw holes don't line up.
Nearly everyone does this once. Drawer pulls are sized by centre-to-centre distance - the gap from the middle of one screw hole to the middle of the other - and the common mistake is measuring between the near edges of the holes instead, which reads short and sends you to the wrong size. Three inch and 96 mm are both widespread and they are not interchangeable, and older or imported pieces often use neither. Measure before ordering; if you're already stuck, fill the old holes, sand flush and drill new ones, which is easier than it sounds on a piece you're painting anyway.
People Worth Following Into This Hobby
Real practitioners we found while researching this setup — people who do the work, show their process, and publish on sites they run themselves. No sponsorships, no affiliations; we just think they're worth your time.
Nancy has repainted and documented her own thrifted furniture for over a decade, photographing the bleed-through and brush-mark failures alongside the finished pieces.
Her chalk-paint guide answers two of the questions in our FAQ in far more depth than a setup page can - why a shellac-based sealer is the only reliable cure for tannin bleed, and when a glossy surface still needs scuffing despite the no-prep label.
Jen flips secondhand furniture in her own garage and writes the step-by-step prep guides that most makeover posts skip past.
She wrote one of the two books in our reading section, and her free beginner guide to chalk painting covers the prep stage - cleaning, scuffing, filling - that decides whether a first dresser holds up or peels.
DeDe paints furniture and runs online furniture-painting workshops, publishing her own troubleshooting posts on bleed-through, brush marks and stripping.
Her bleed-through post is the most thorough treatment of the exact failure our FAQ warns about, and her workshops are the structured next step for a reader who finishes a first dresser and wants a method rather than more tips.
Ellen paints secondhand furniture and writes single-project walkthroughs, including a step-by-step dresser repaint and a post on fixing chalk-paint bleed-through mid-project.
Her dresser walkthrough is literally this setup's project done end to end by one person, which is the thing a beginner wants to read after buying the paint and before opening it.
Love what you see here? Save individual picks with on any item, or copy everything to a list of your own in one click — great for coming back to later, or dropping as a not-so-subtle hint.